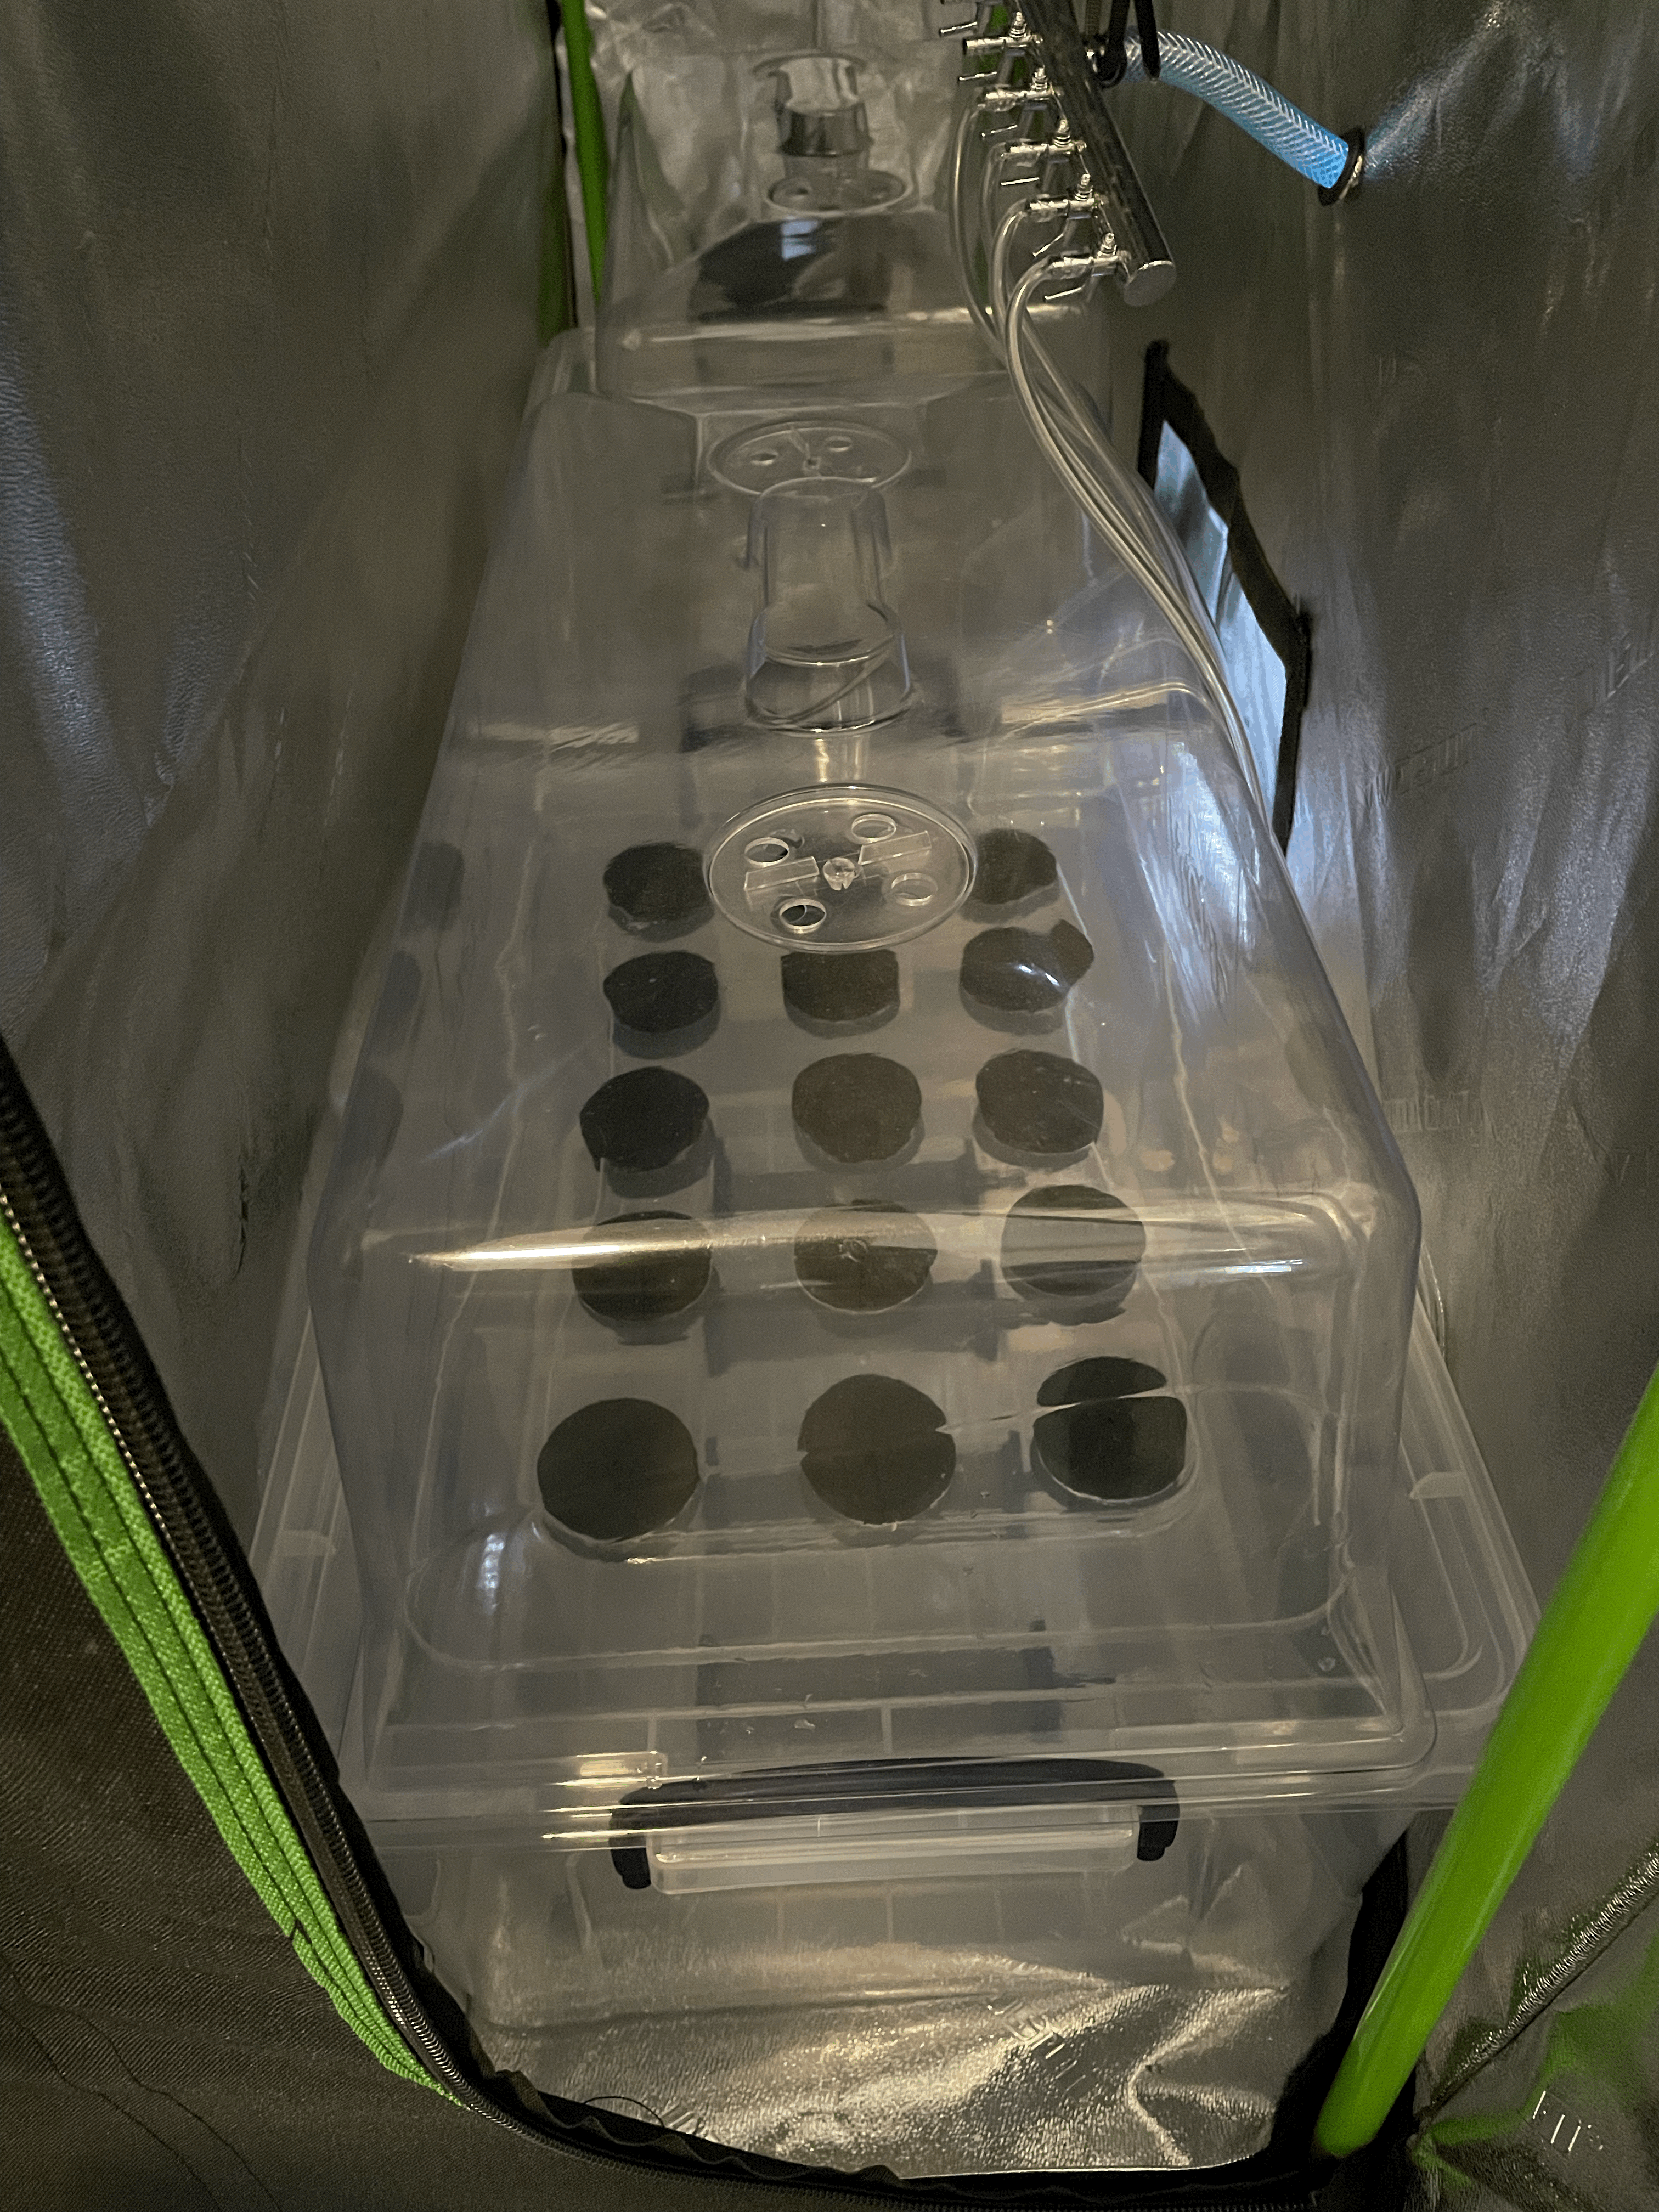
Clone Propagation Tank

My goal is to fully optimize the growing process of plants (Find more about this here https://www.austinjbergman.com/optimal-plant-enviroment/ ). This requires me to maximize the amount of controllable processes in order to limit the levels of error. Each seed is genetically unique. This causes variance in optimal PH, EC, growth cycles, and yields between plants. For this project I am trying to control this variance through a process called striking or cloning. Cloning is a form of asexual reproduction where a cutting is removed from a plant and placed in a growing medium. The cutting will eventually root and become a new, genetically identical plant. The major benefit of this grow style is that I can reuse the same genetics grow after grow. Since I can control the growth environment, I will be able to fine tune the settings until I zero in on the perfect environment for this exact plant. I should then be able to replicate the results indefinitely.
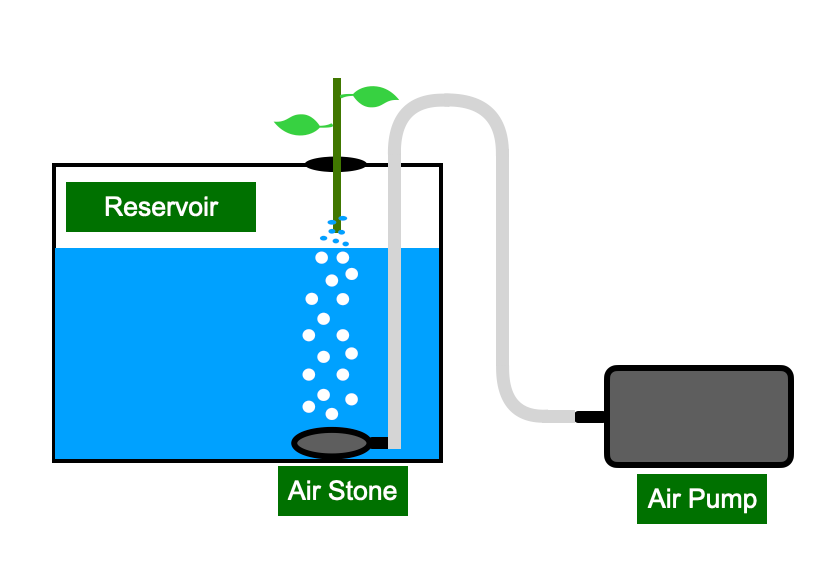
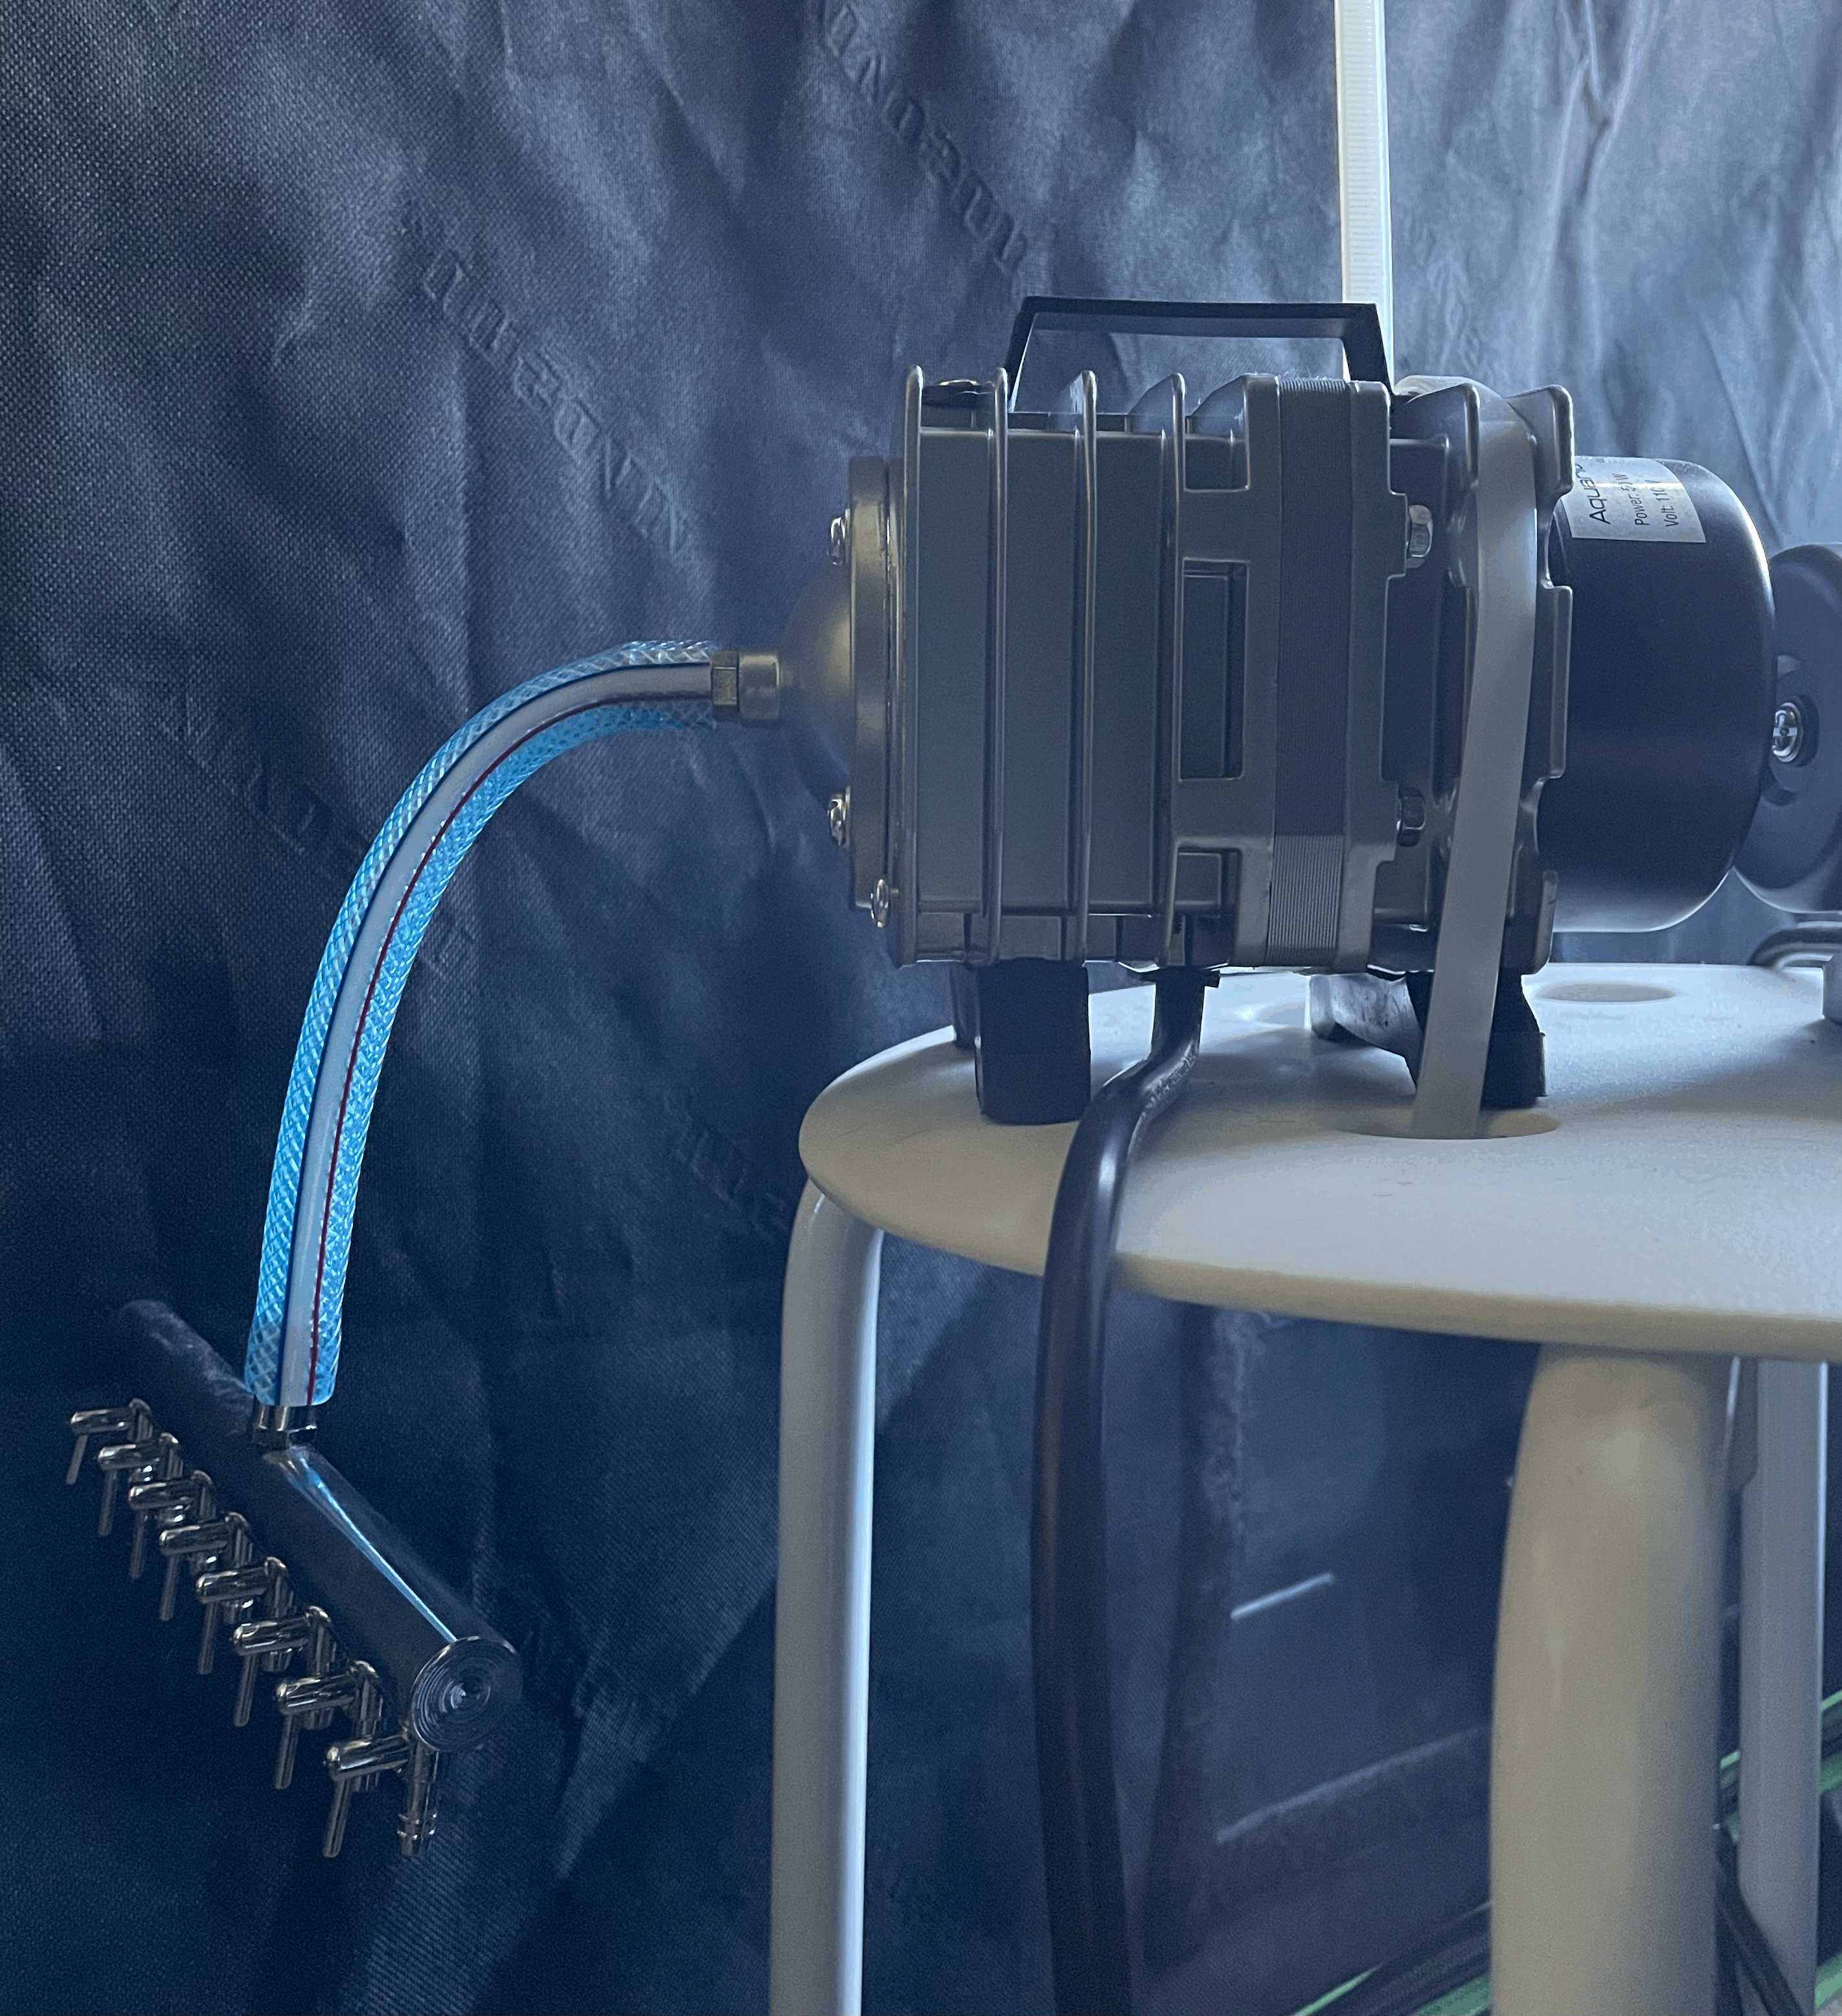
There are various processes that can be used to clone plants. Since these plants will be growing in a hydroponic setup I decided to use a clone propagation tank so the plants wouldn't have to change growing mediums. Clone propagation tanks work by pumping air through an air stone. The airstone diffuses the water into many small bubbles that "pop" when they reach the surface. This agitation causes small amounts of water to reach the cutting. The cutting are constantly misted and will begin to root in 4-7 days
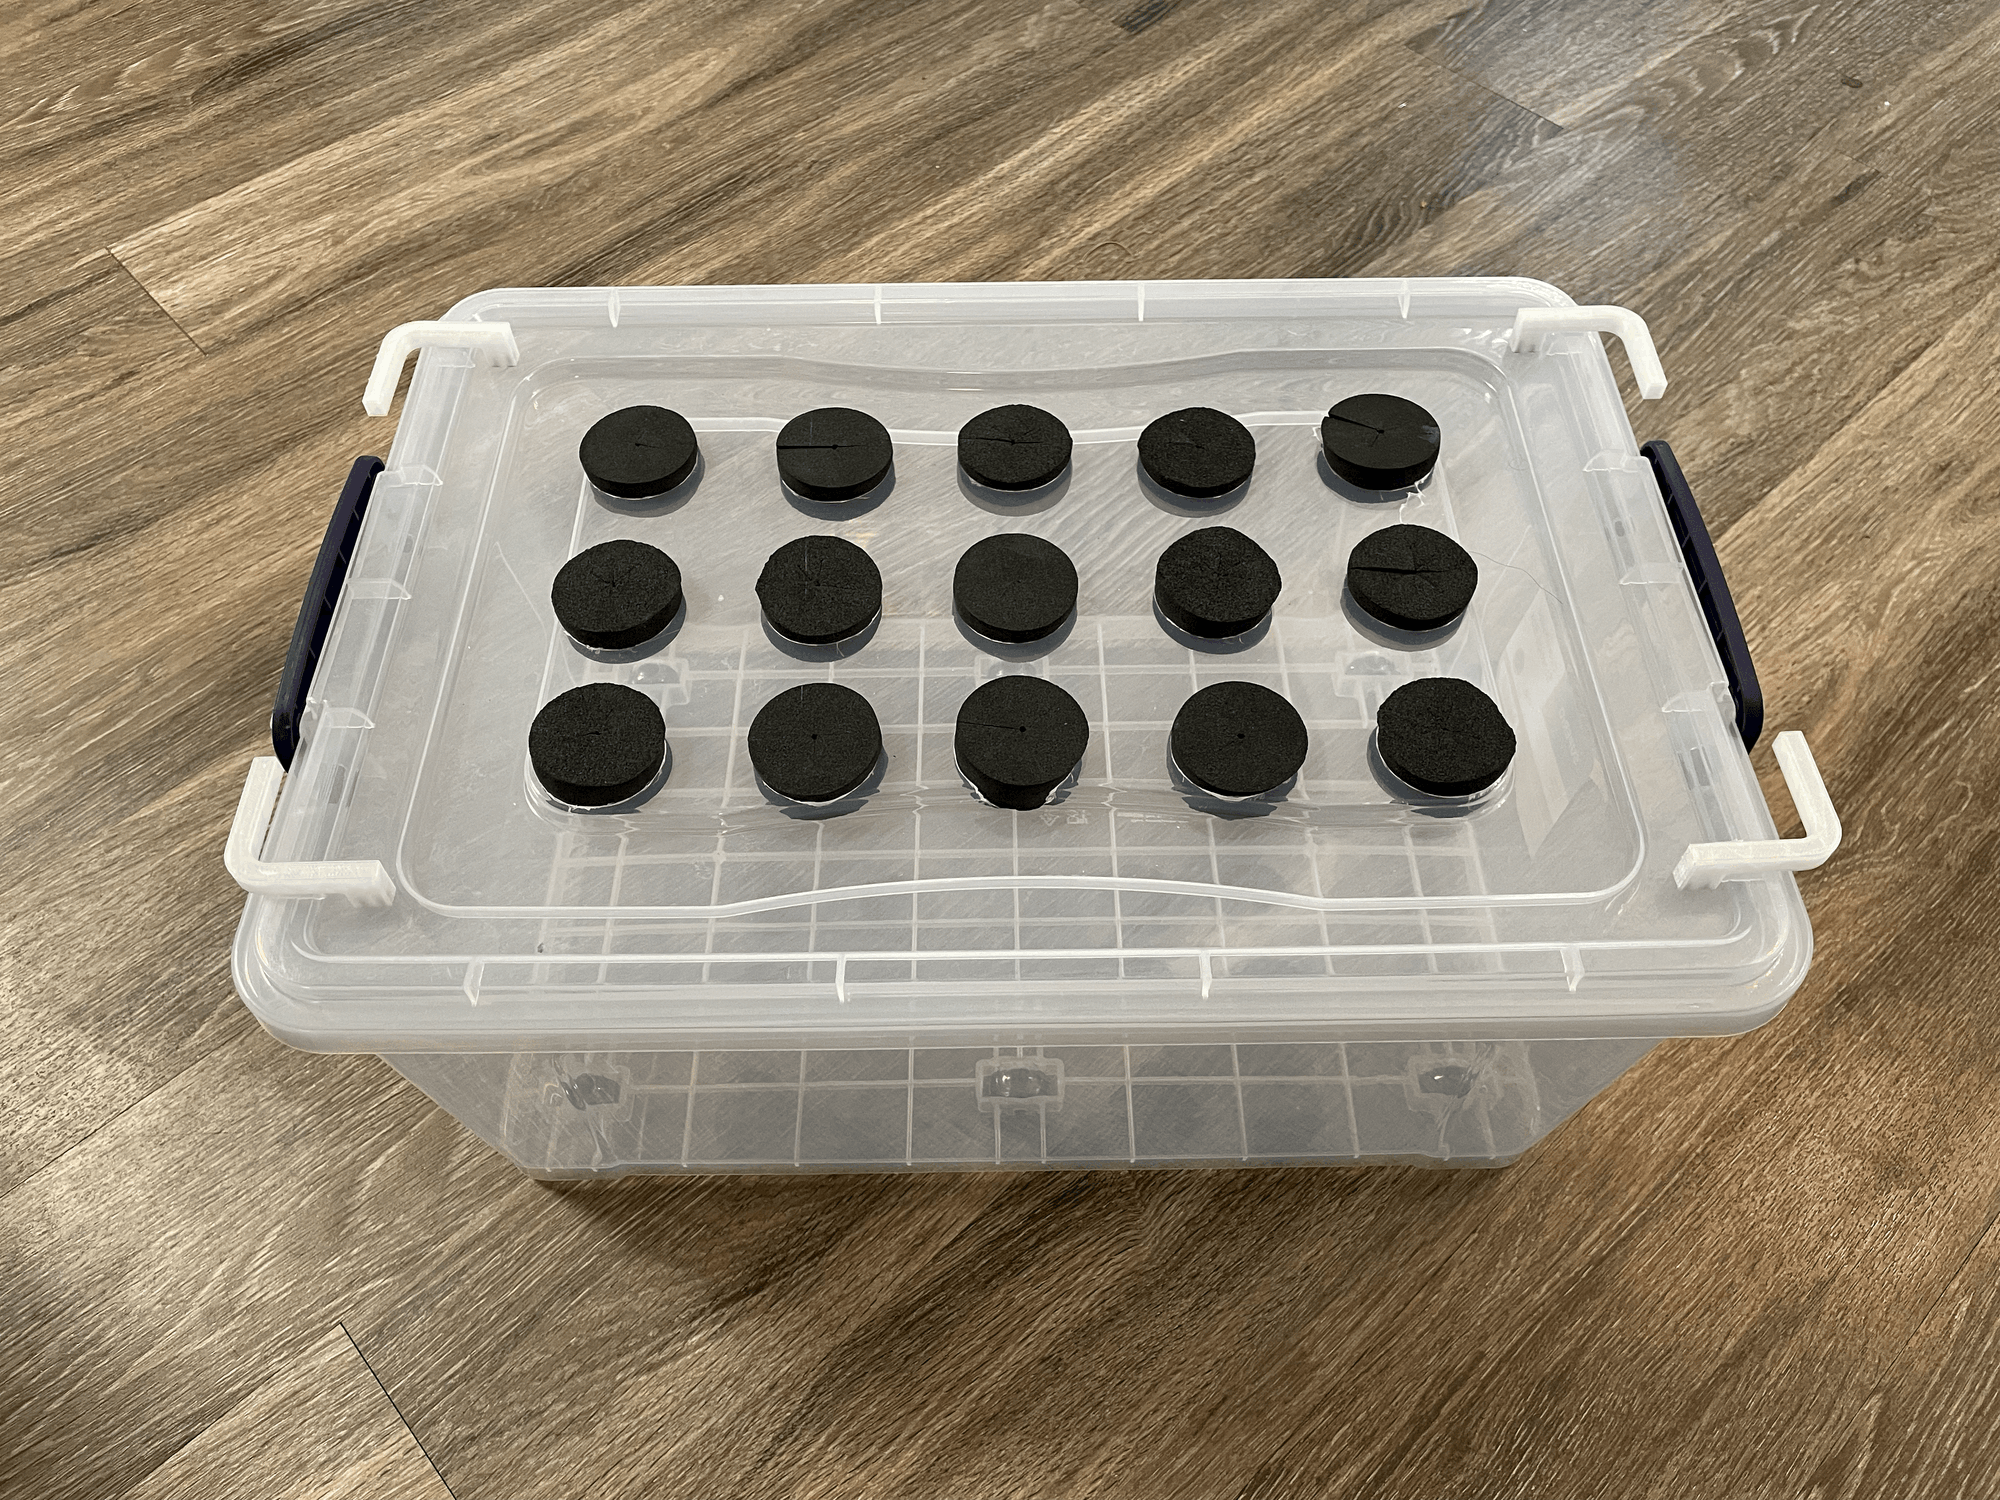
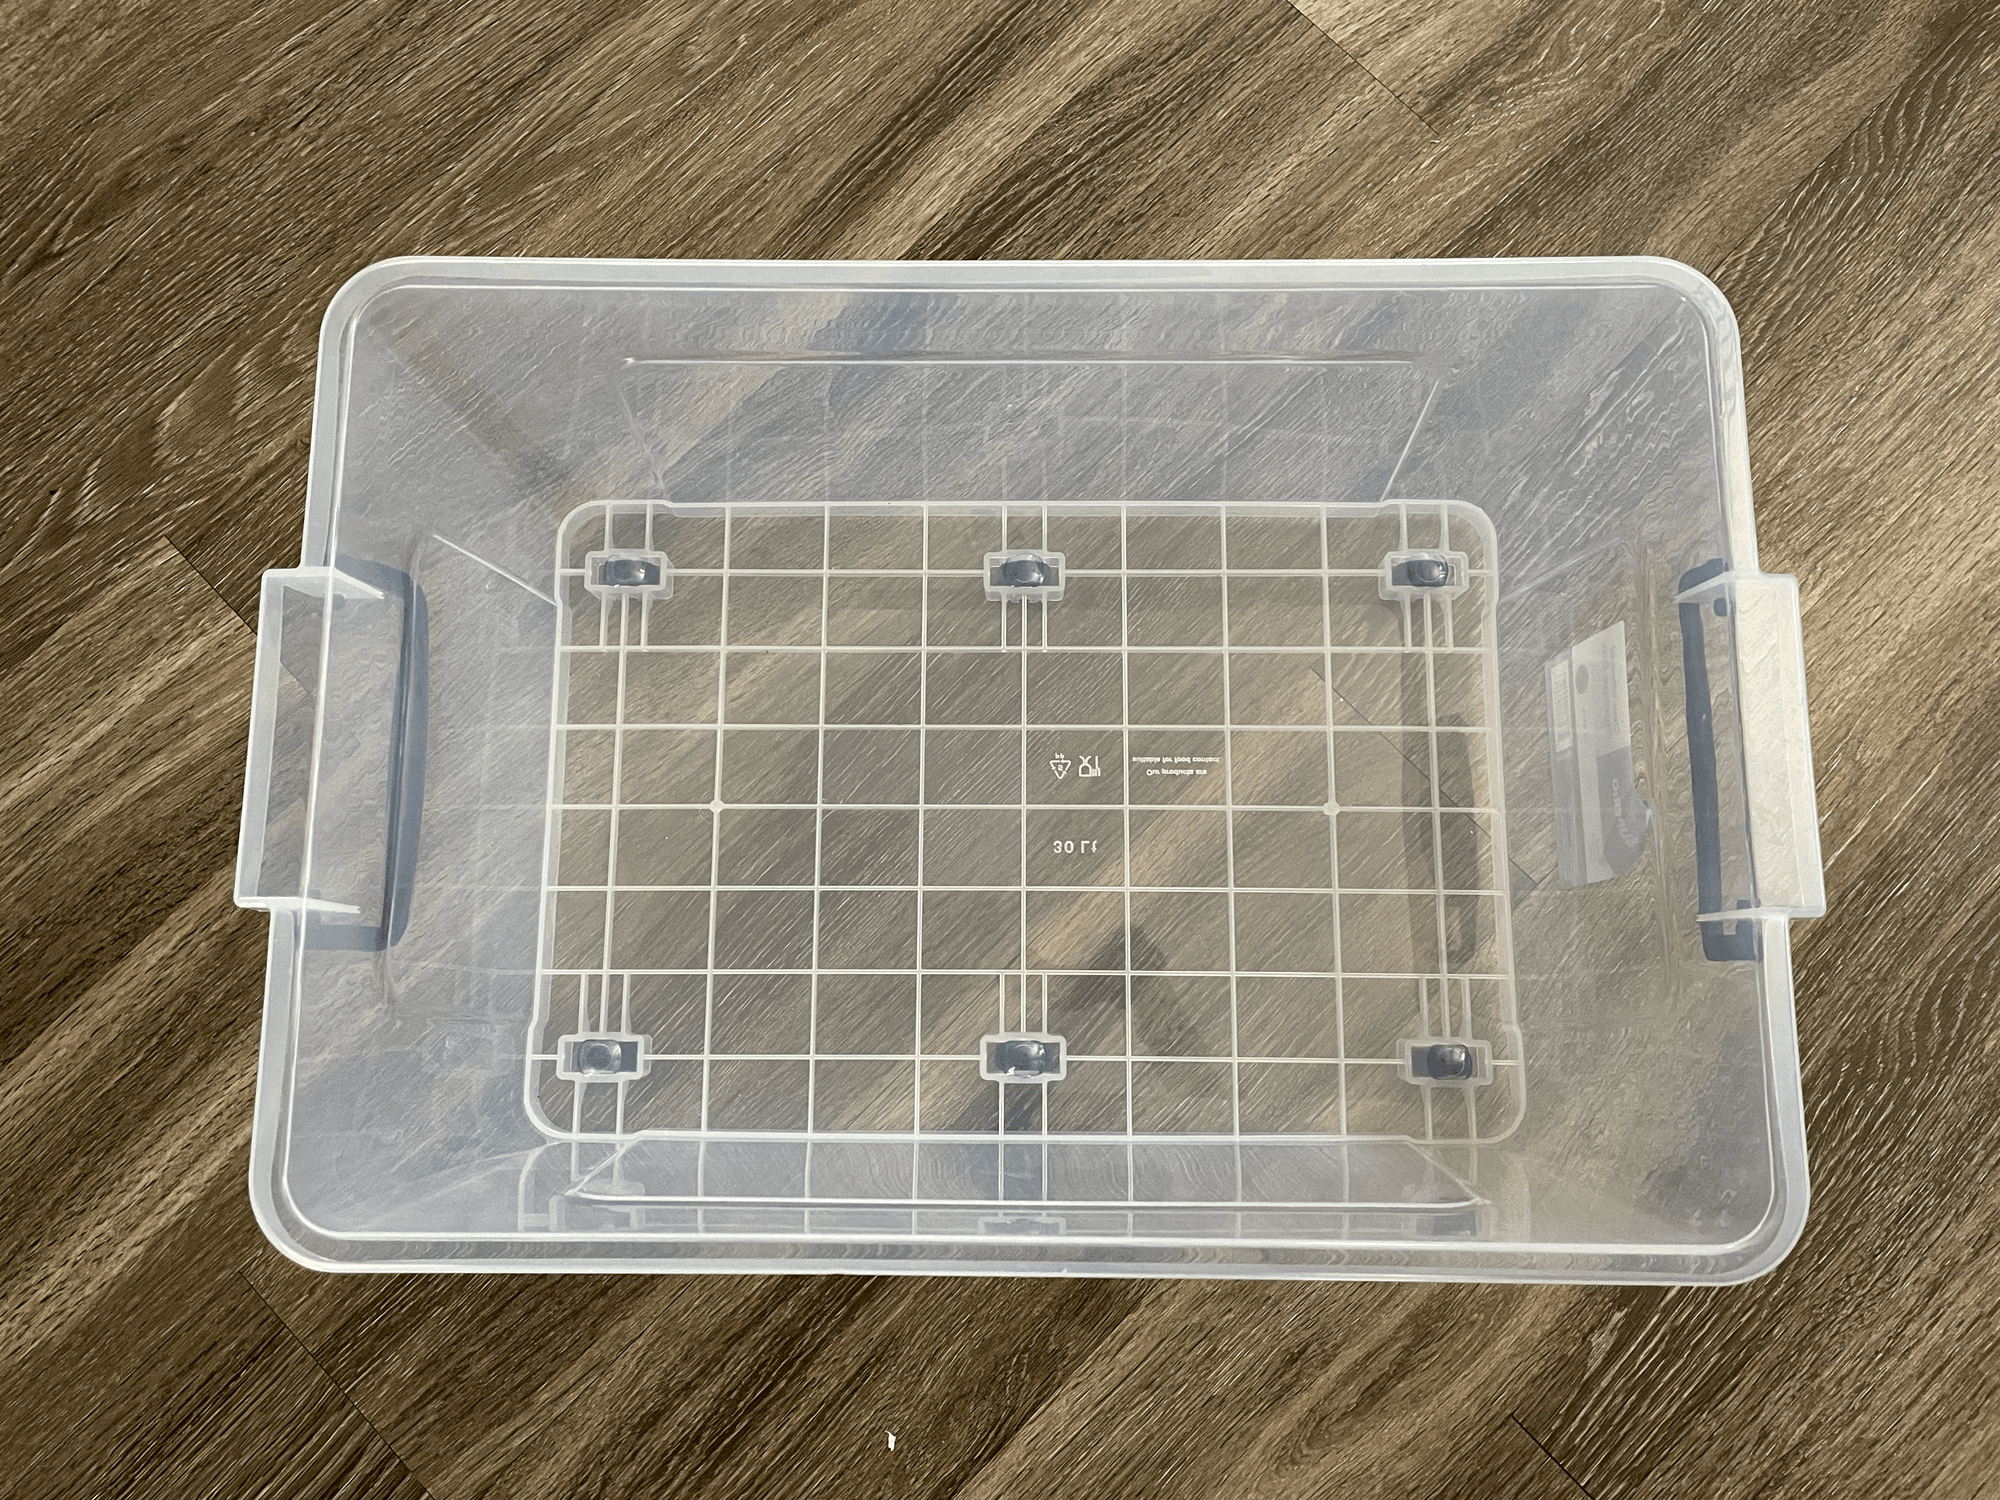
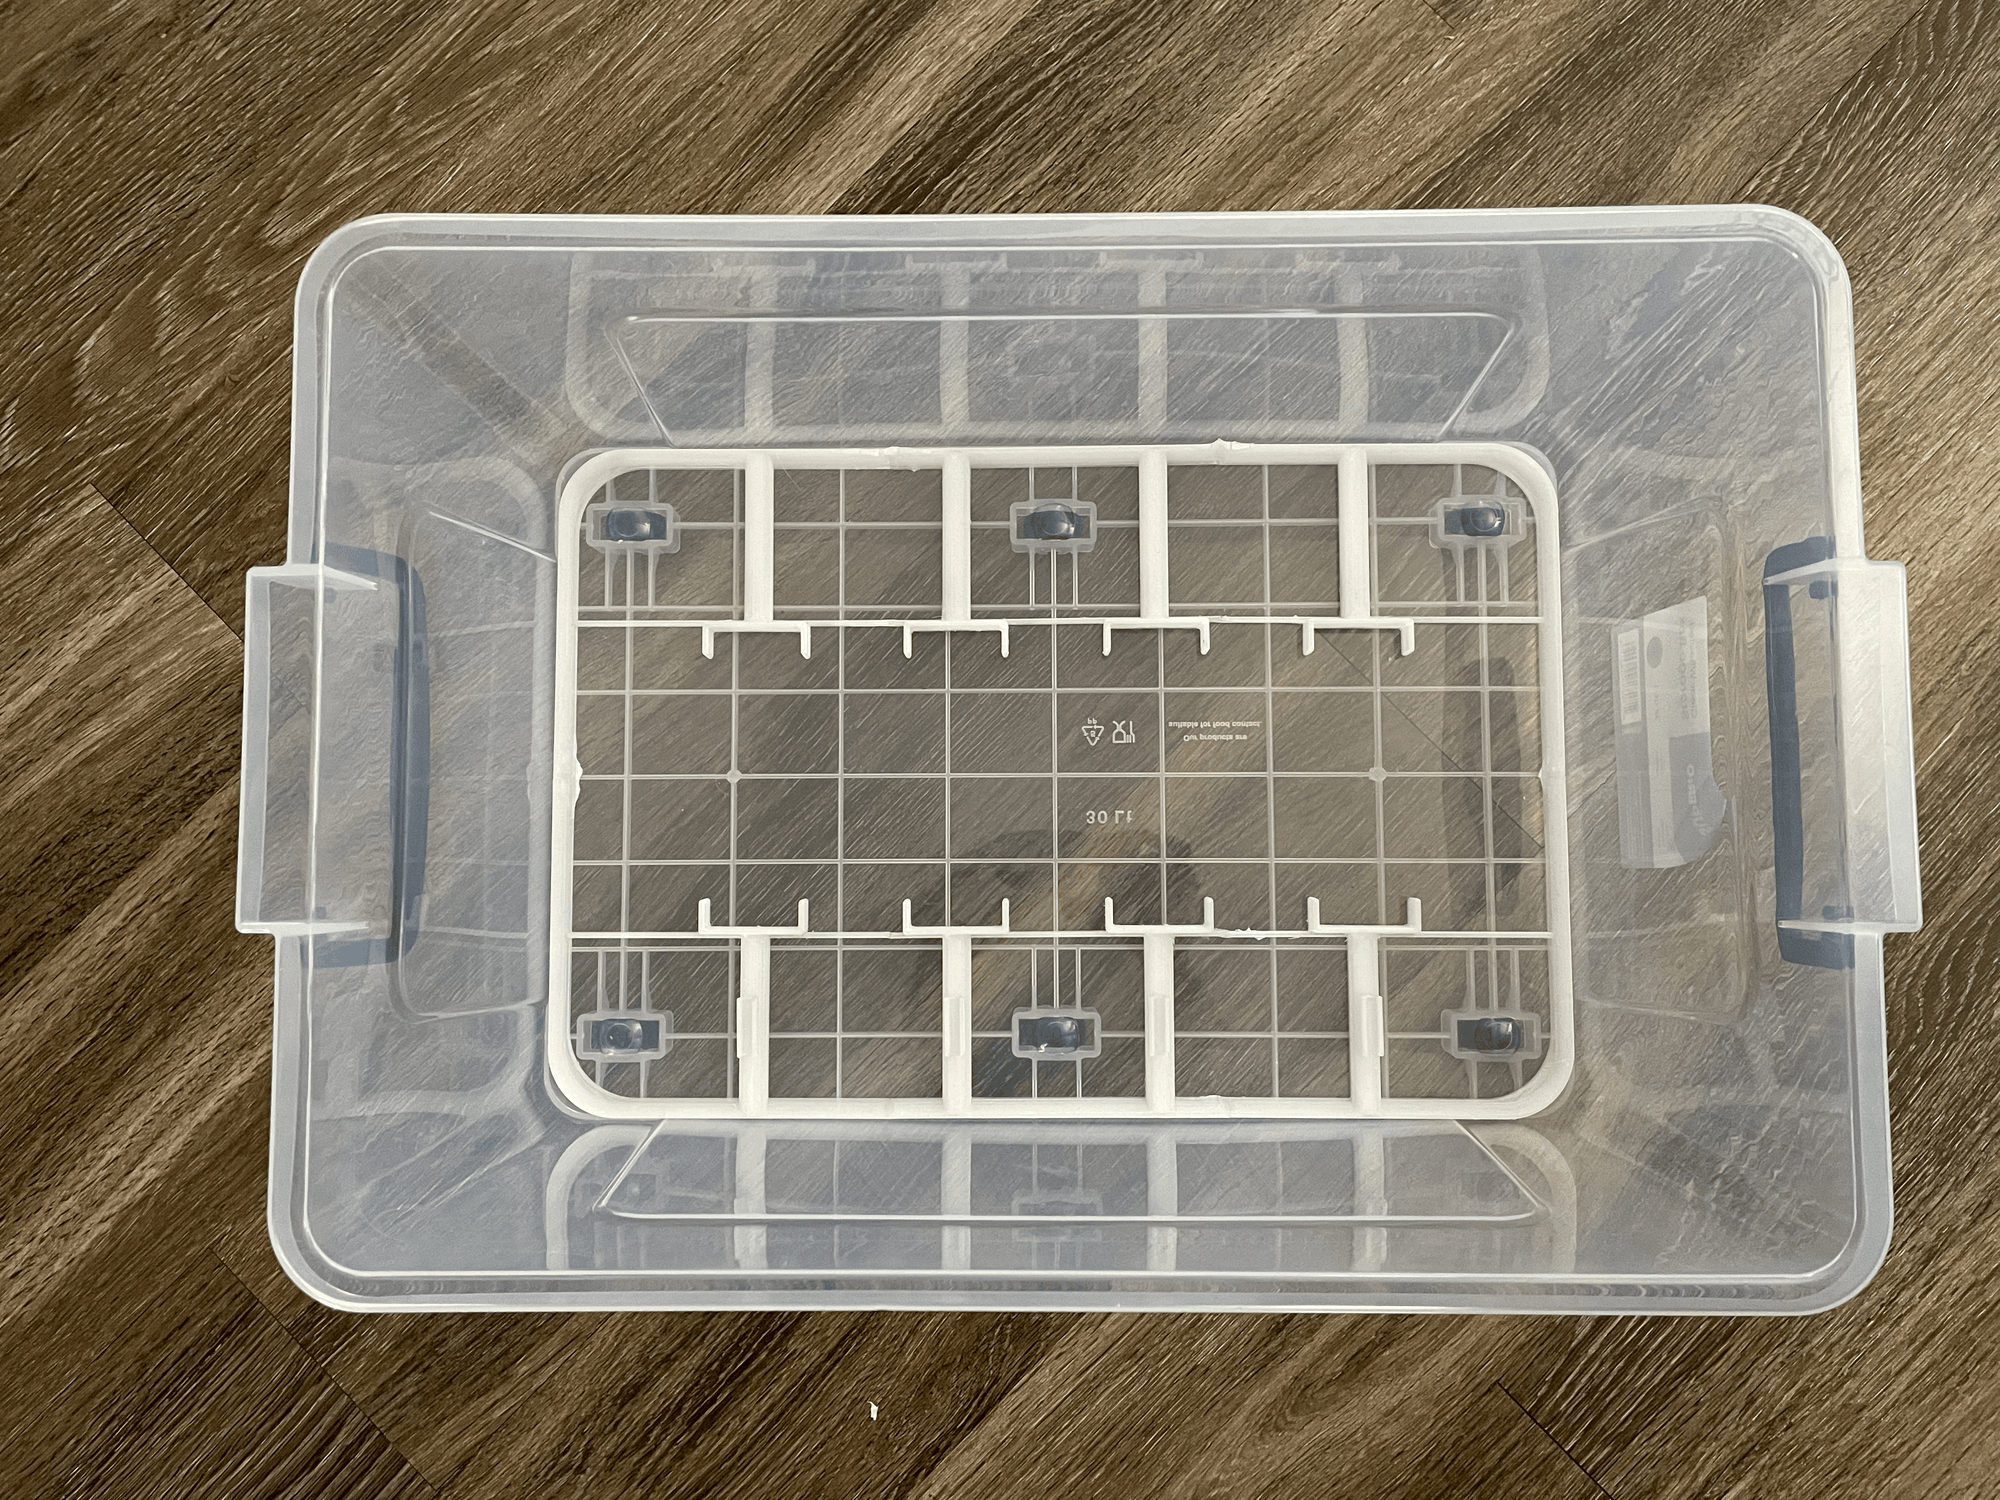
To start I found a tub that would fit in the nursery side of my tent

I marked 15 equally spaced holes
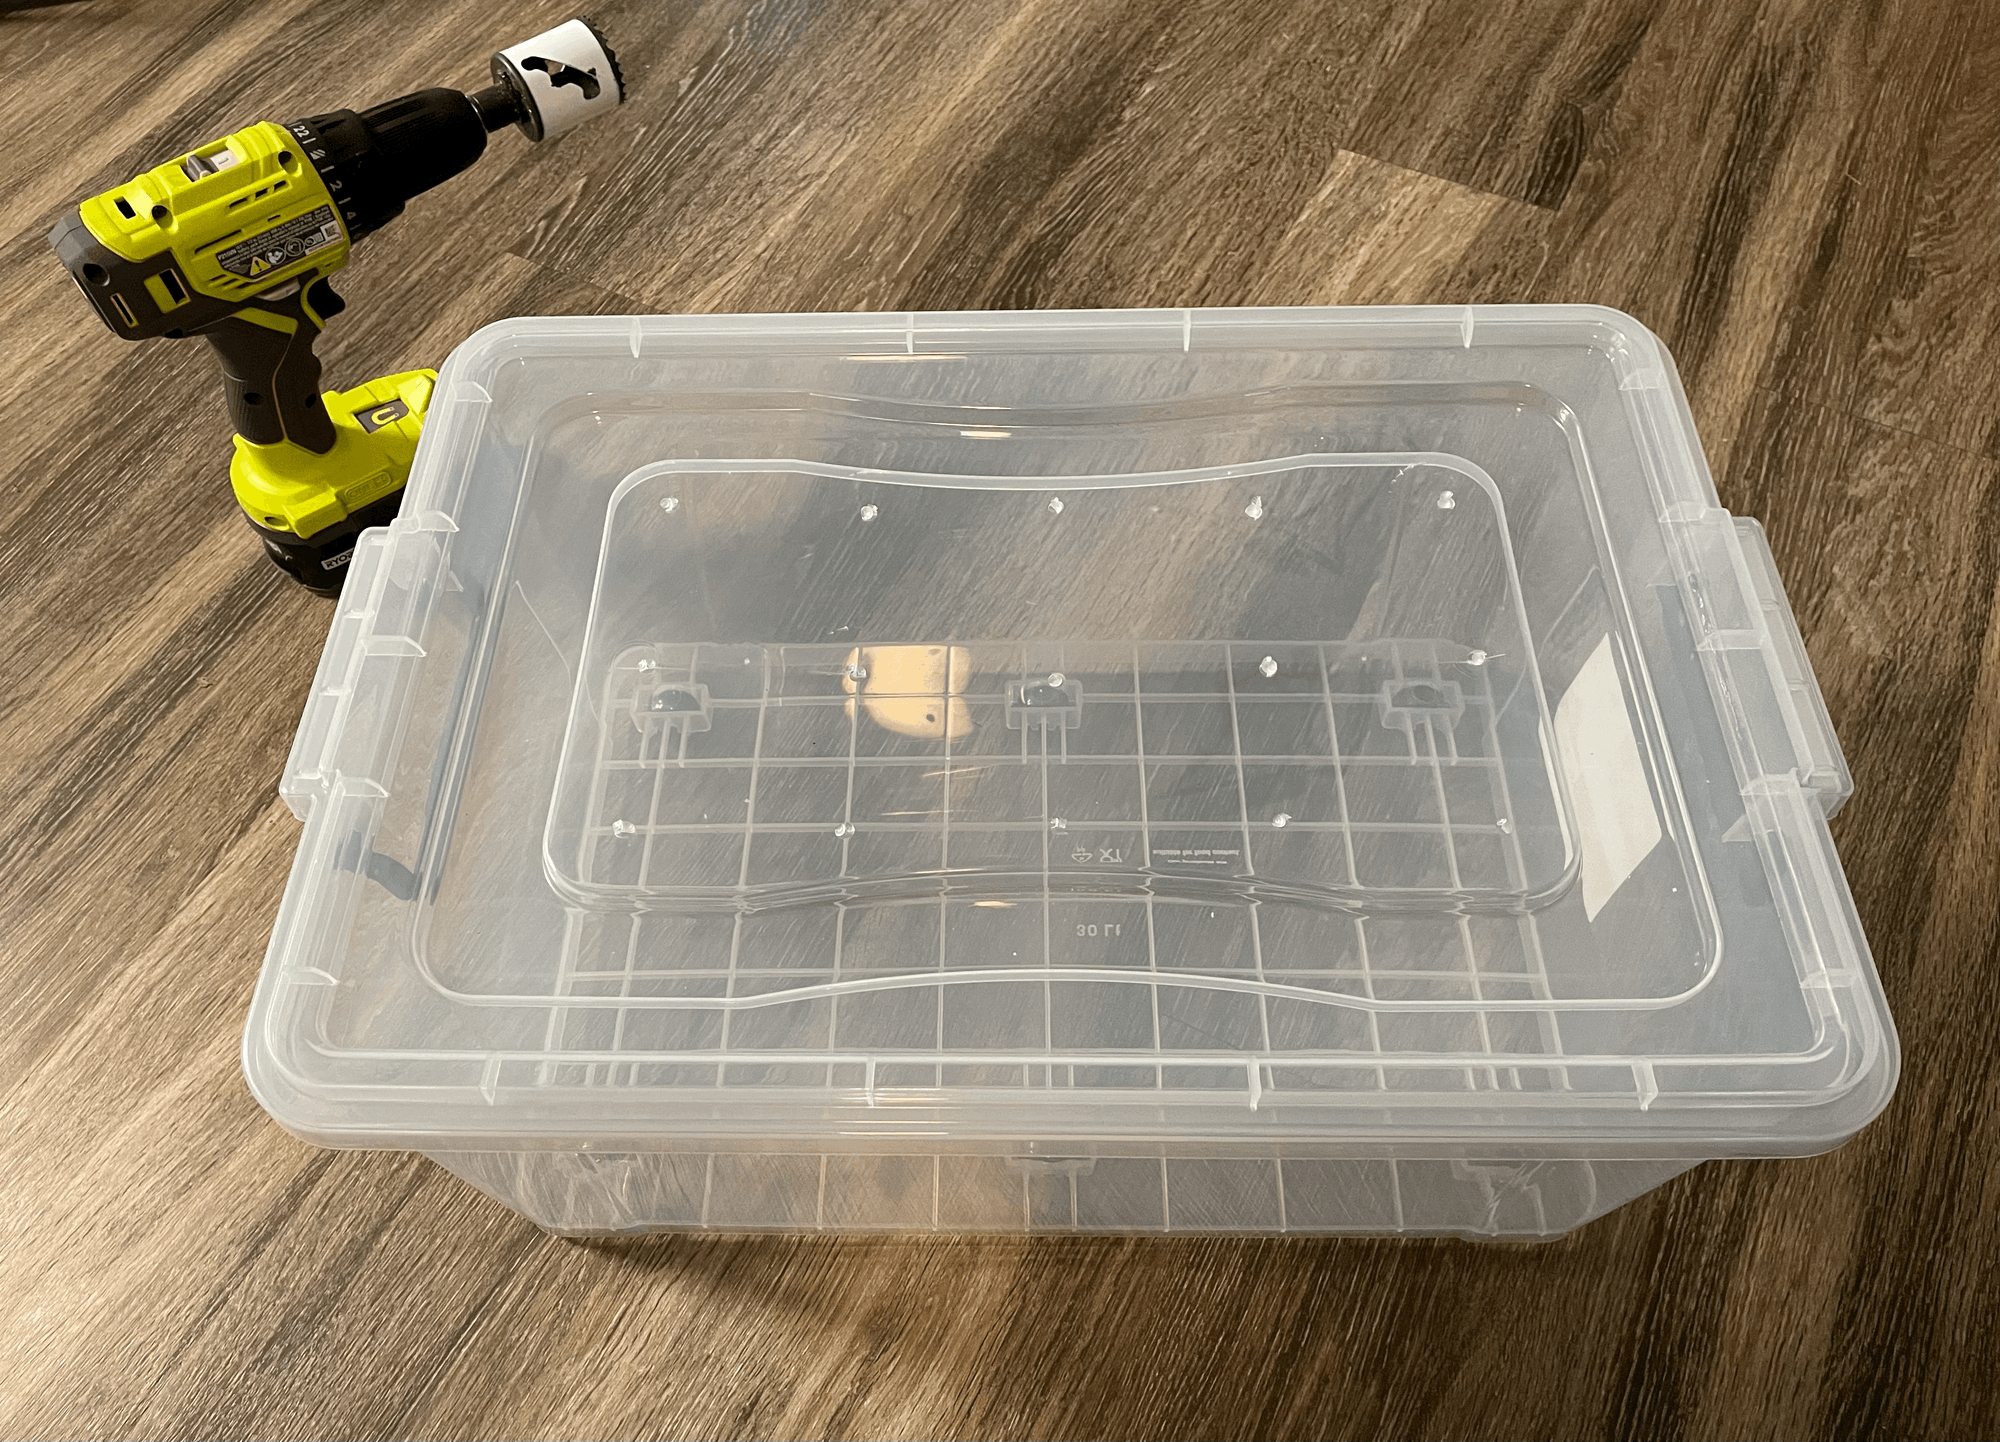
I then used a hole saw to drill 1.75" holes
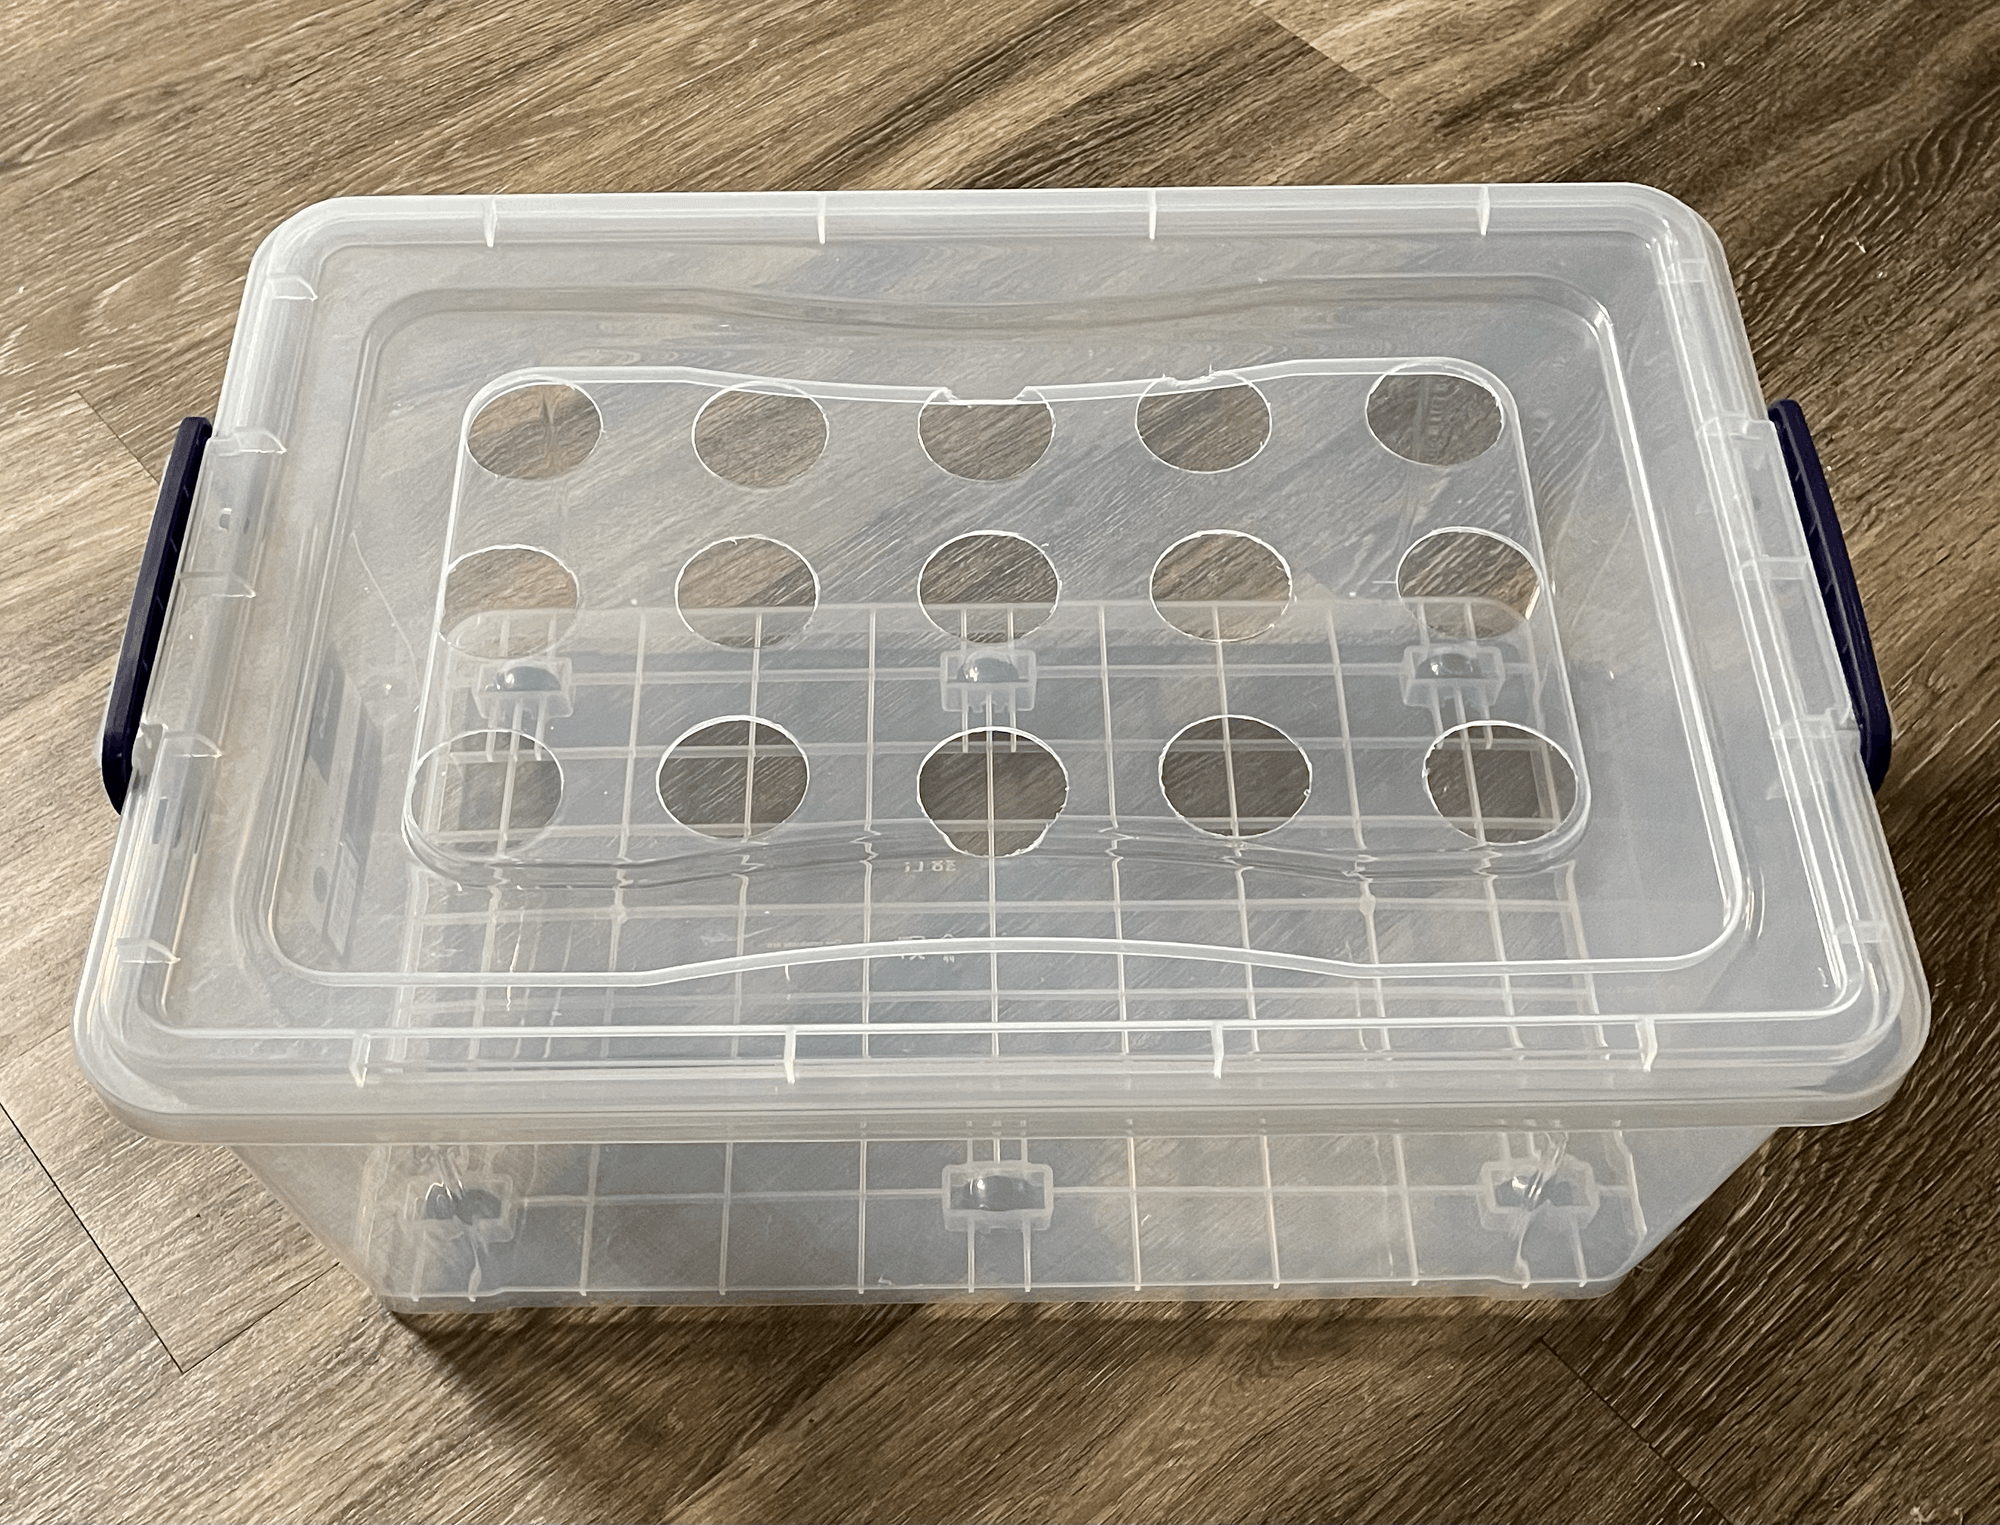
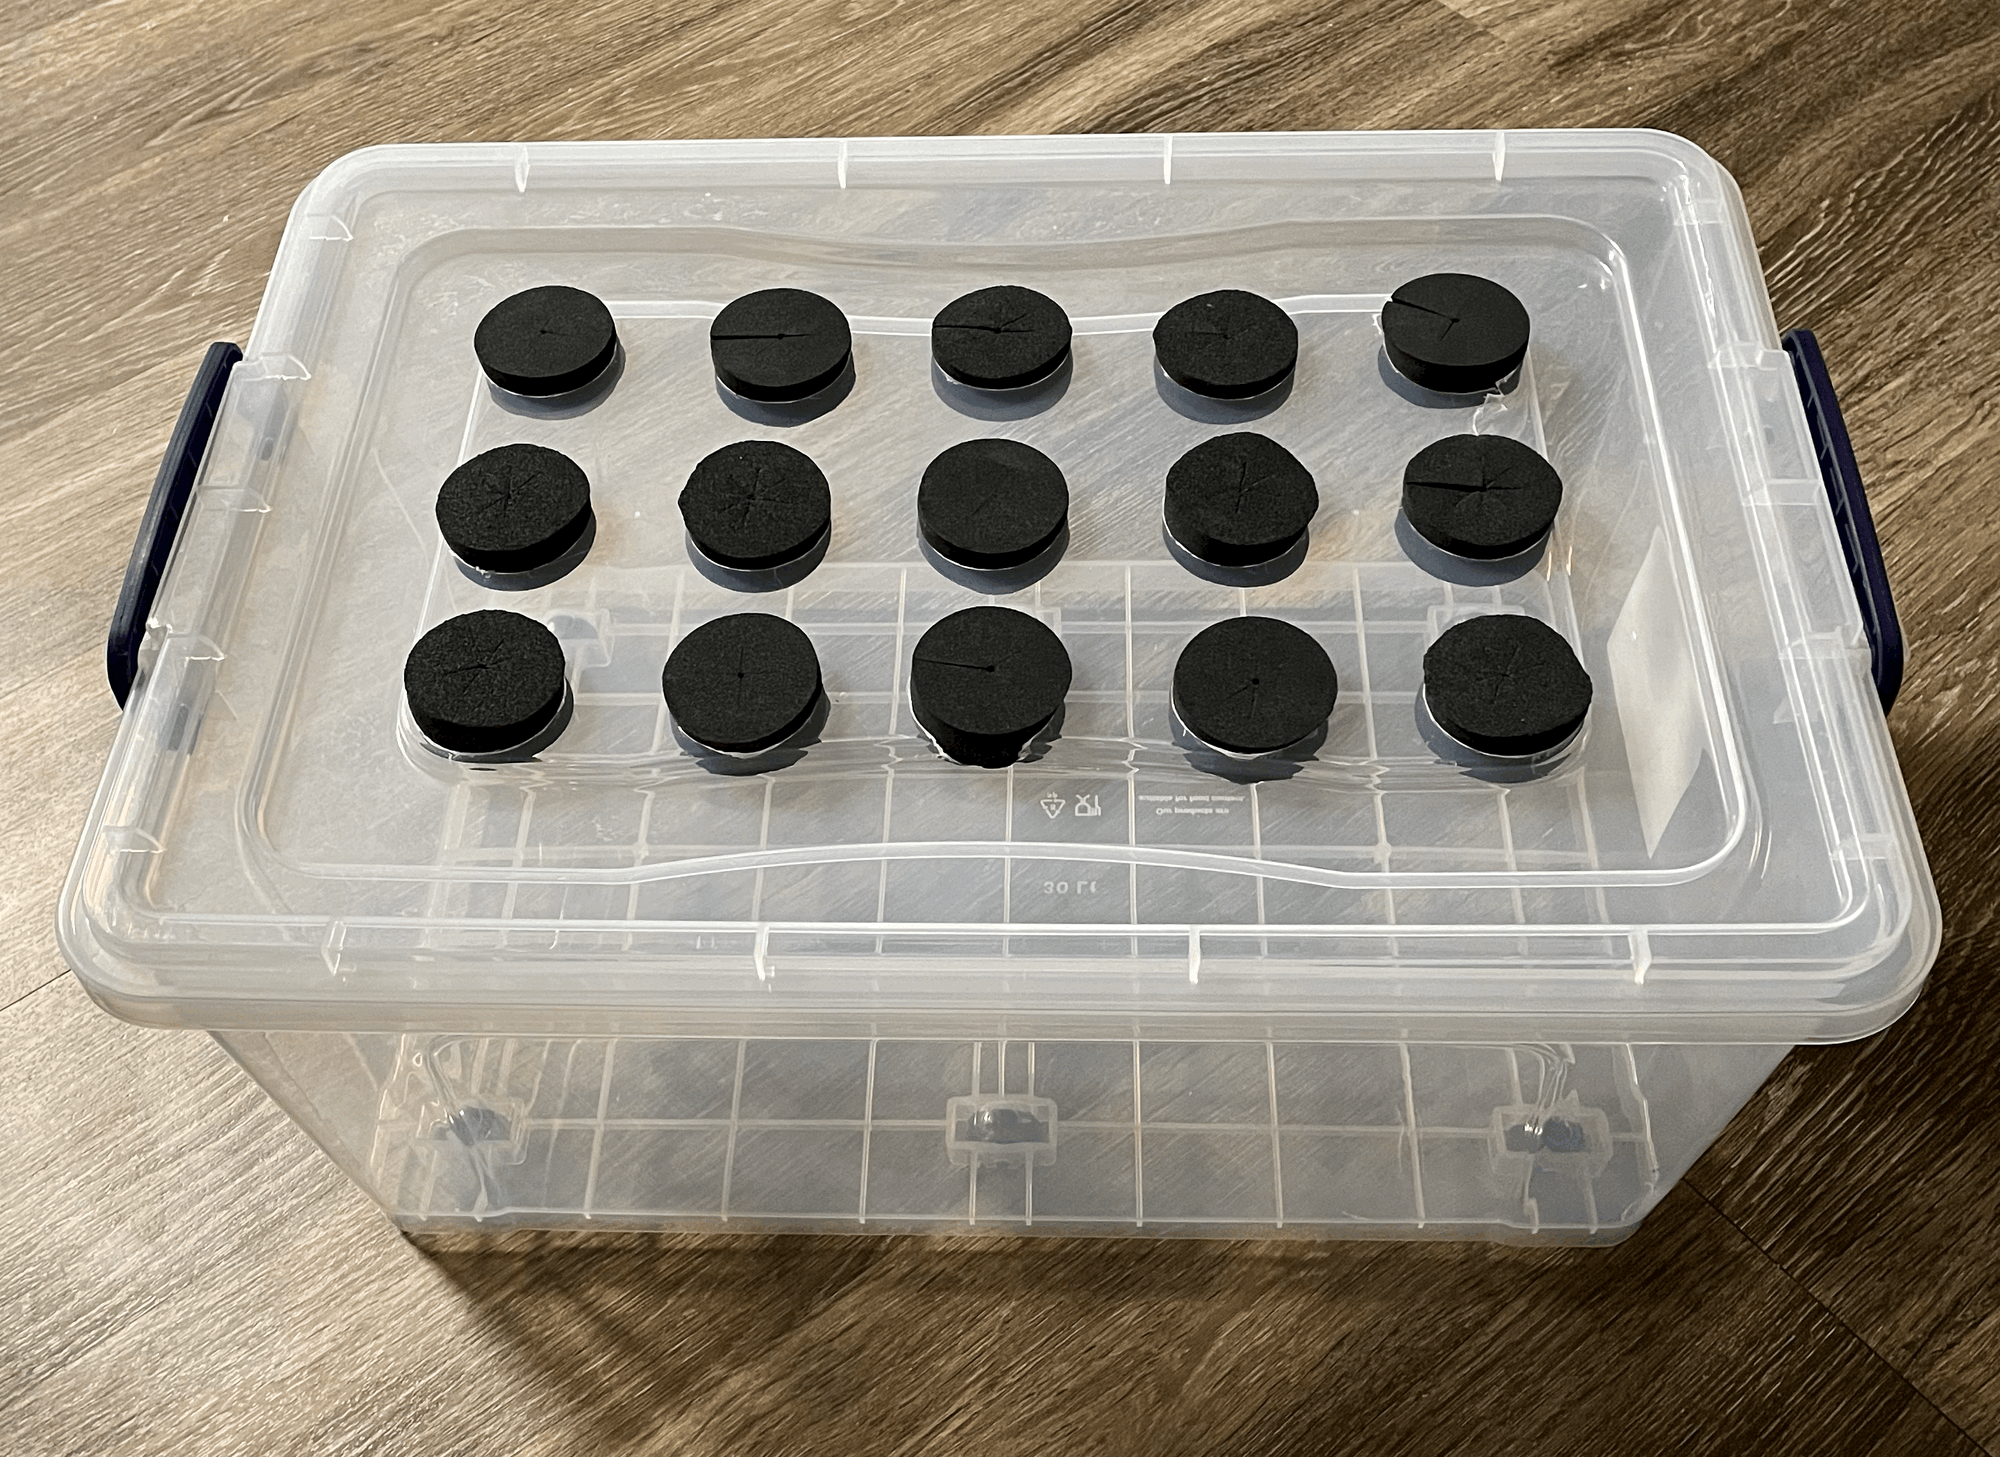
The 1.75" holes are perfect for 2" clone collars
Next, I wanted to create a frame for the airstones so they would stay centered. With the help of the brother, 3D models were created of the bucket, frame, and air stones
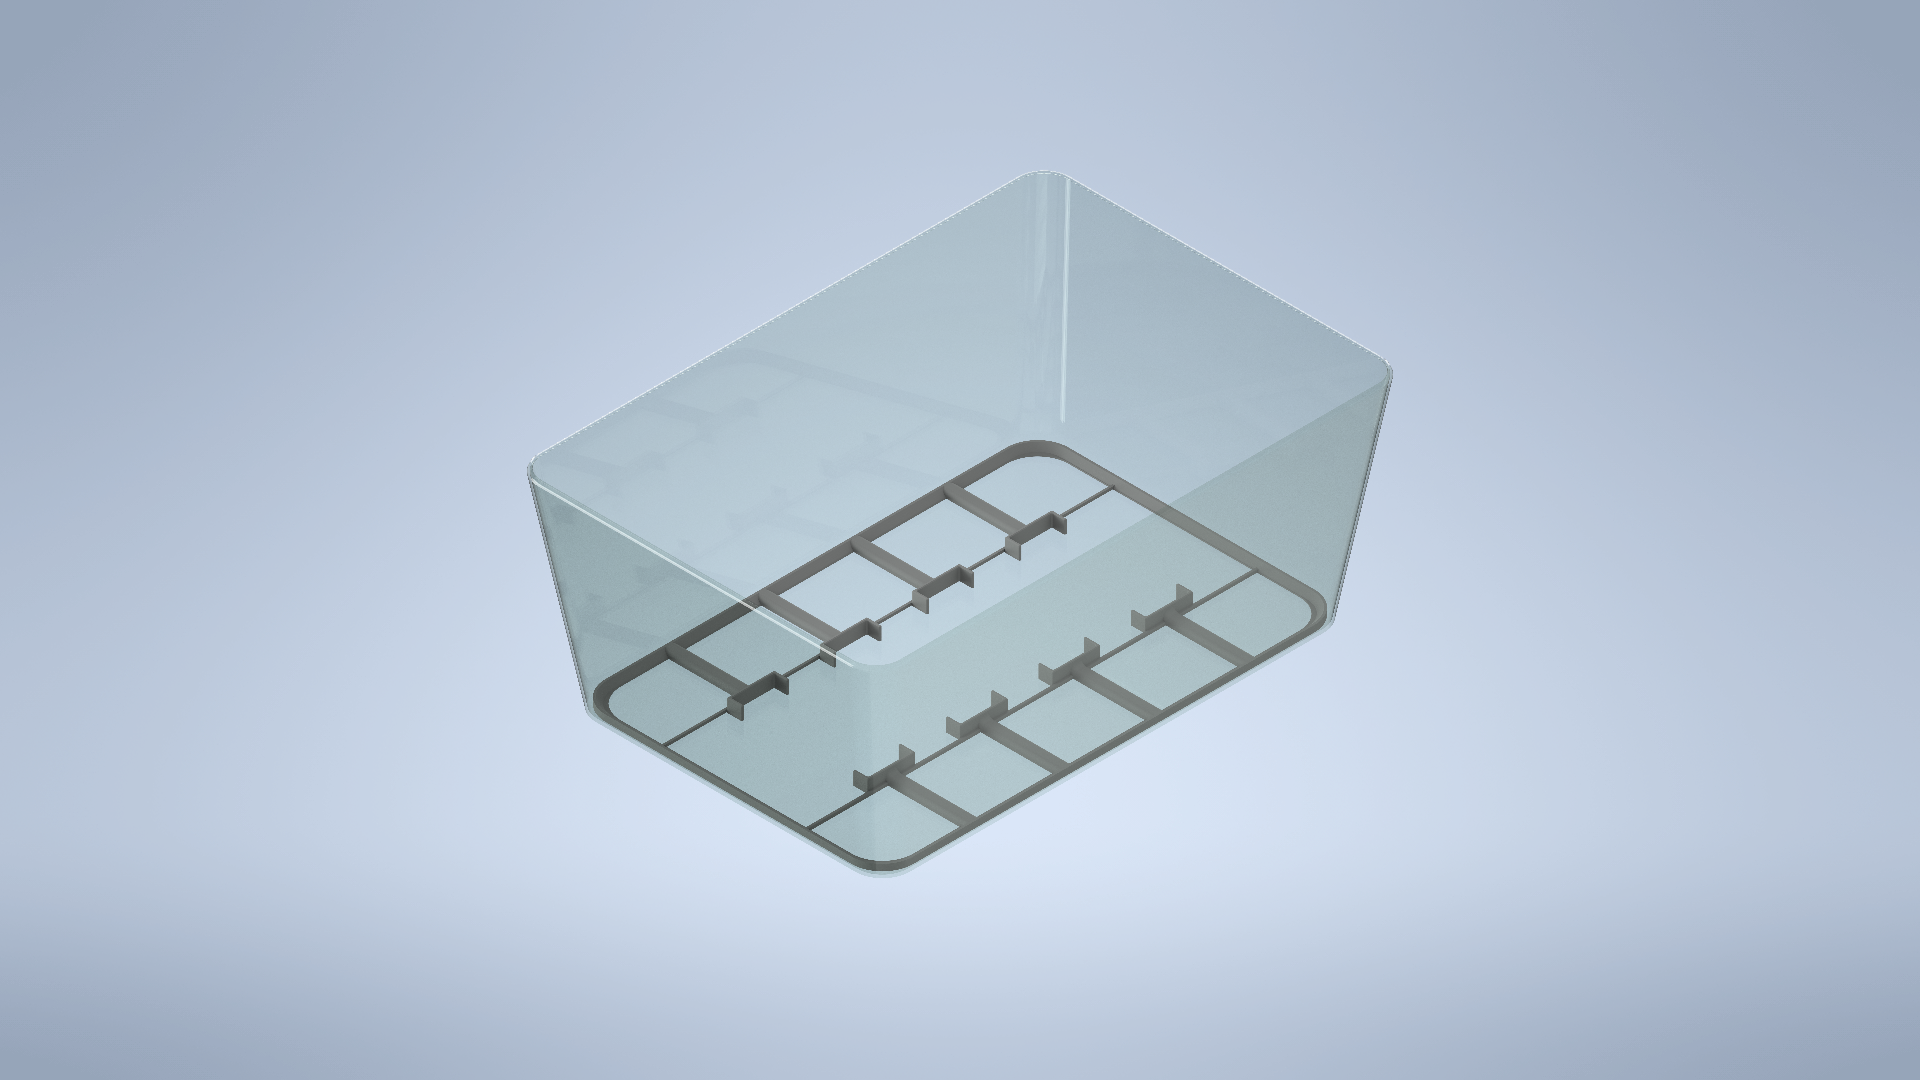
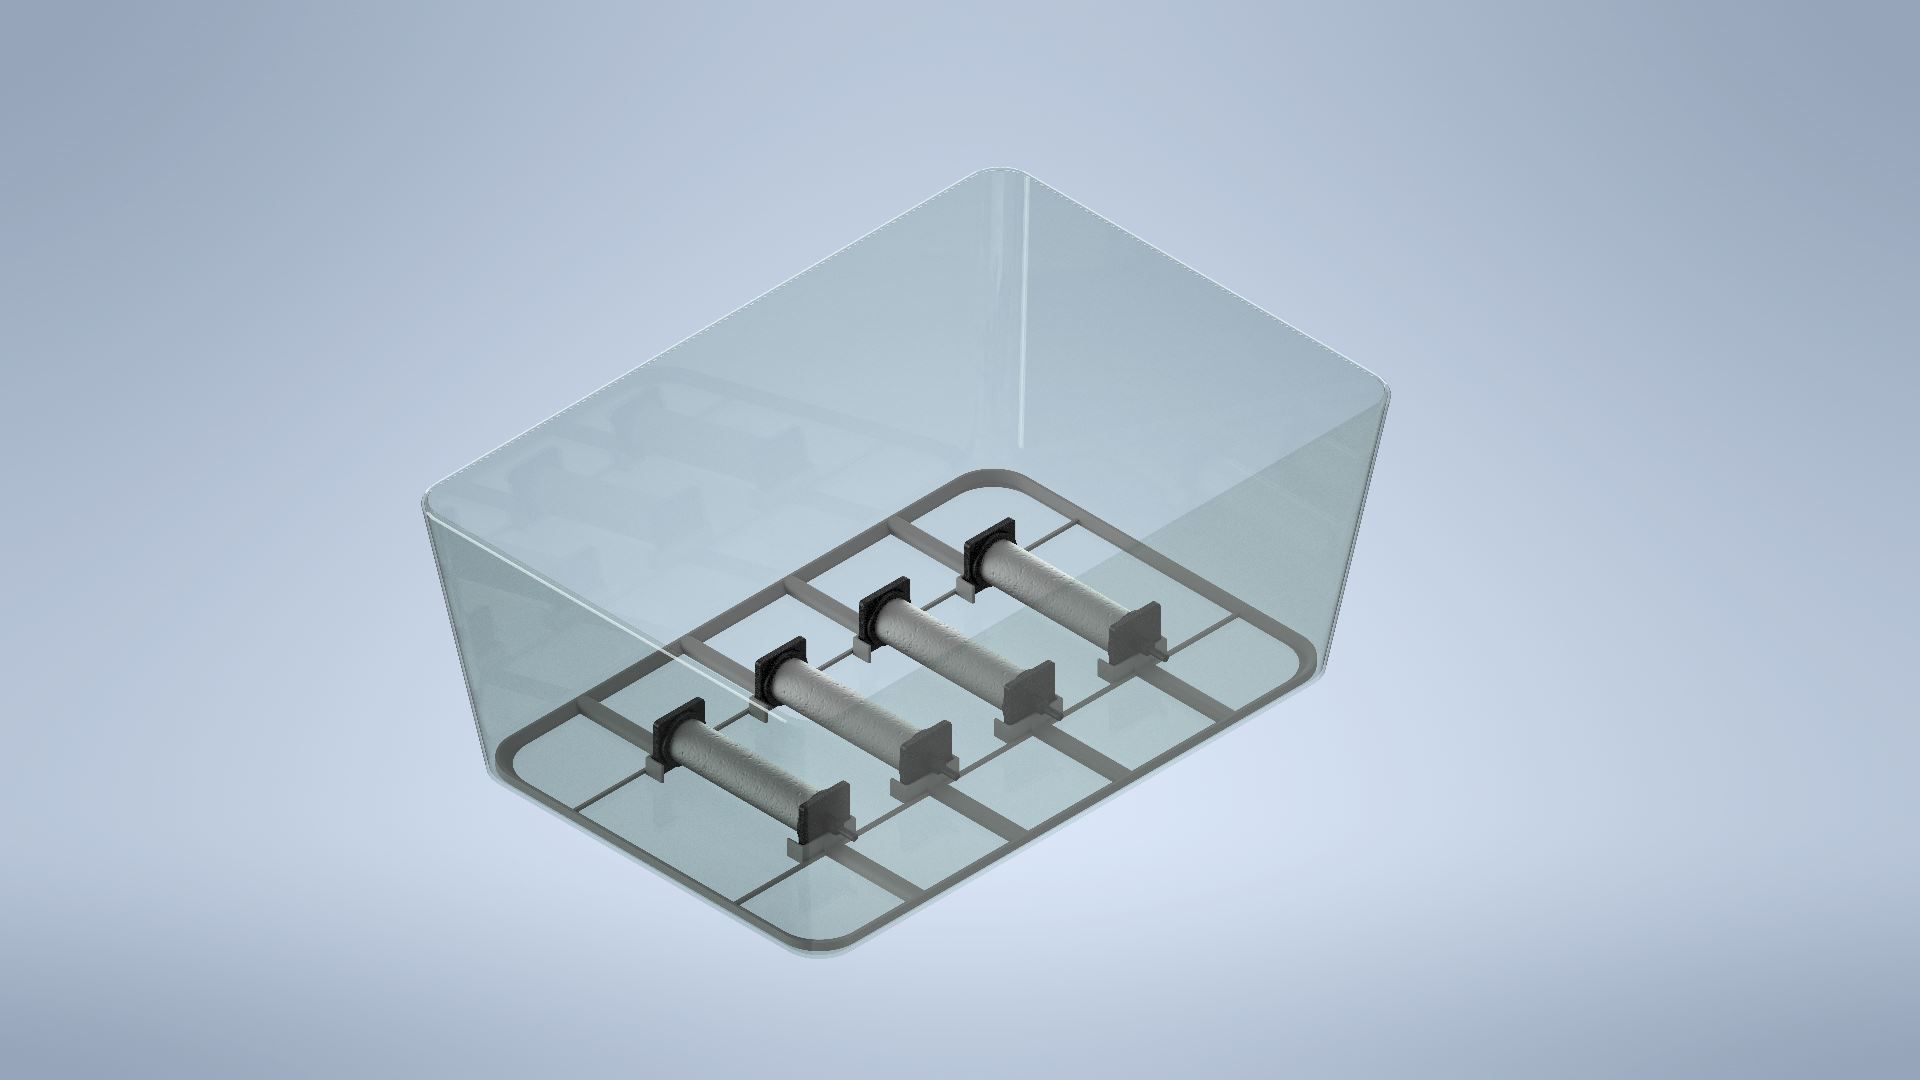
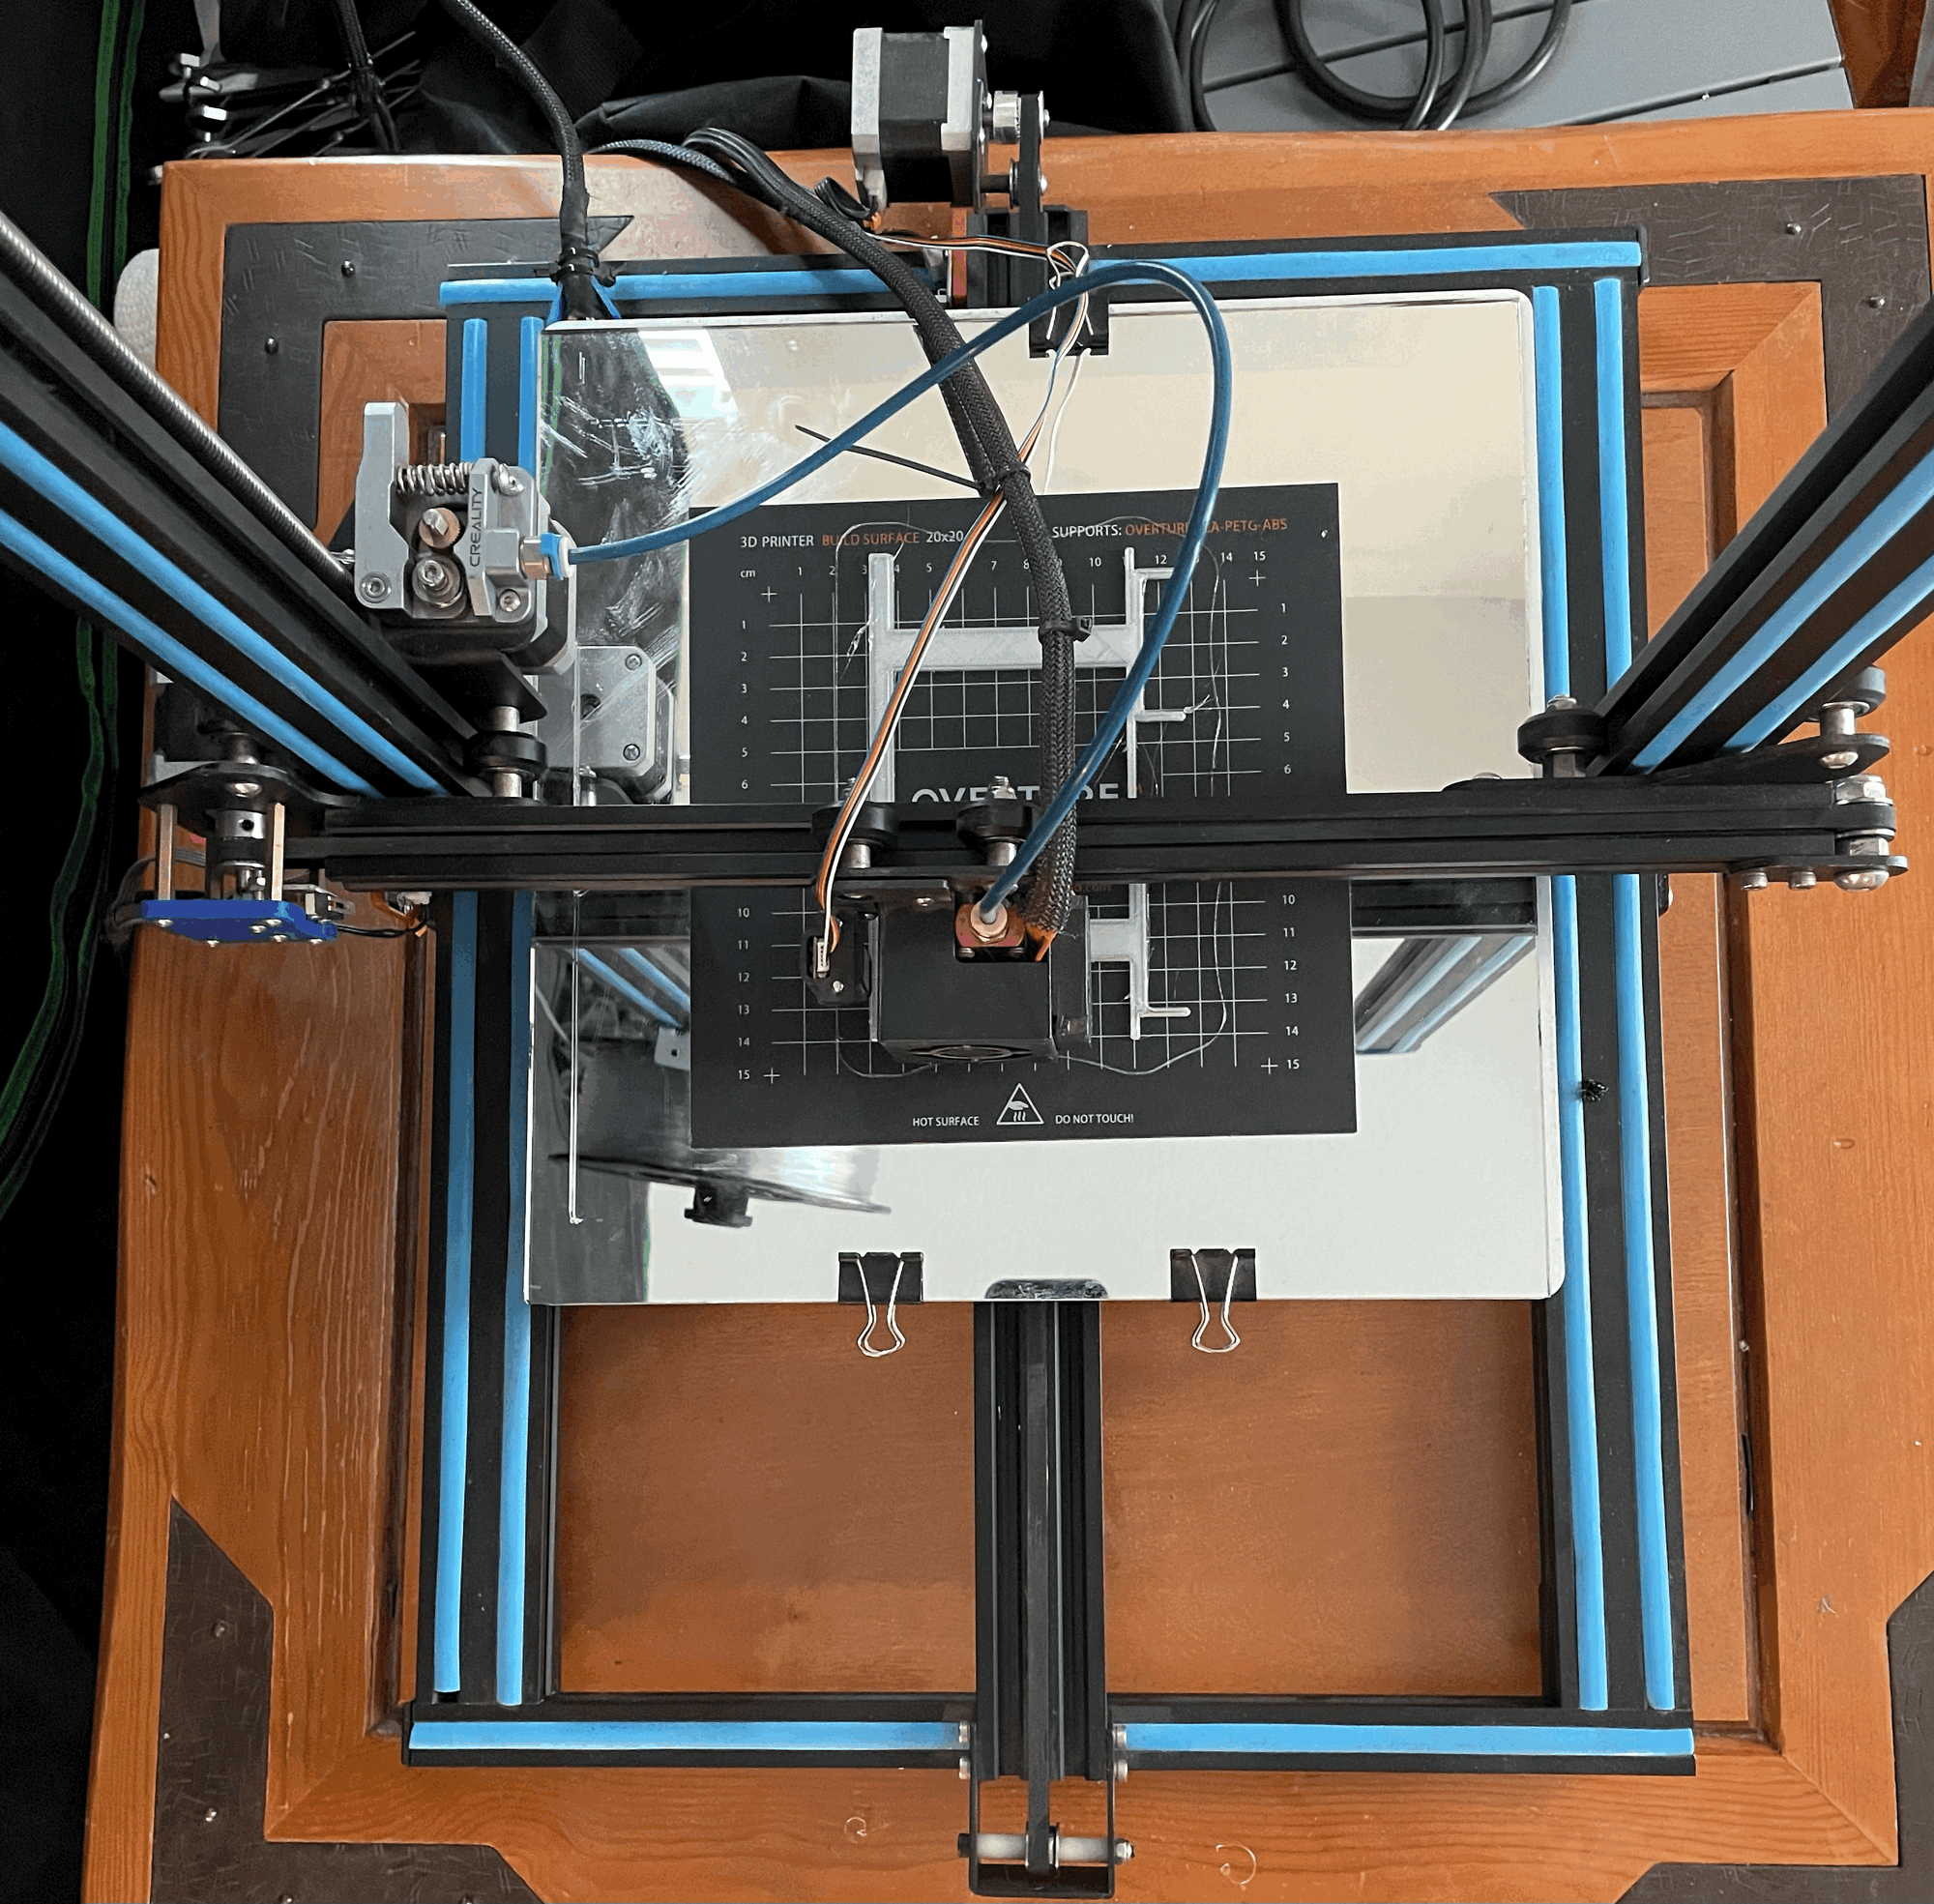
Now that we had the 3D model it was time to 3D print the frame. The frame was too large to print all at once and had to be separated into six parts
Next came the moment of truth to see if we correctly took the measurements
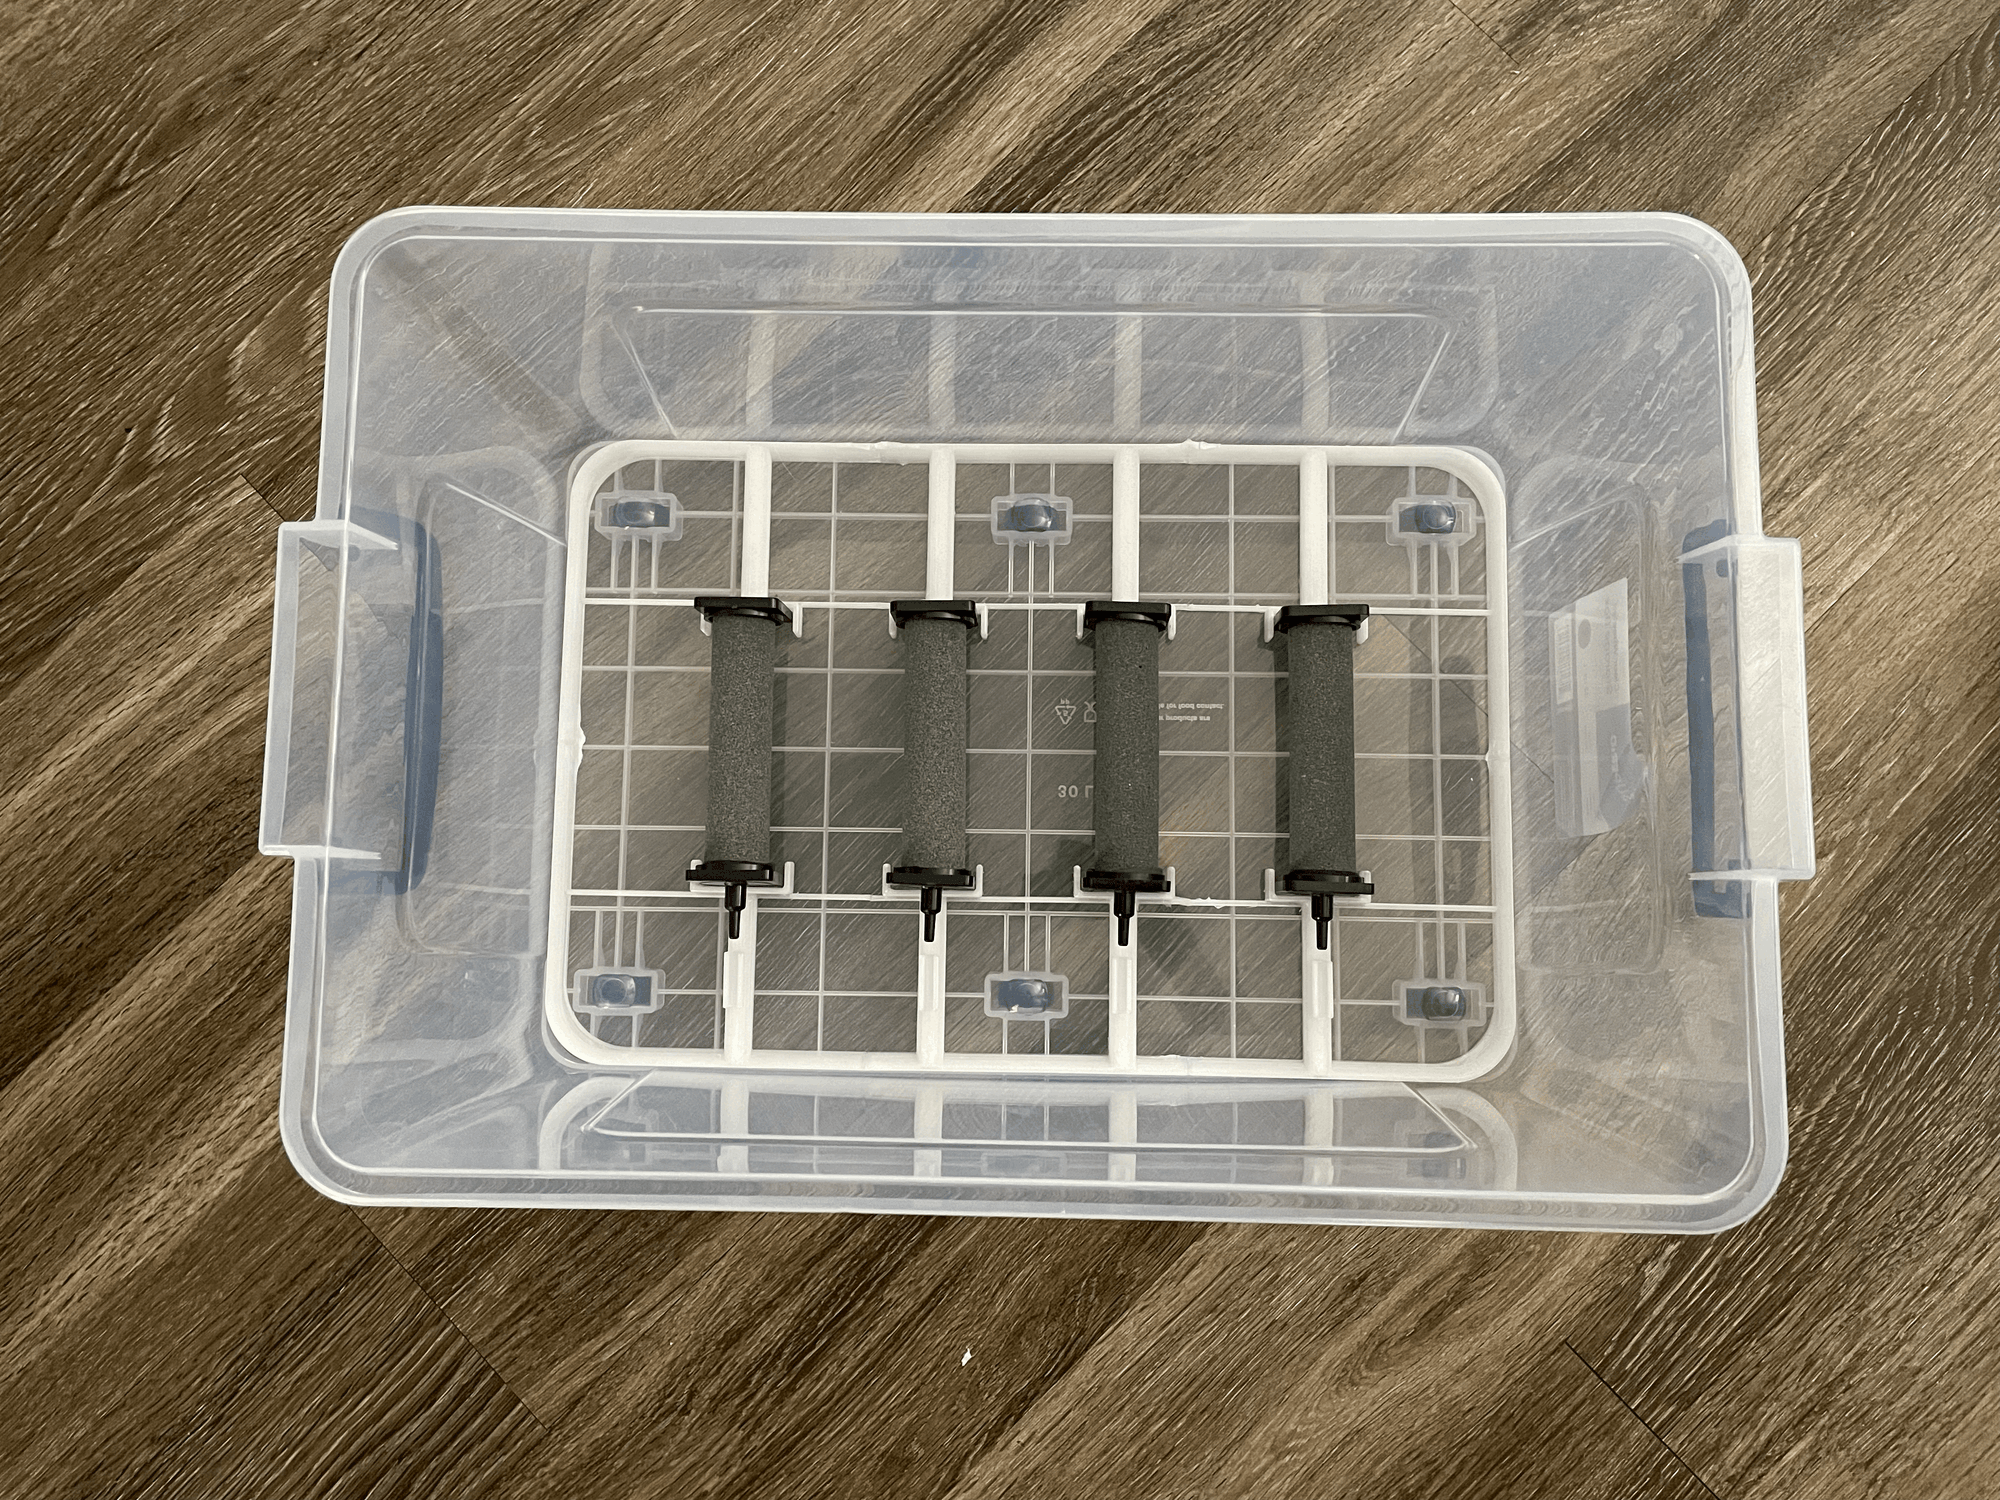
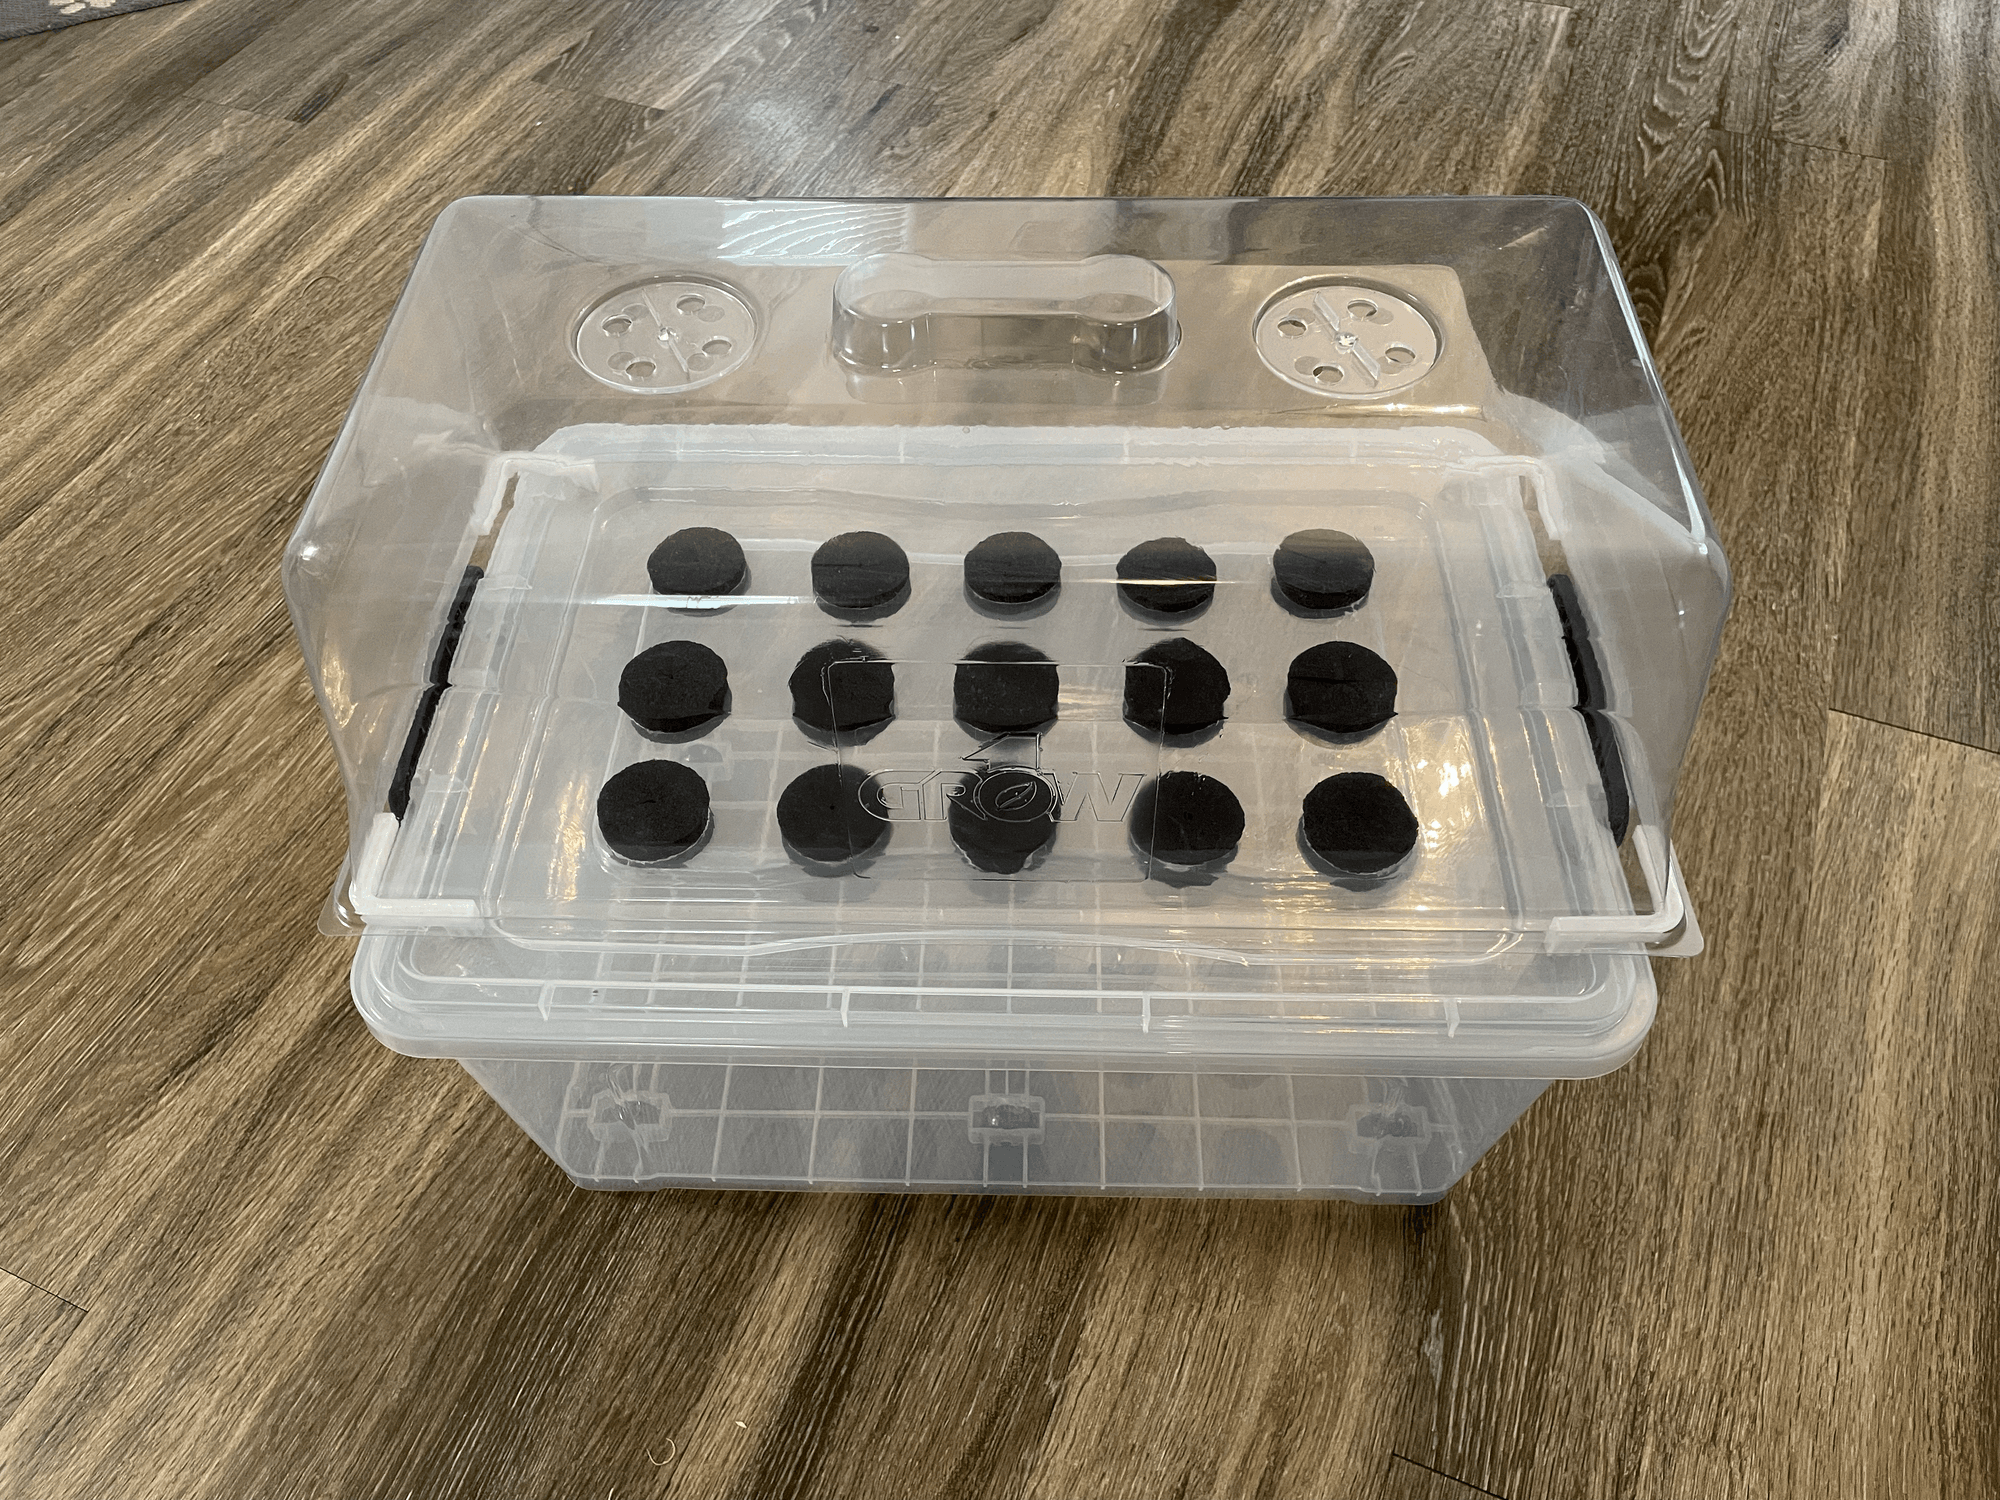
Everything fit perfectly. Next small holes were drilled in the side of the tub and the air stones were connected to the air pump.

Finally the tank needed a humidity a way to retain humidity. I had some extra domes that fit on top of seedling trays but they were too large for the propagation tank. To get the dome to fit we 3D printed 4 corner fittings
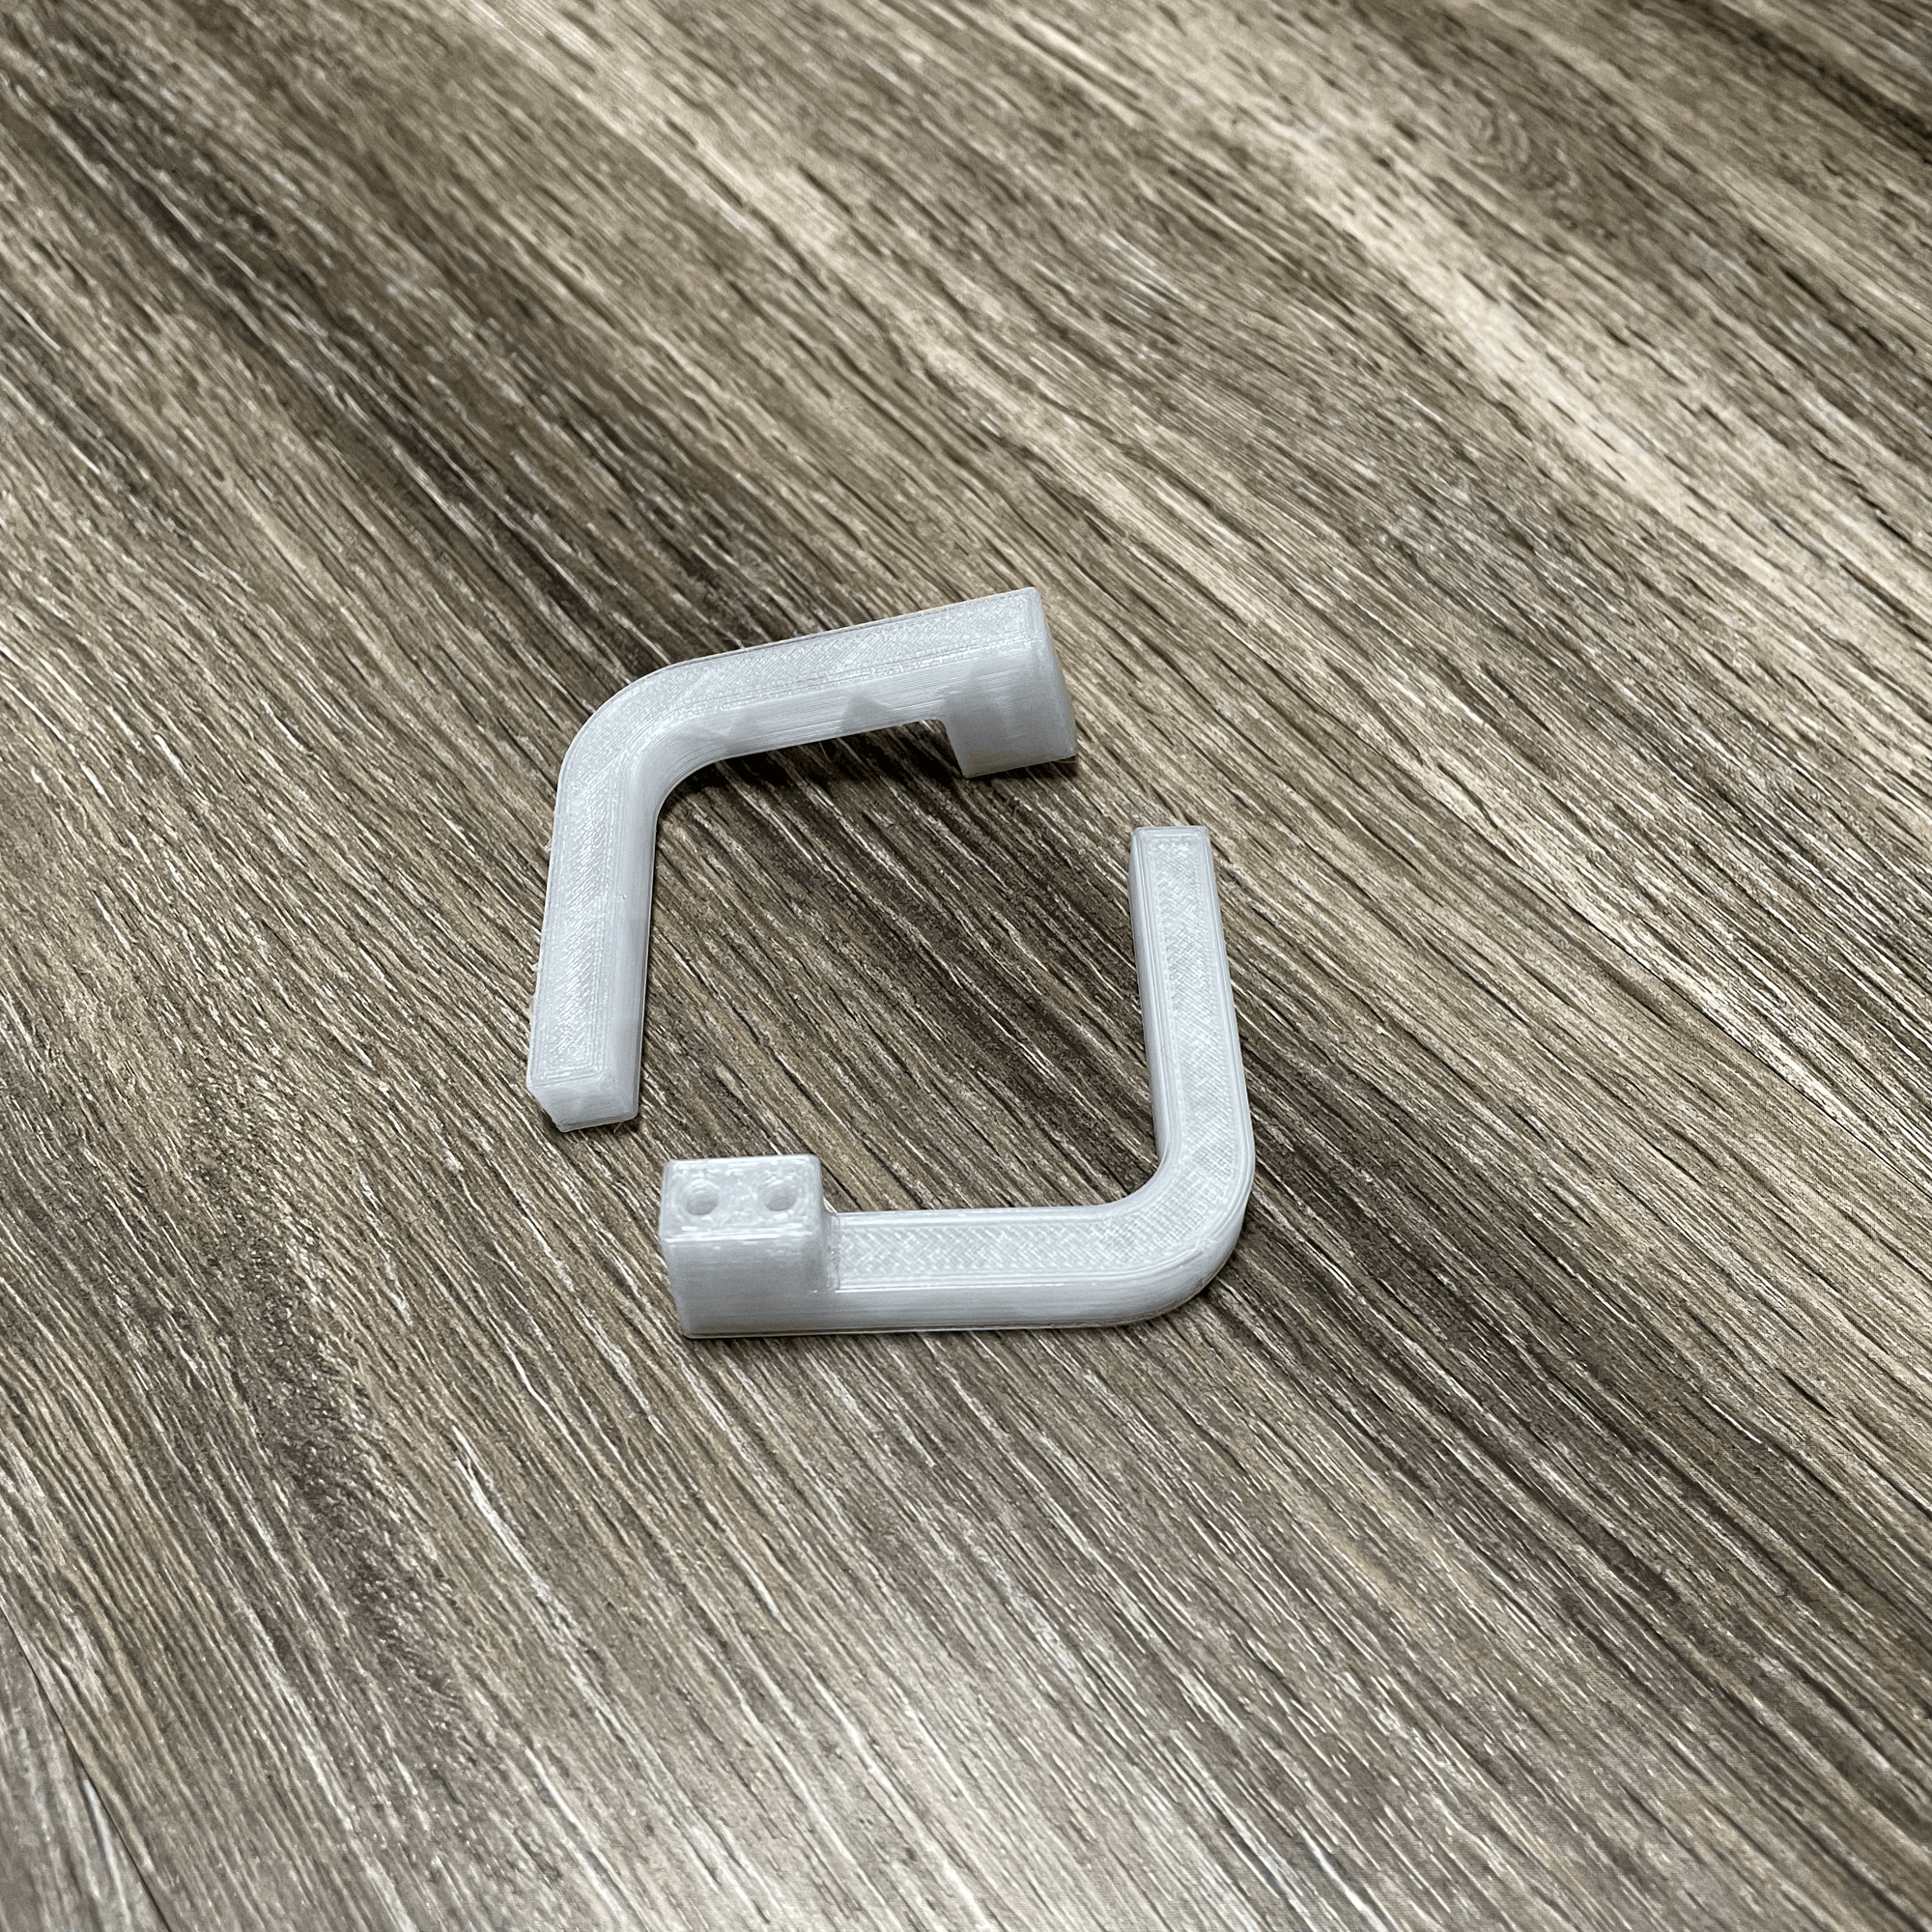
The fittings were attached to the lid and the dome now fit completing the propagation tank build