NFT Hydroponic Build
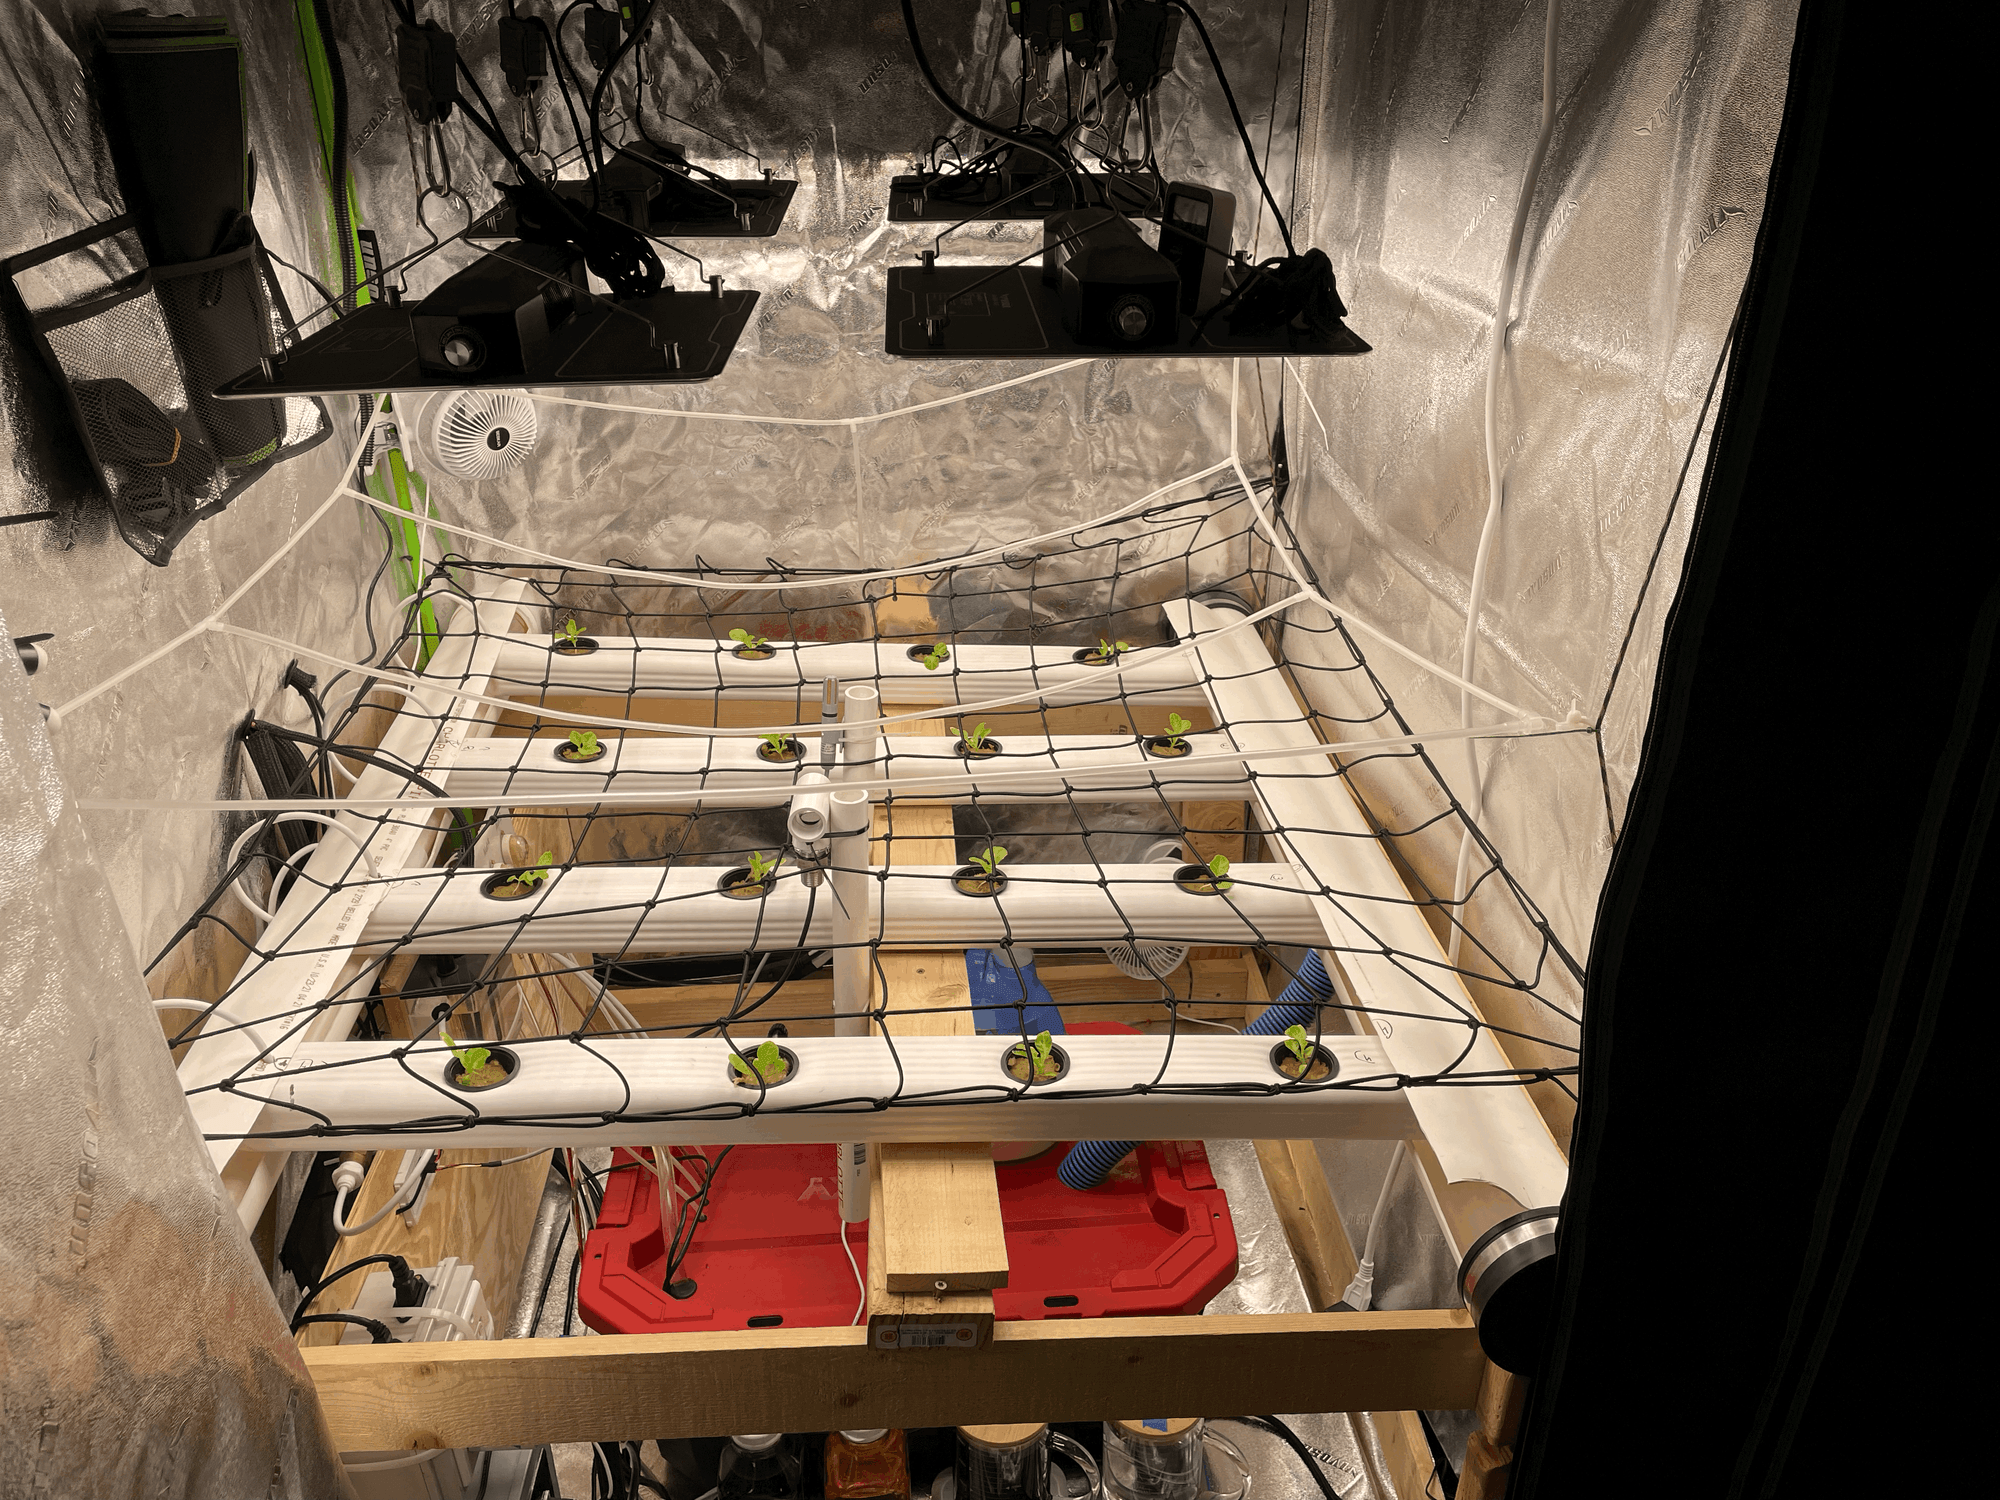
TABLE OF CONTENTS
- What is NFT Hydroponics
- NFT Structure
- Control Panel
- Water Environment
- Air Environment
- Power Control Box / Lights / Amps
- Nursery
- Dashboard / Monitor / Camera
- What is NFT Hydroponics
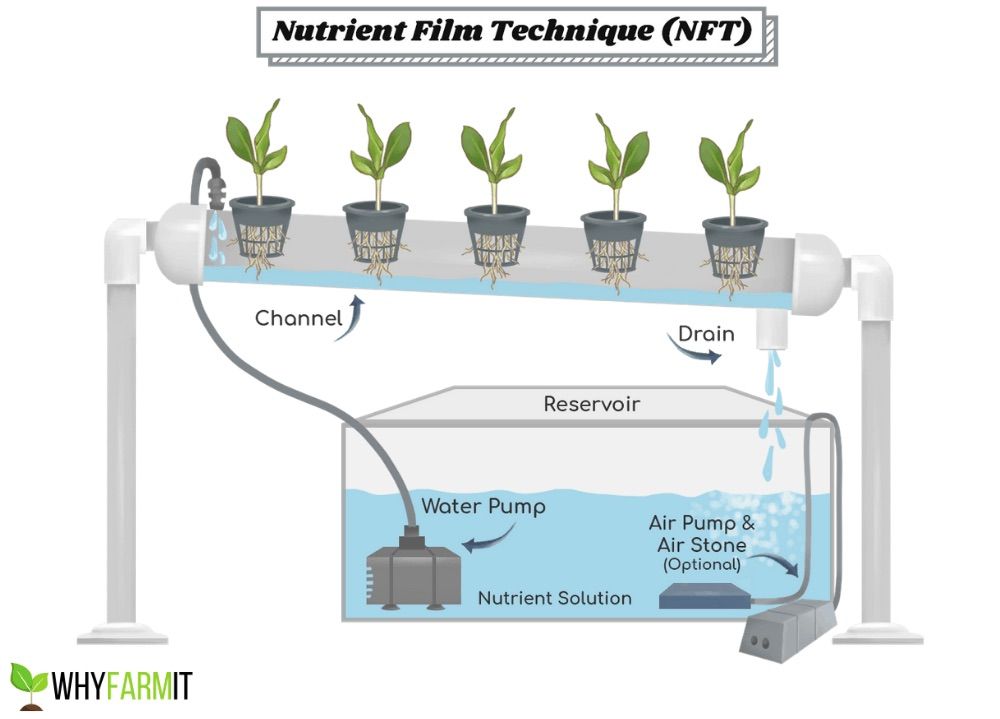
NFT or Nutrient Film Technique is an active, recycling form of hydroponics. A pump provides a constant thin "film" of liquid through a channel ensuring the plants roots have constant access to the nutrient solution
The reason I chose NFT over other hydroponic systems is mainly due to a video I watched by Kyle Gabriel. He published his automated NFT build and made the code open source. This provided the base system I used and saved me a ton of time in development
https://kylegabriel.com/projects/2020/06/automated-hydroponic-system-build.html
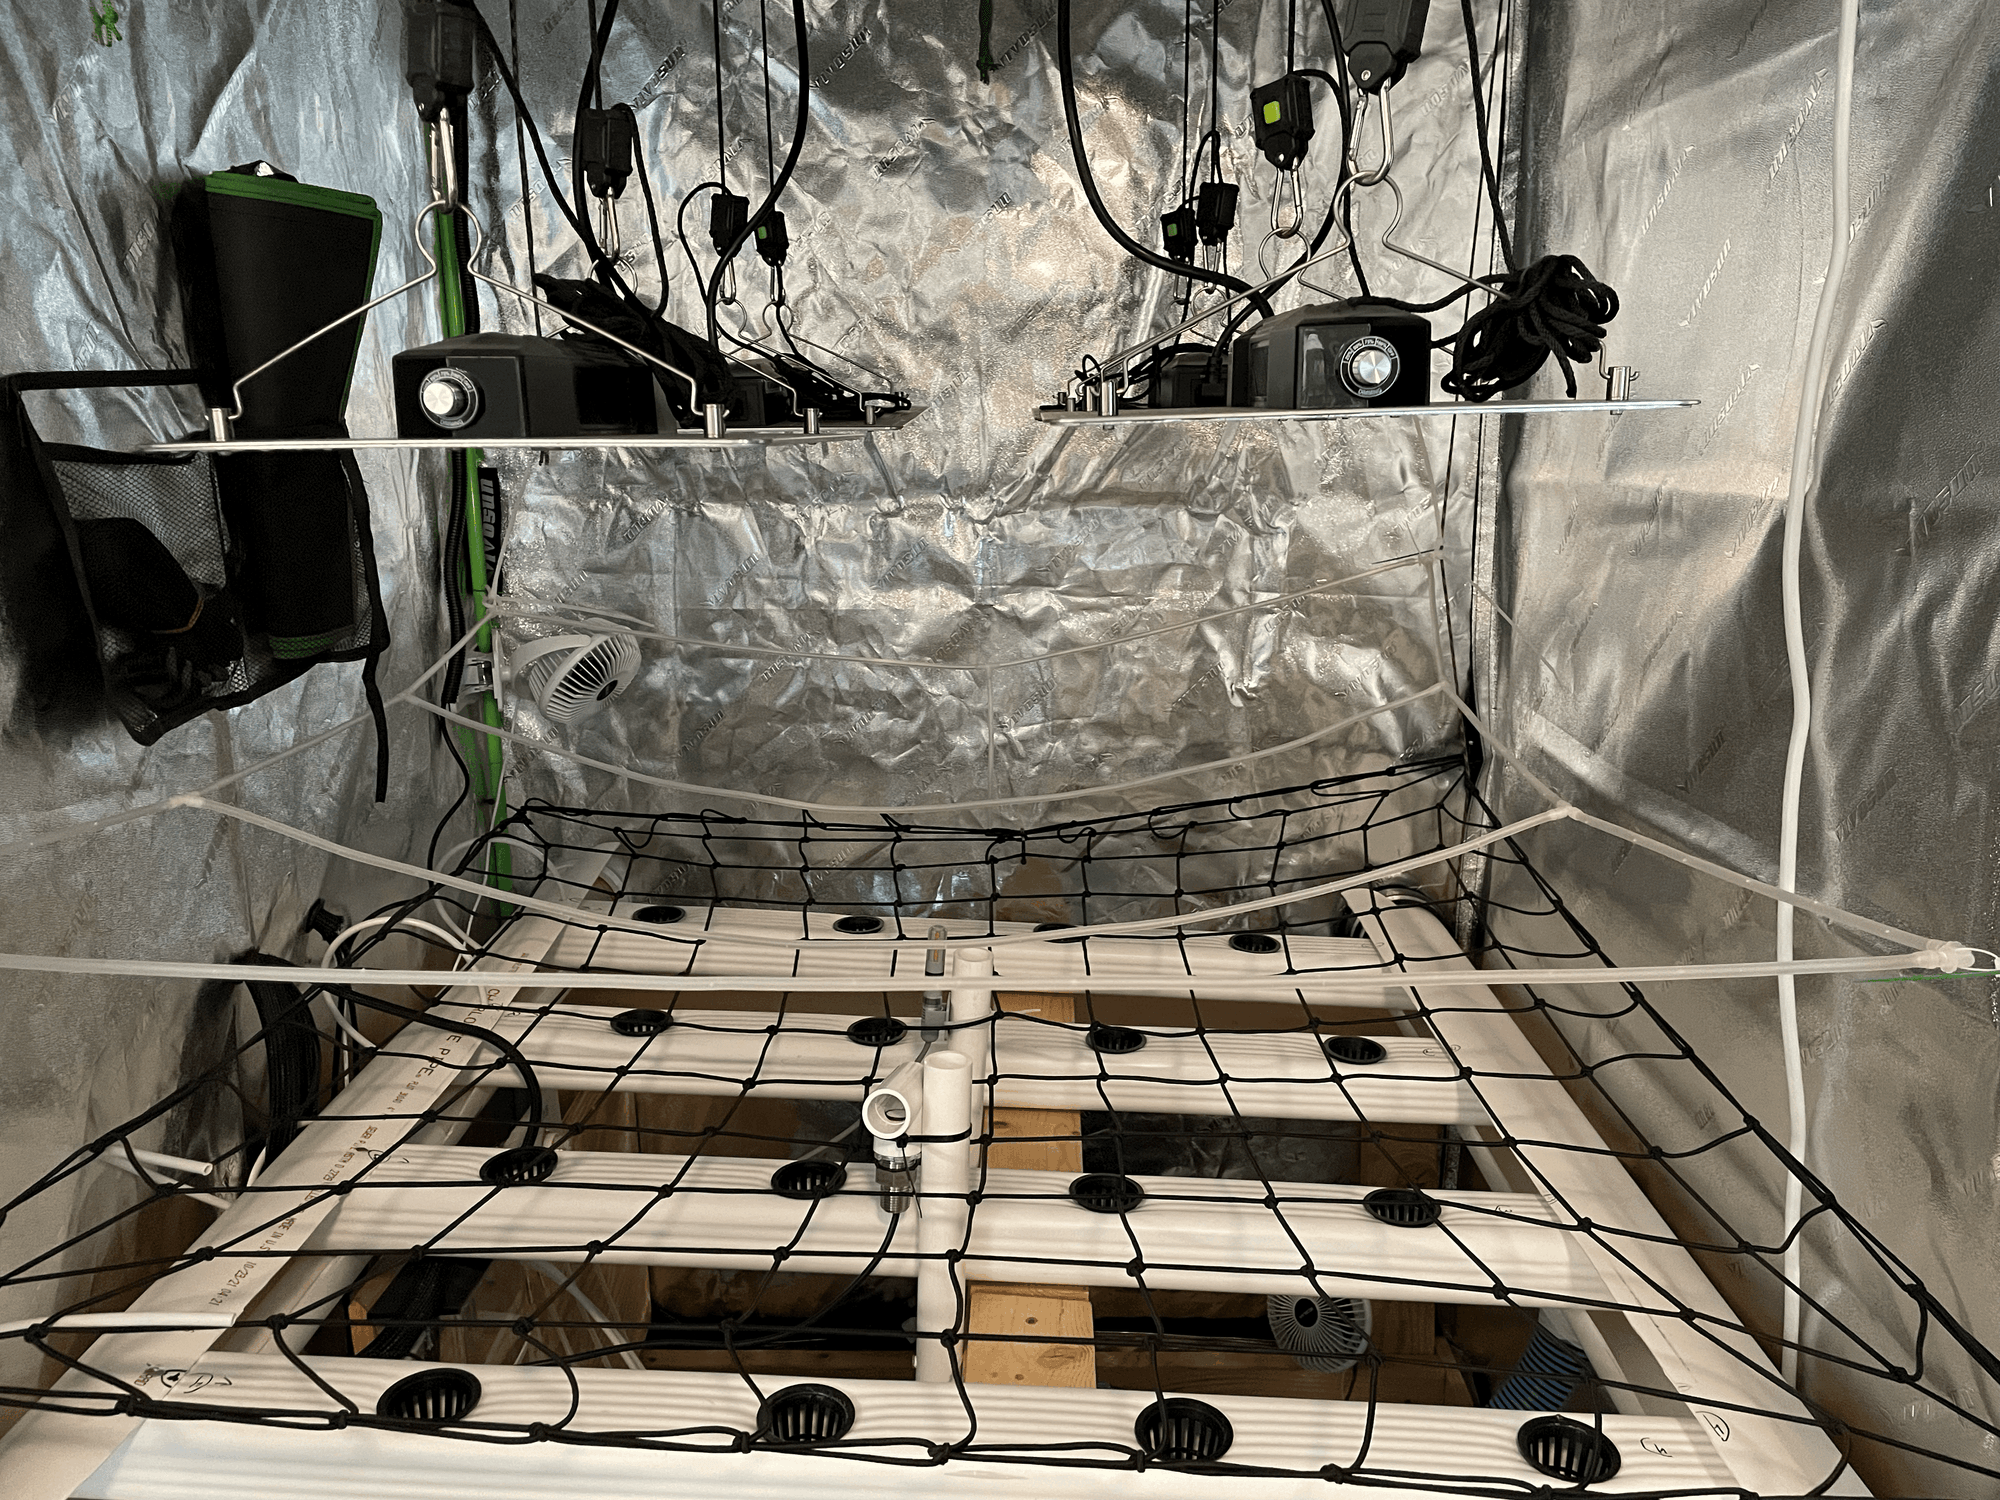
2. NFT Structure
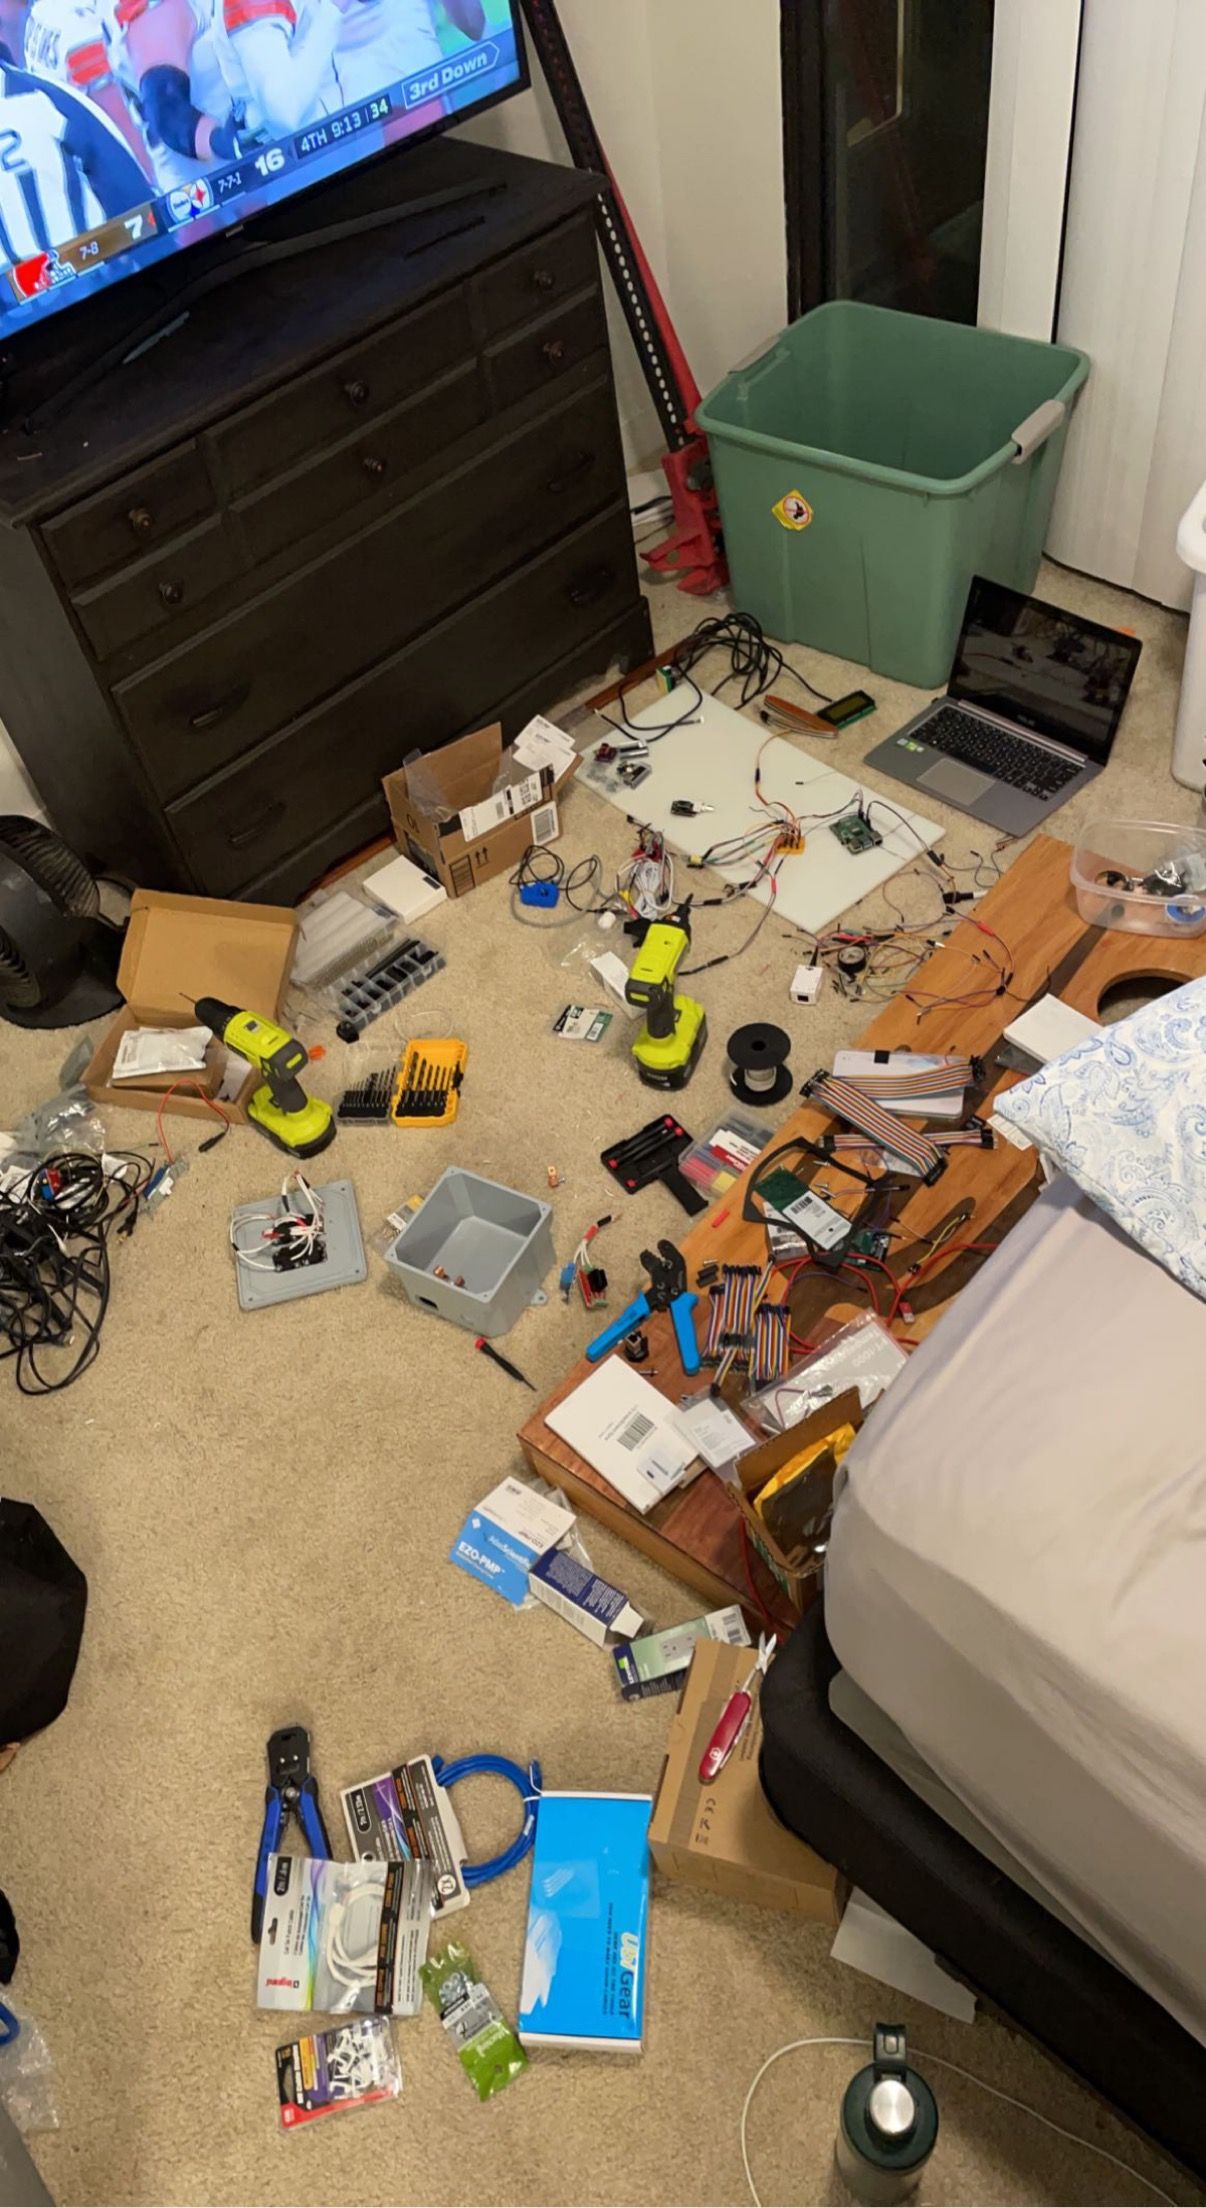
This post will be mostly images from the completed build. I unfortunately didn't take a lot of pictures during the build so I won't be able to share as many step by step processes as I would like. One of the few picture I do have is while building the control panel. I faced several difficult problems during this build, but constructing this an apartment with limited space was uniquely challenging
I wanted to use Kyle's automated system and then take it a step farther and fully optimize it. You can read more about what an optimal environment looks like here
 Austin Bergman
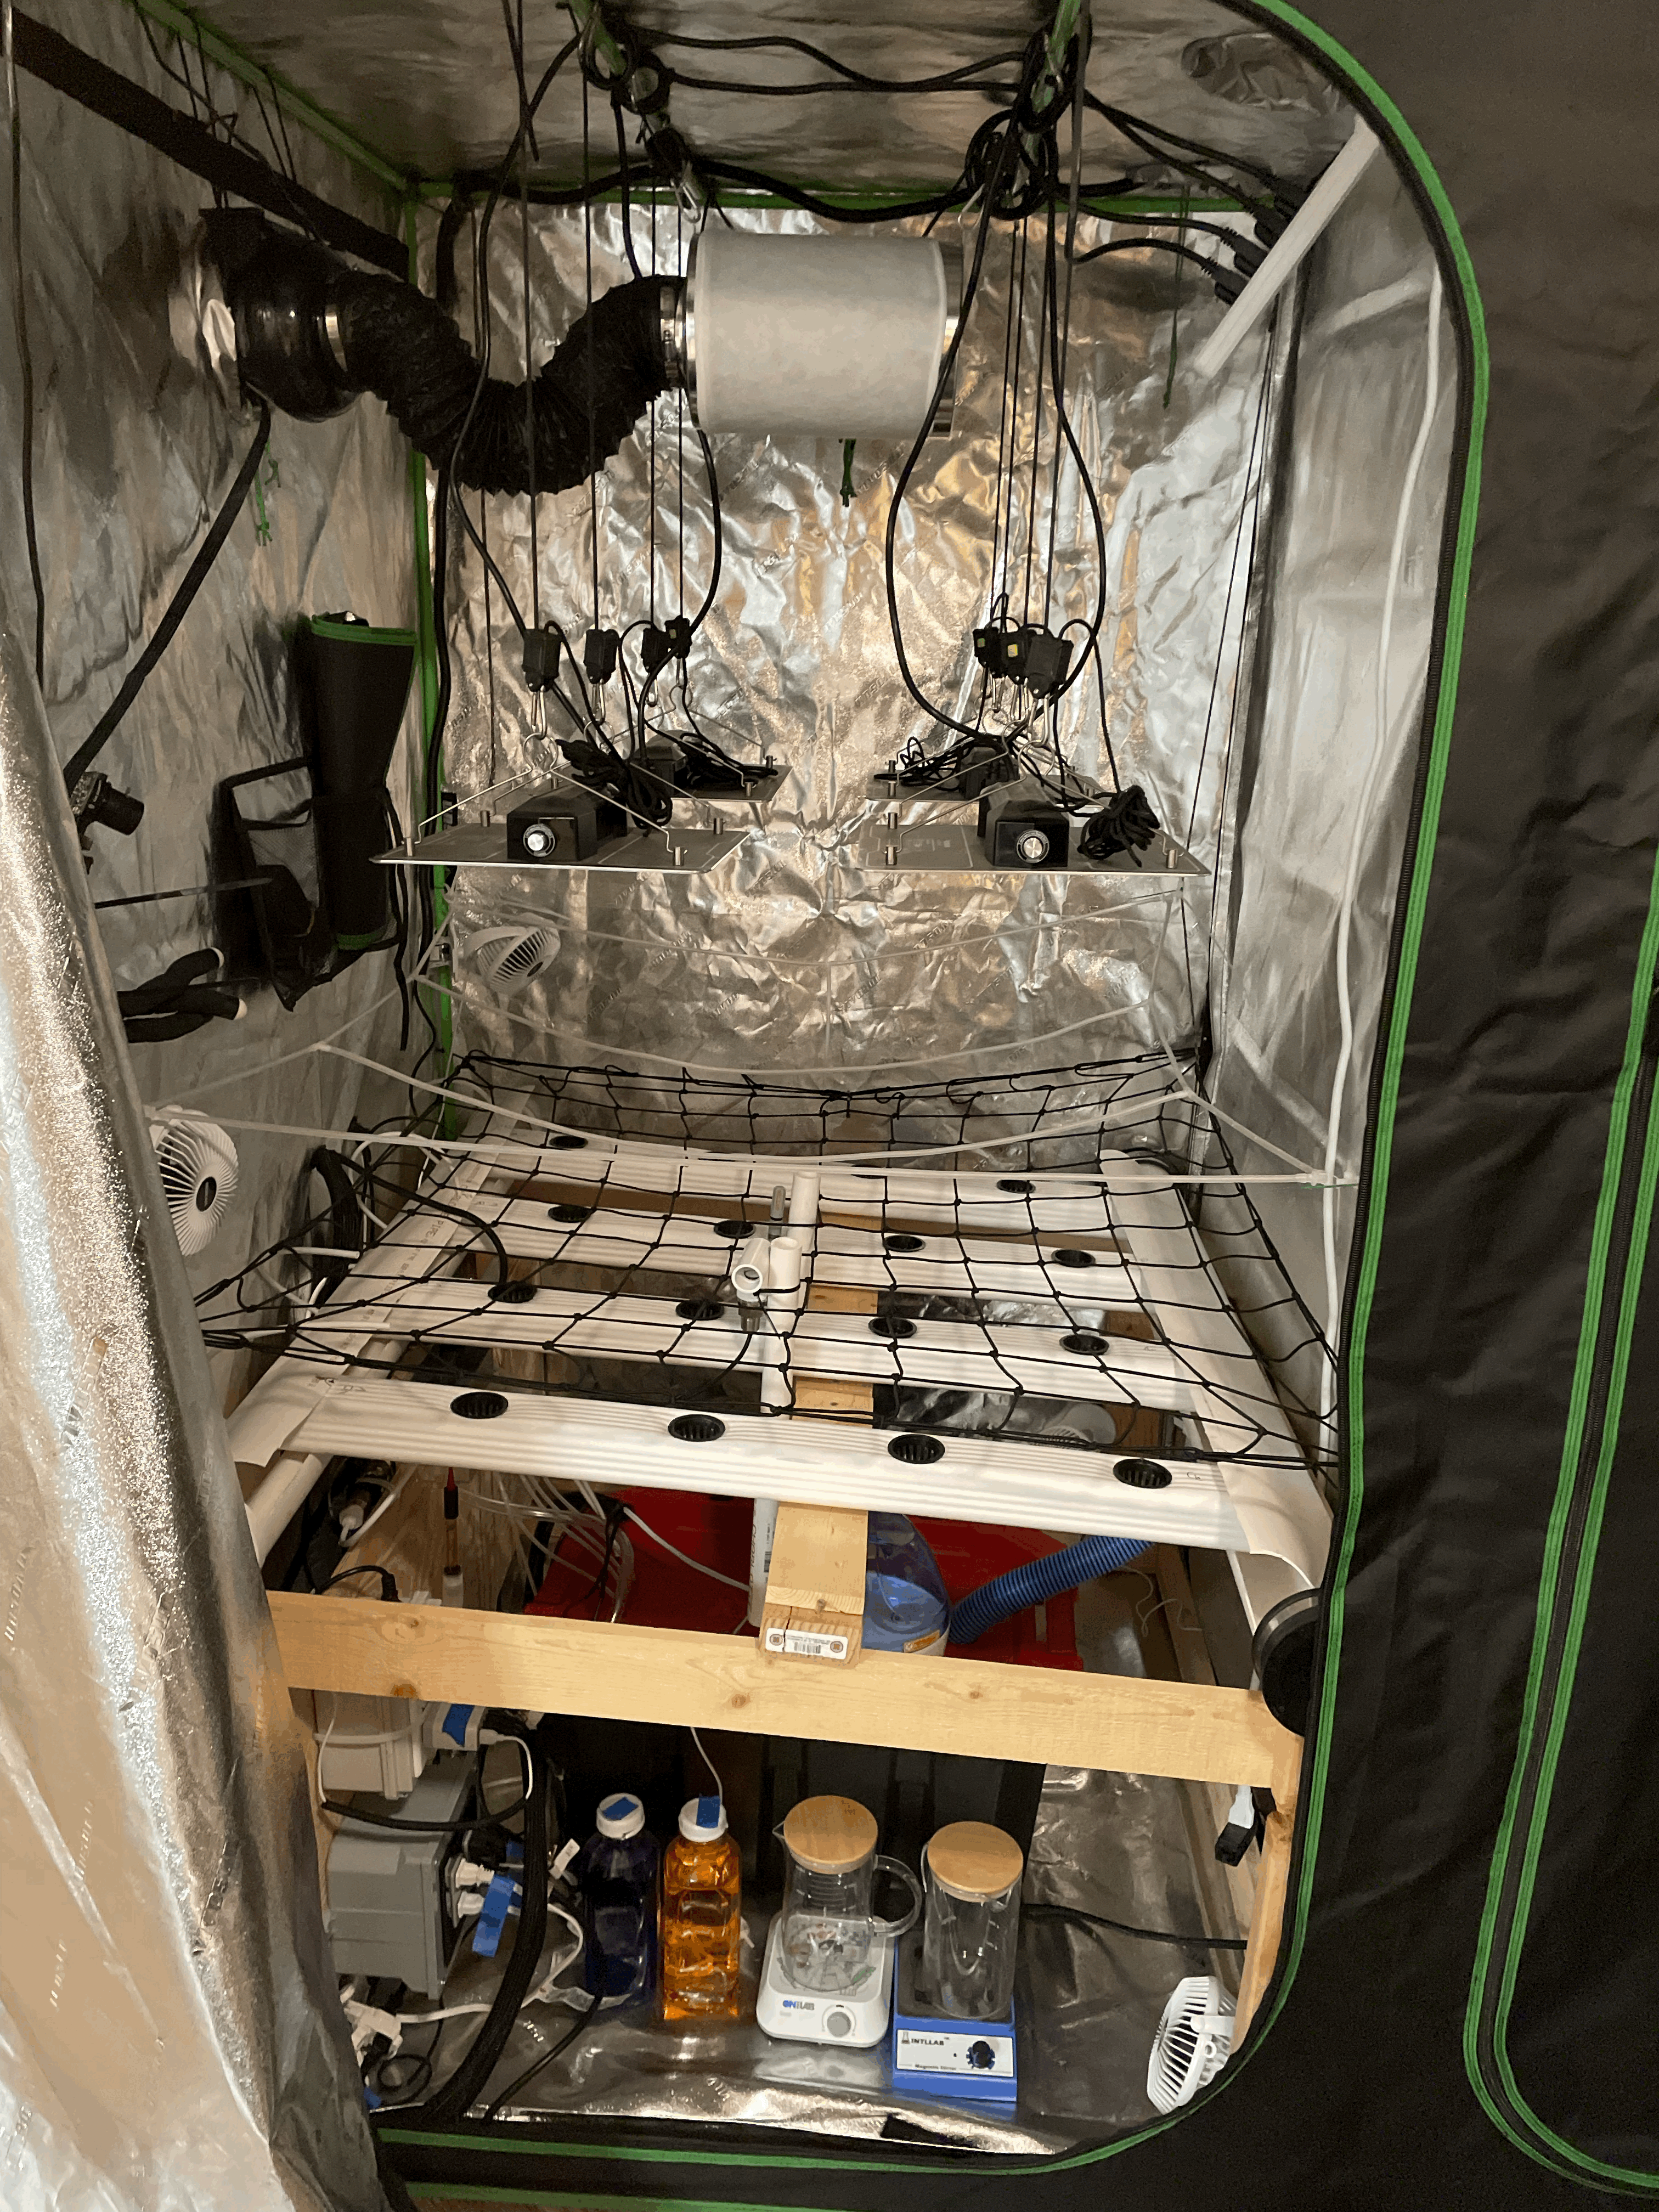
I followed the standard NFT build where a submersible water pump pushes water through the water input tube. The water flow creates pressure inside a sealed PVC pipe (Water Distribution) and forces the water through a small tube into the channel. The channel is slightly angled preventing the water from standing. The water will collect in the water collection pipe and then be returned to the reservoir
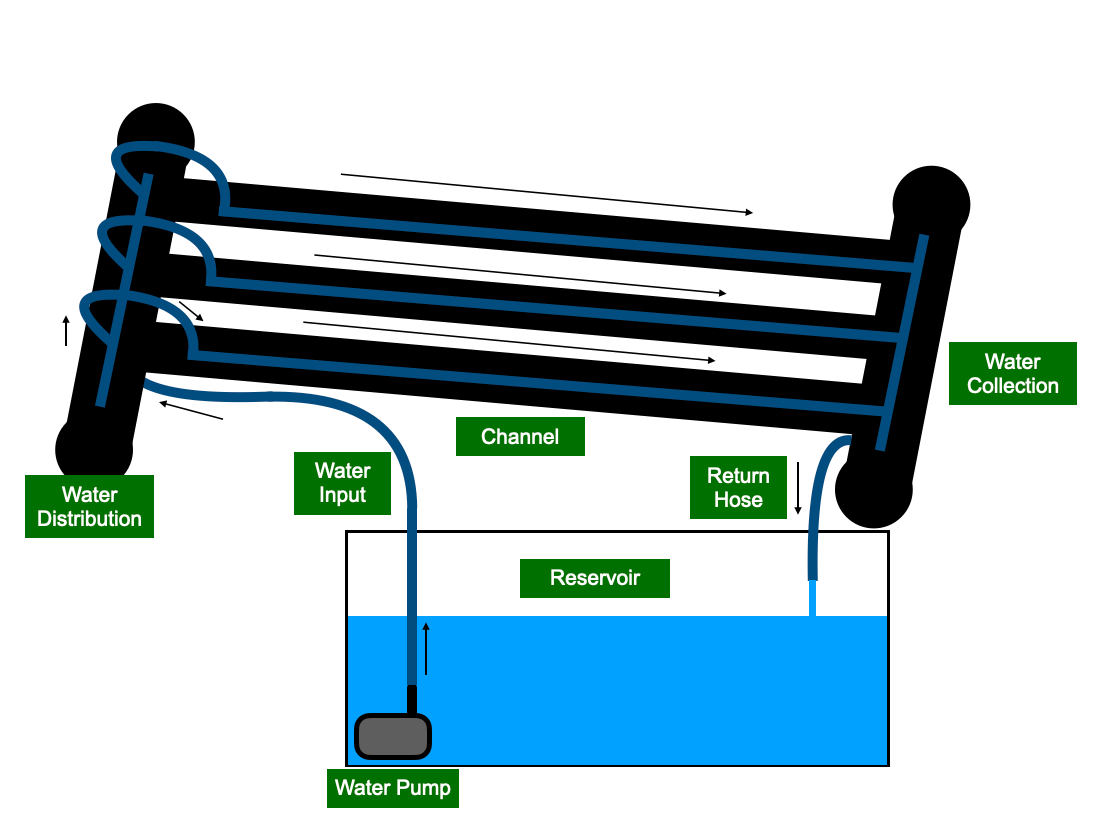

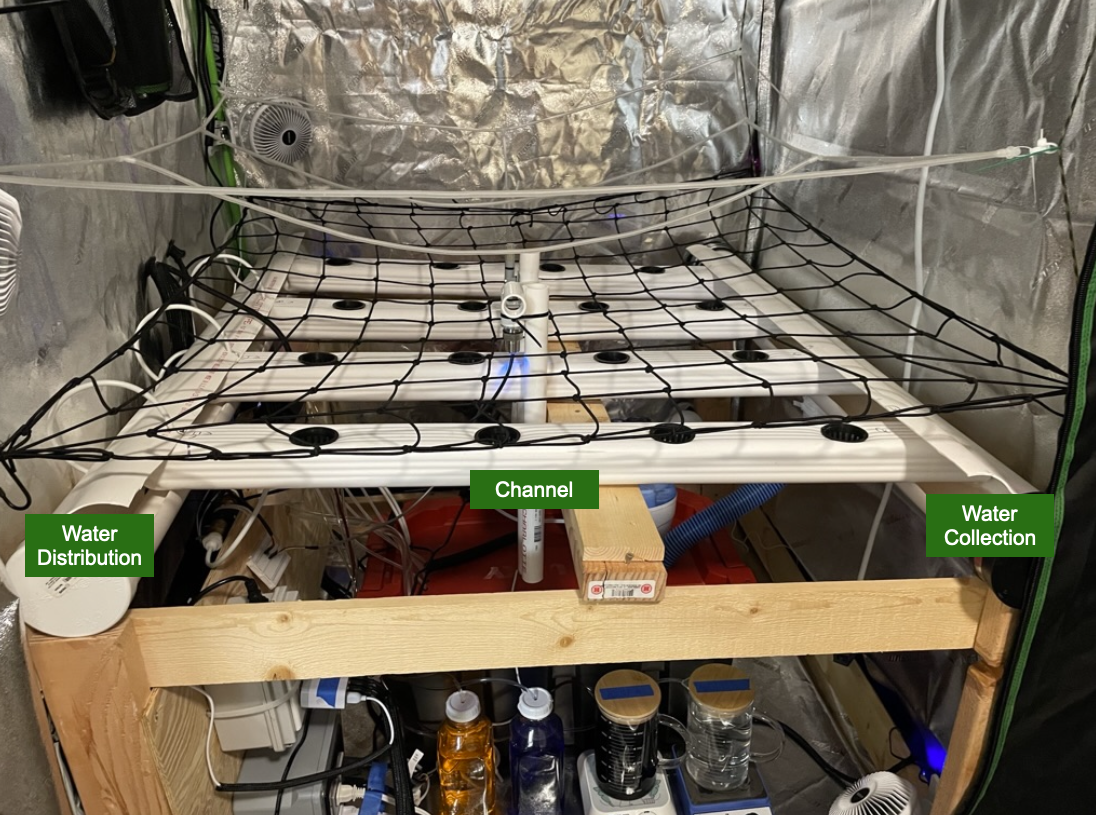
My NFT System With Diagram Labels
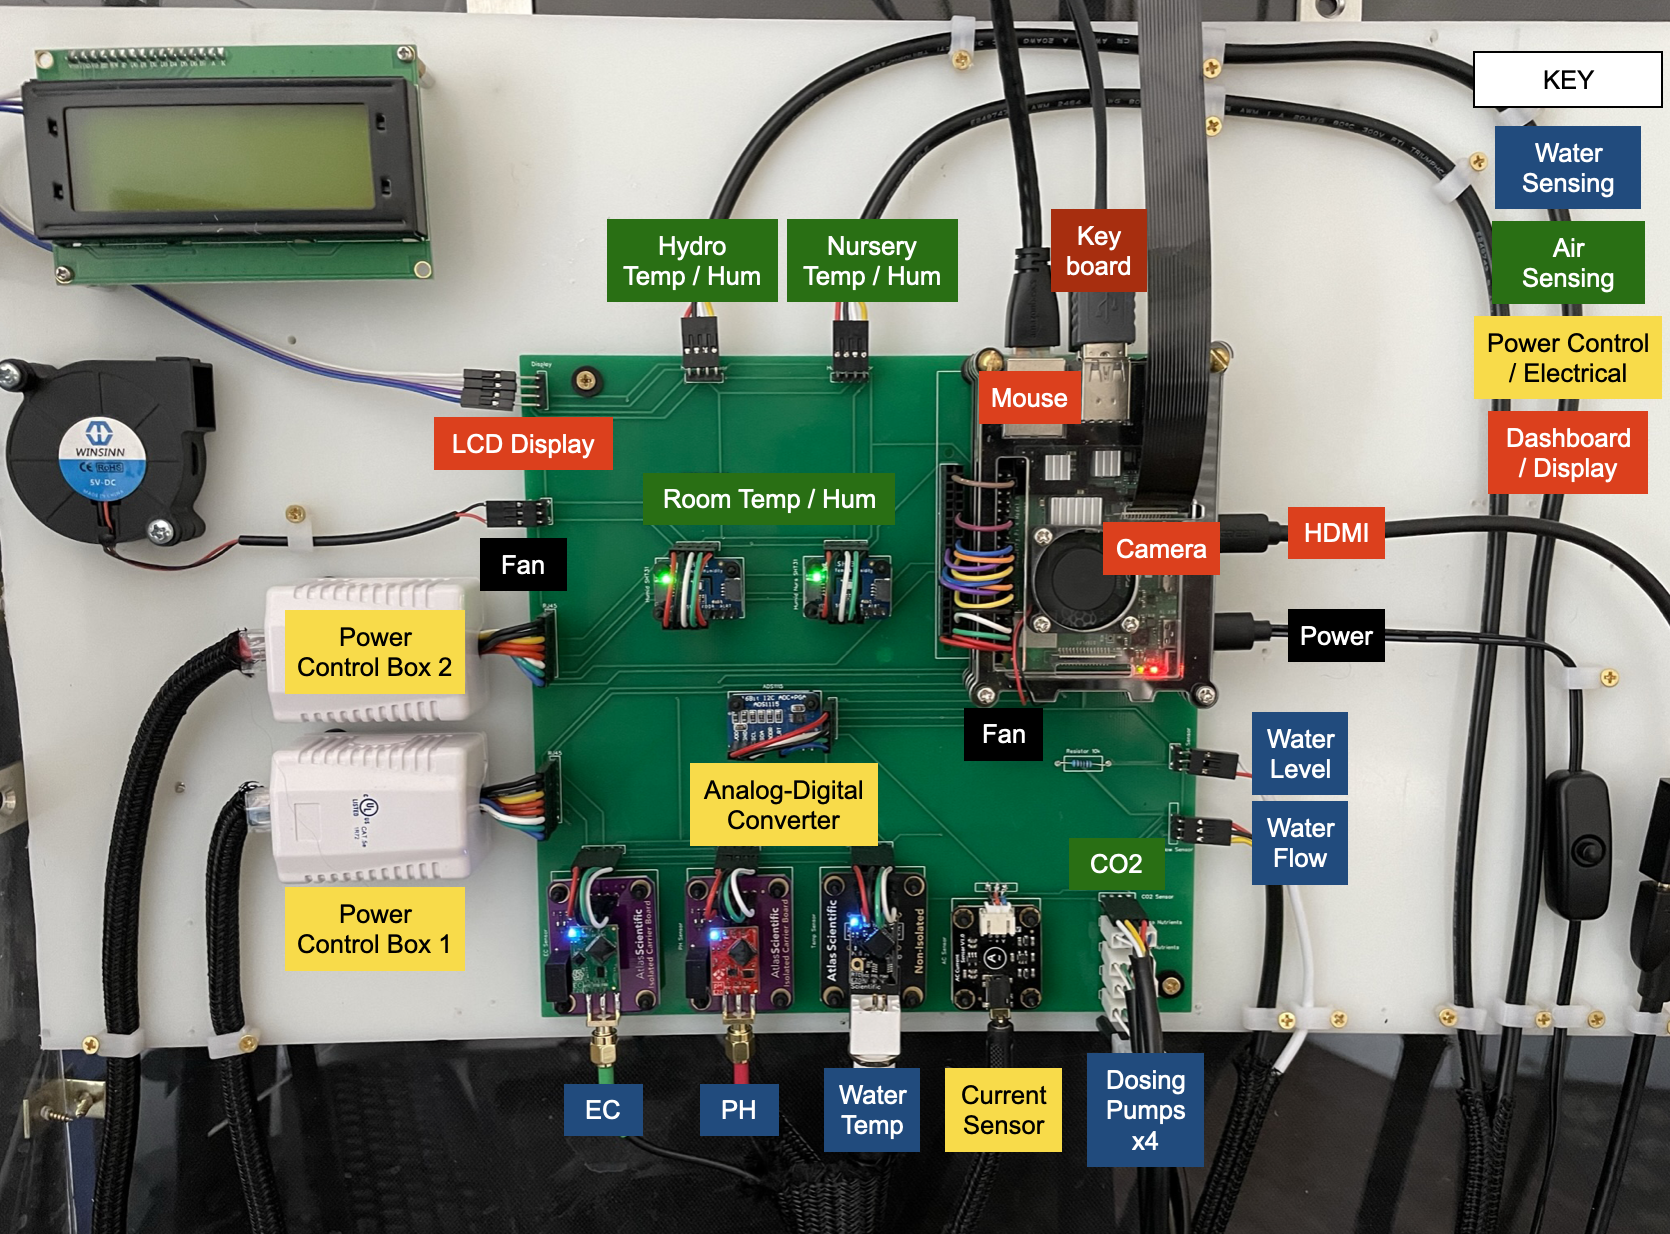
3. Control Panel
Plants need the environment to stay within a specific range to be able to grow. Nutrients needs to be replaced as it is absorbed by the plants, humidity needs to be high enough to keep the plant from drying out but low enough to prevent disease and temperature need to fall between freezing and stressing the plant. The control panel connects the Raspberry Pi to sensors that can measure the environment and outputs that can change the environment. My control panel had two iterations. The first had jumper cable connections and the second used a custom PCB. You can read more about this change here
Austin Bergman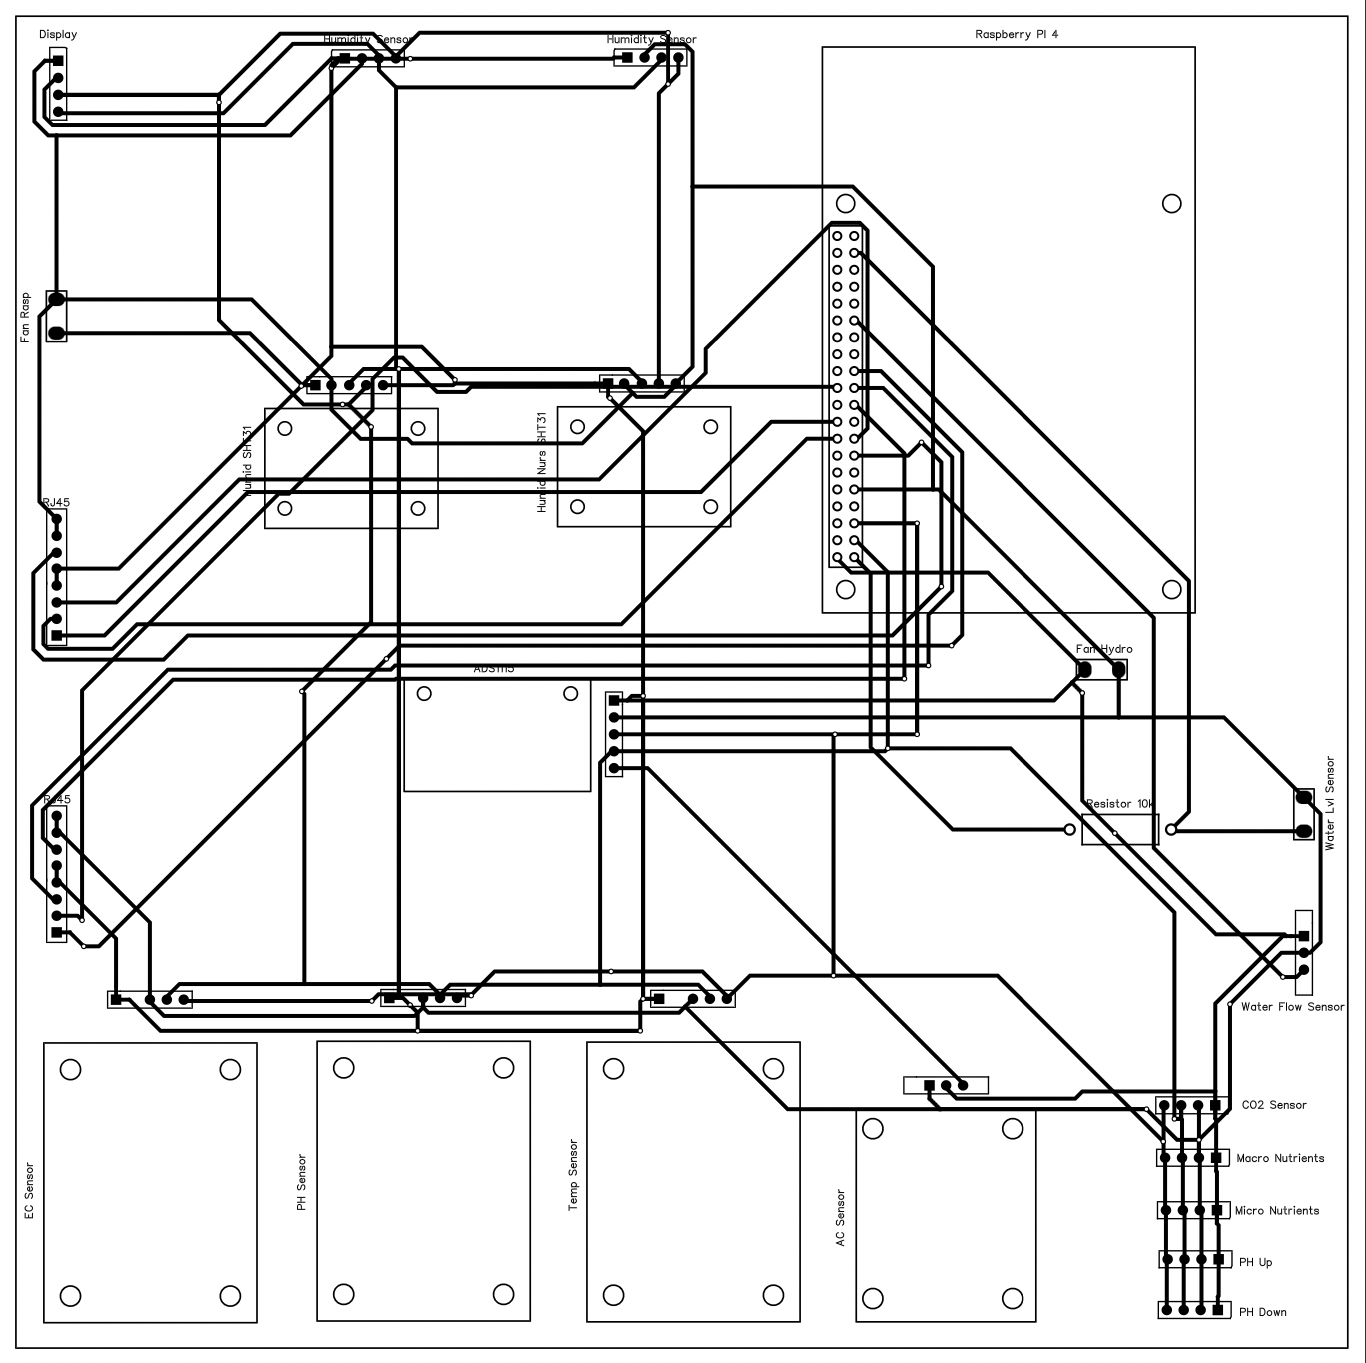
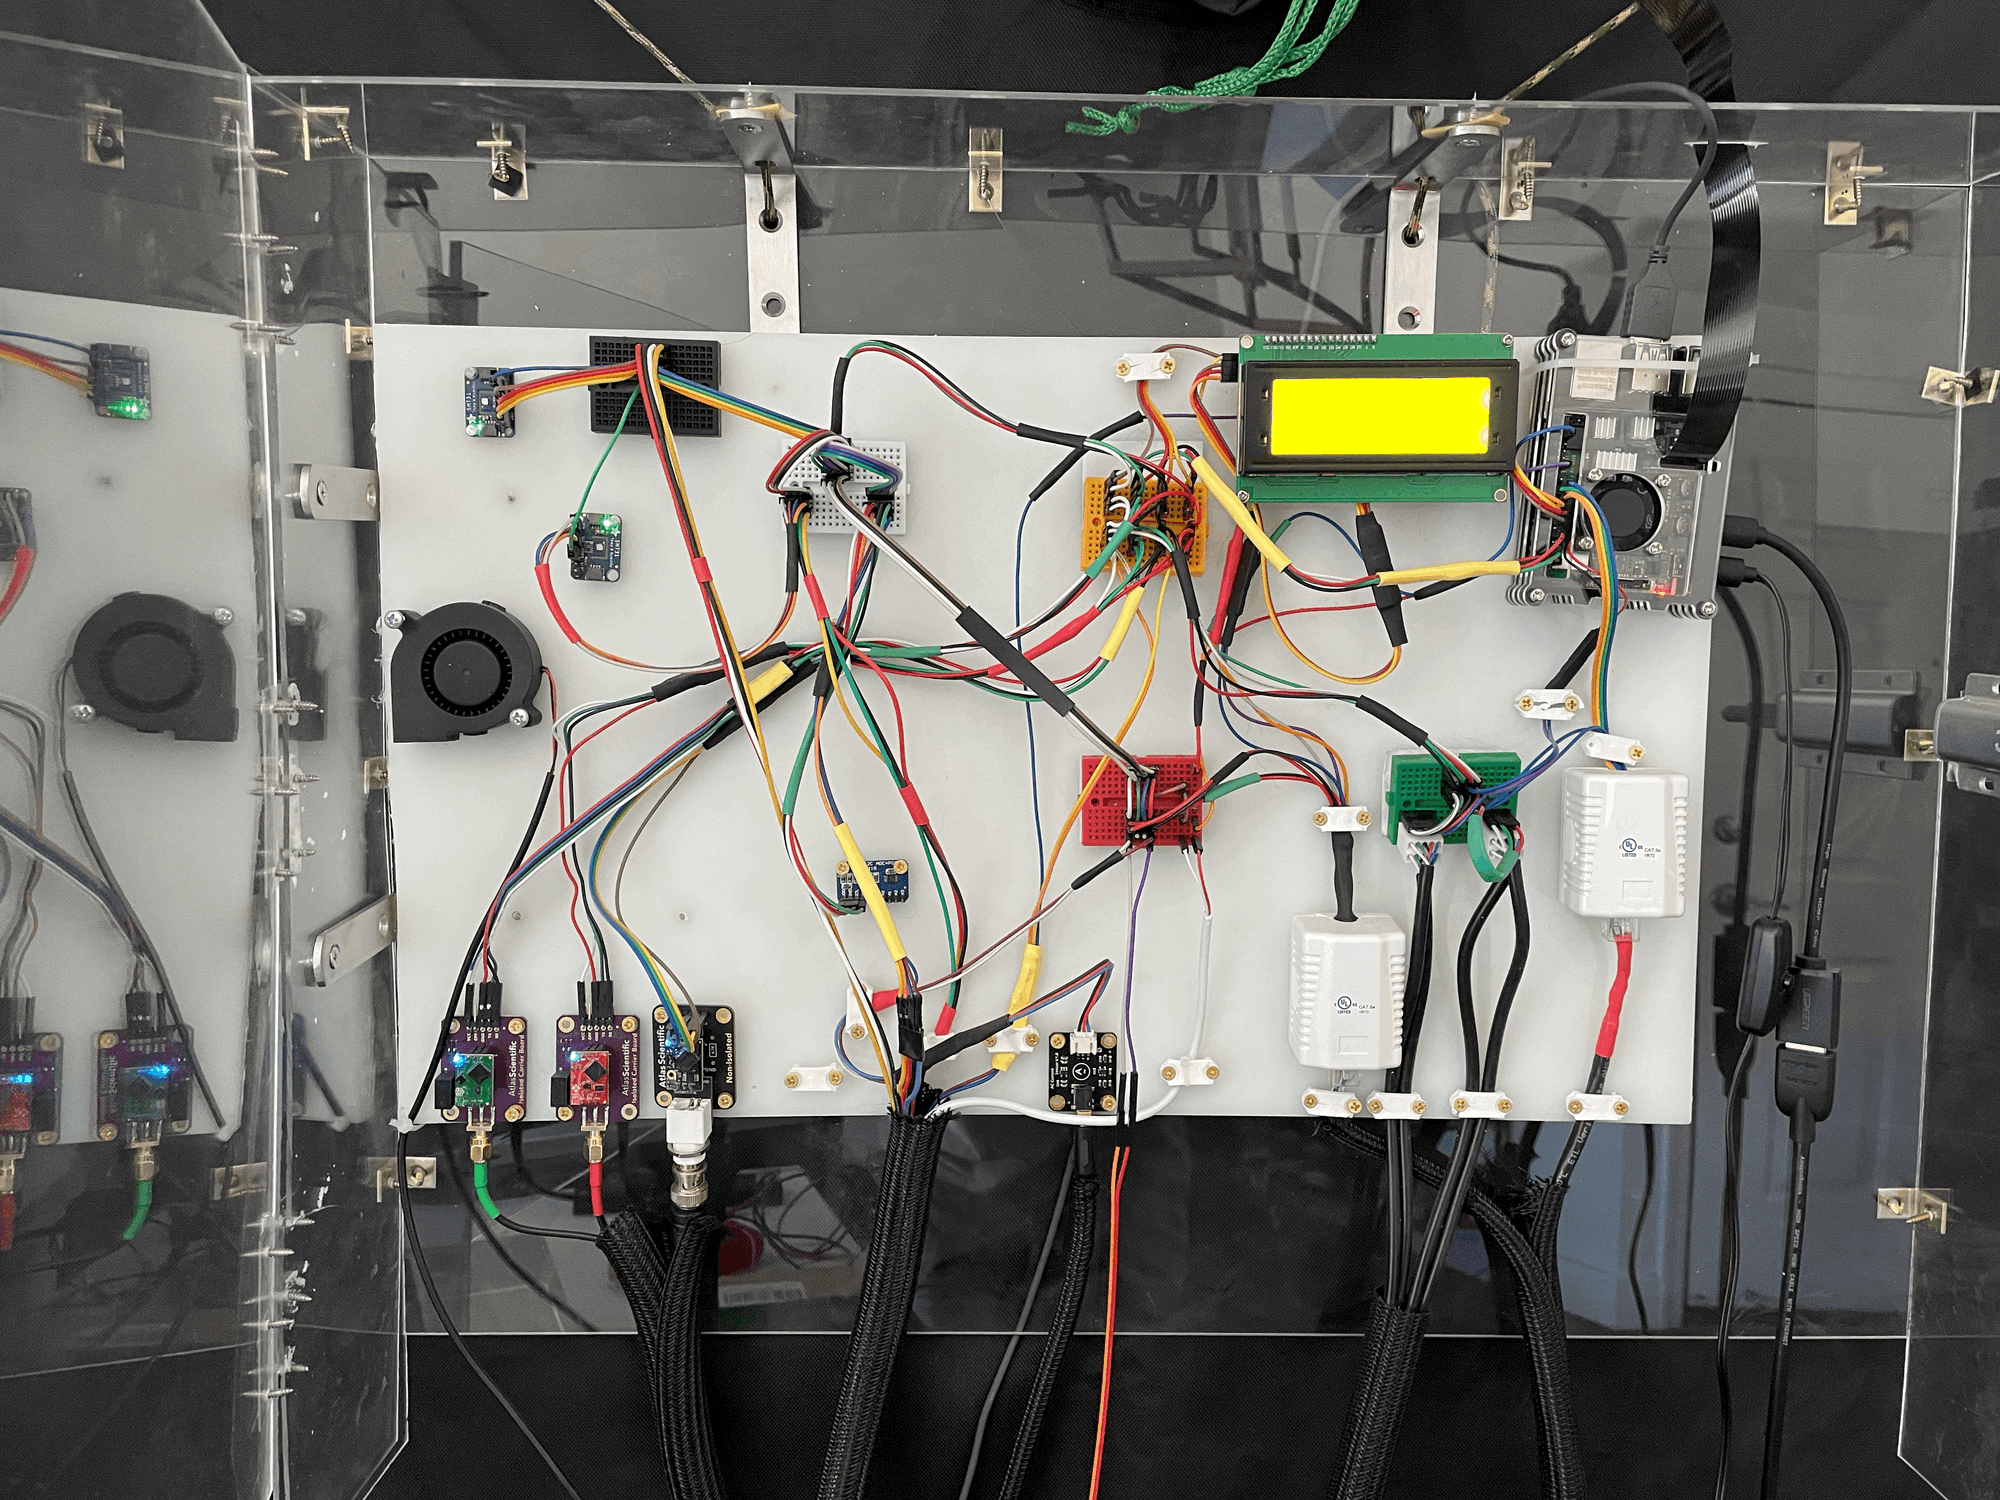
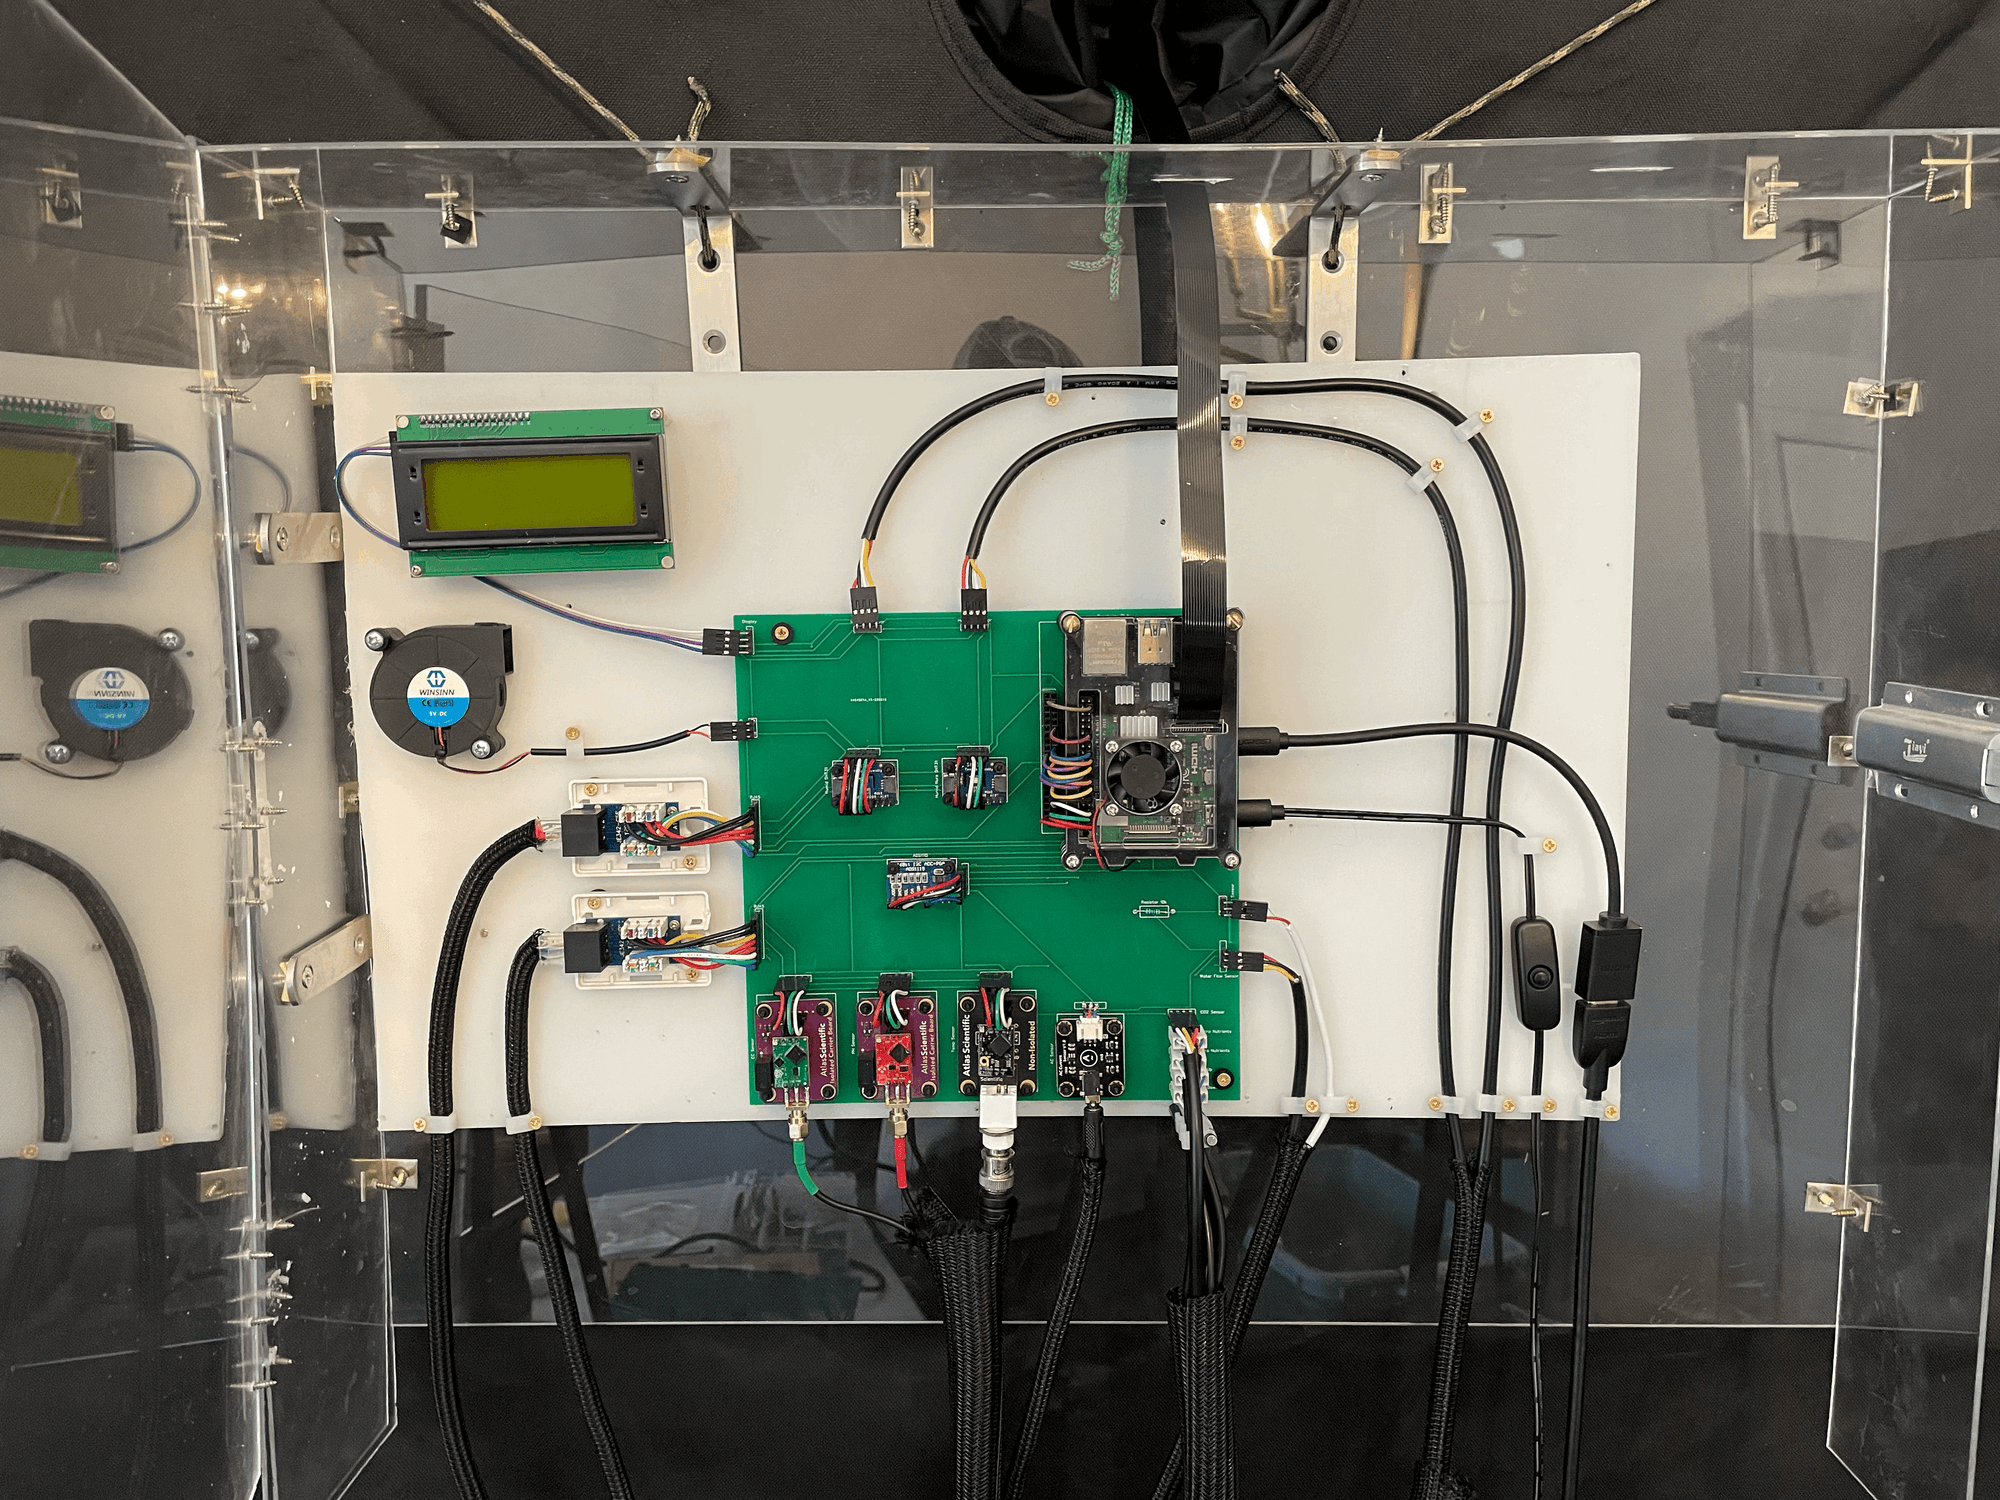
Left: Jumper Wire Control Panel Right: PCB Control Panel
All sensors are connected using the I2C serial communication protocol and can be separated into 4 categories: Water Sensing, Air Sensing, Power Control, and Dashboard
4. Water Environment
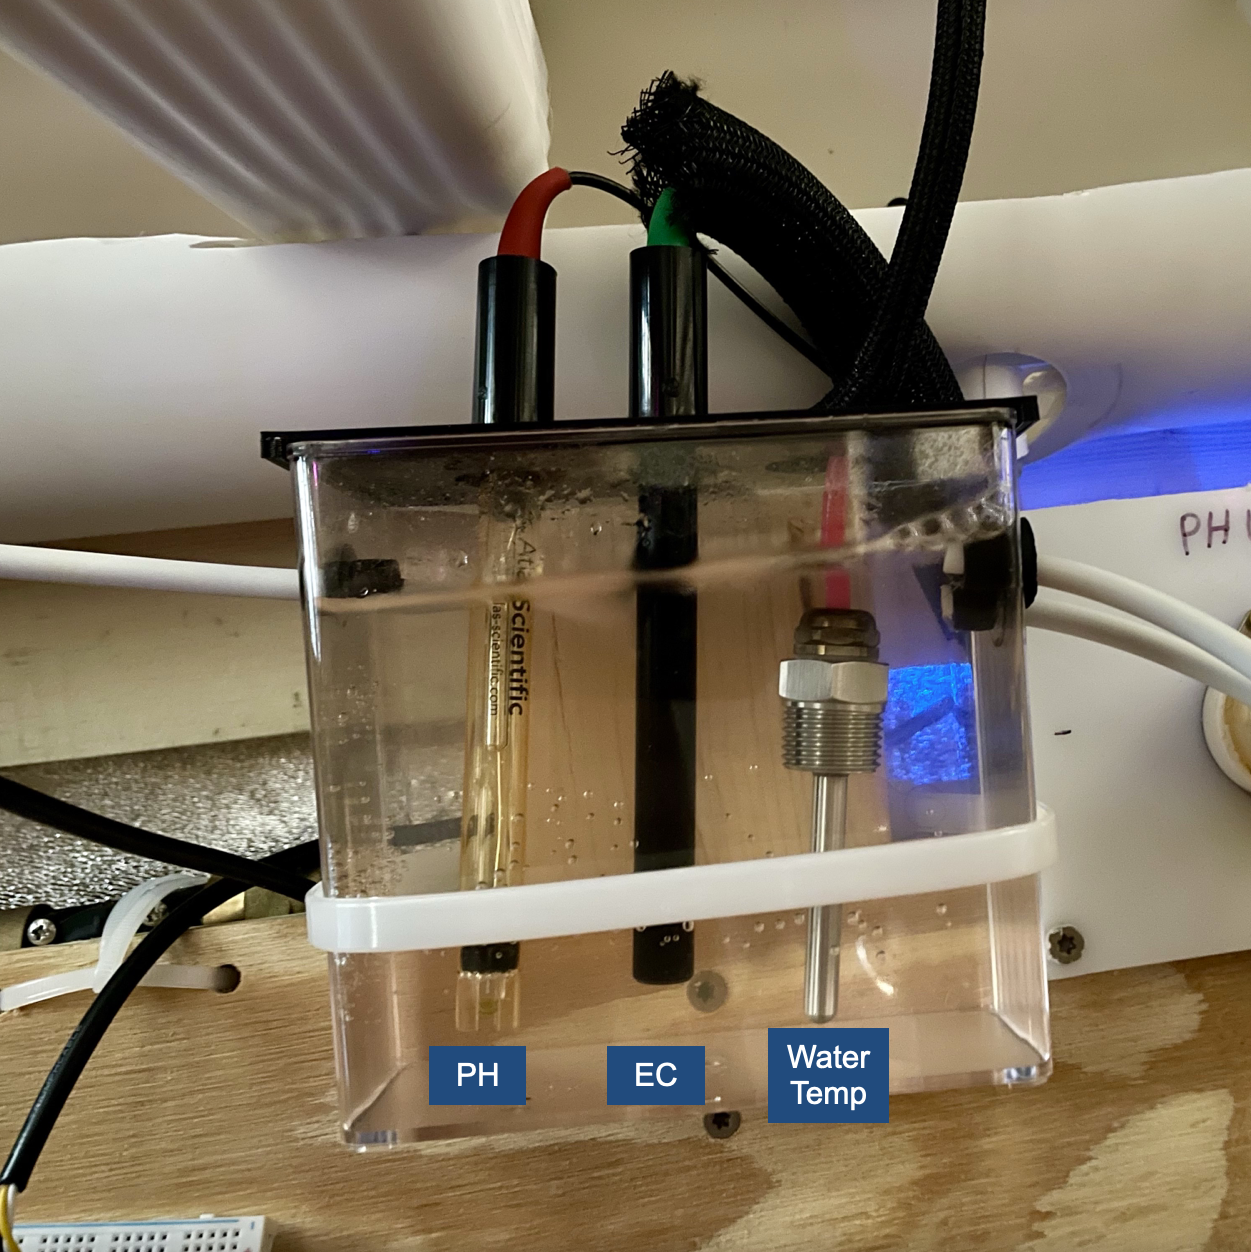
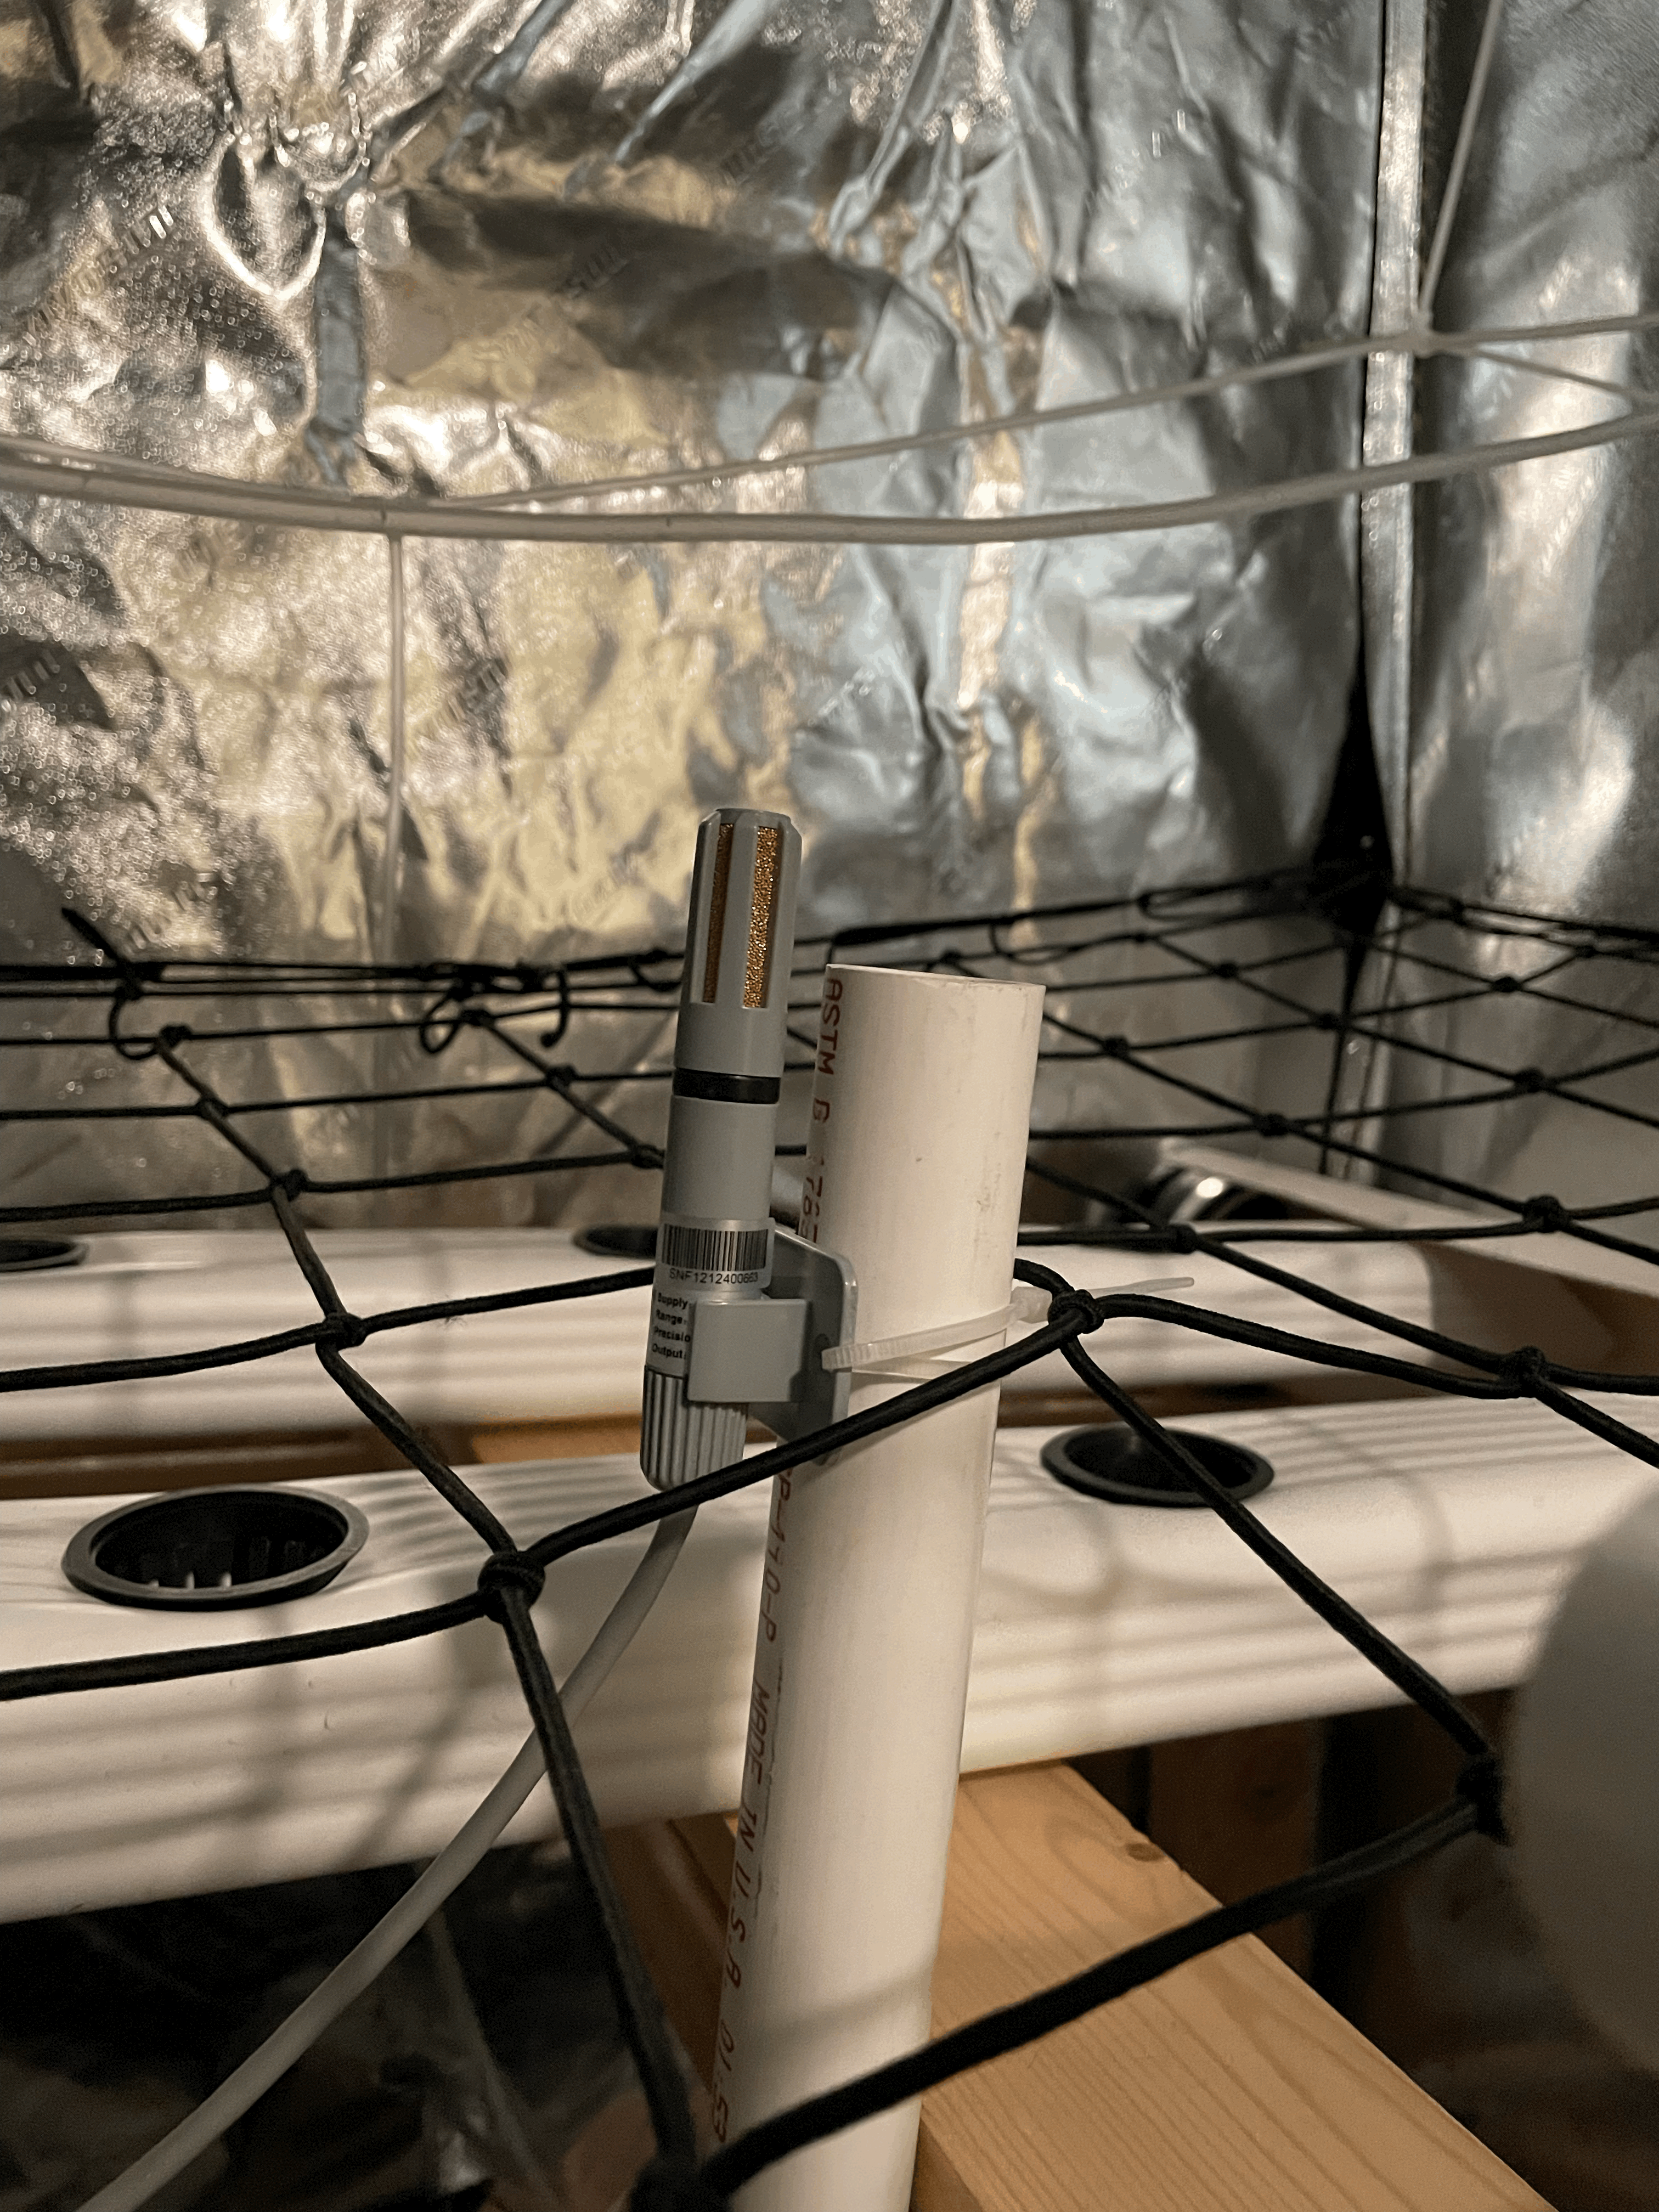
The Potential Hydrogen (PH), Electrical Conductivity (EC), and Water Temperature probes are installed in a sample reservoir
If the PH or EC levels are out of range a peristaltic pump will add the appropriate nutrient / PH buffer to the main reservoir
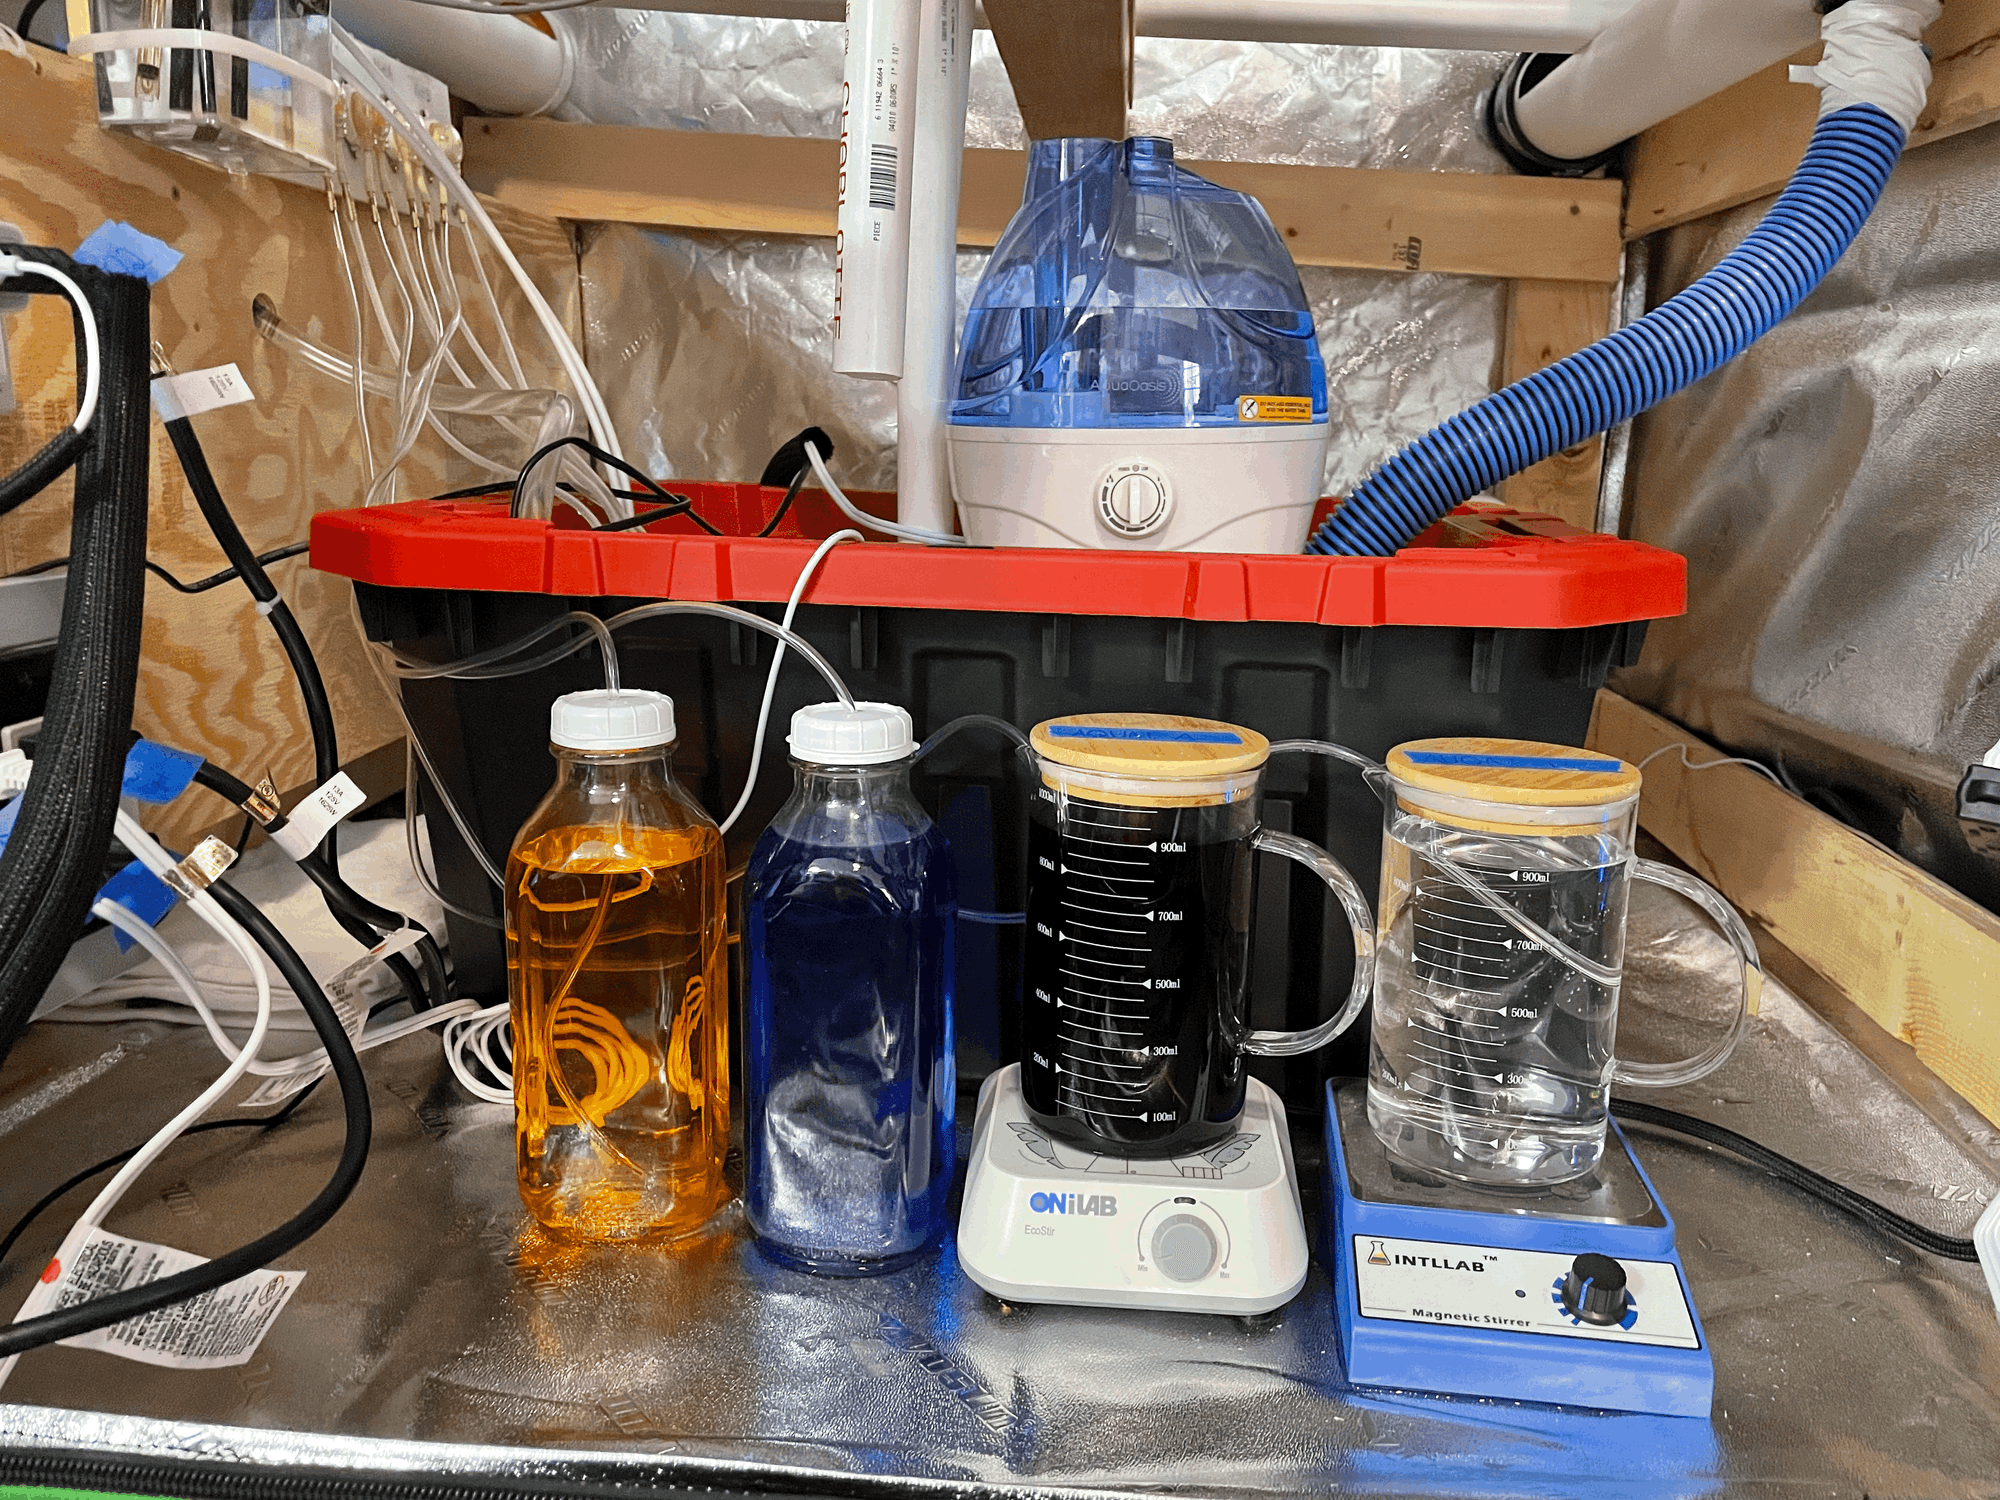
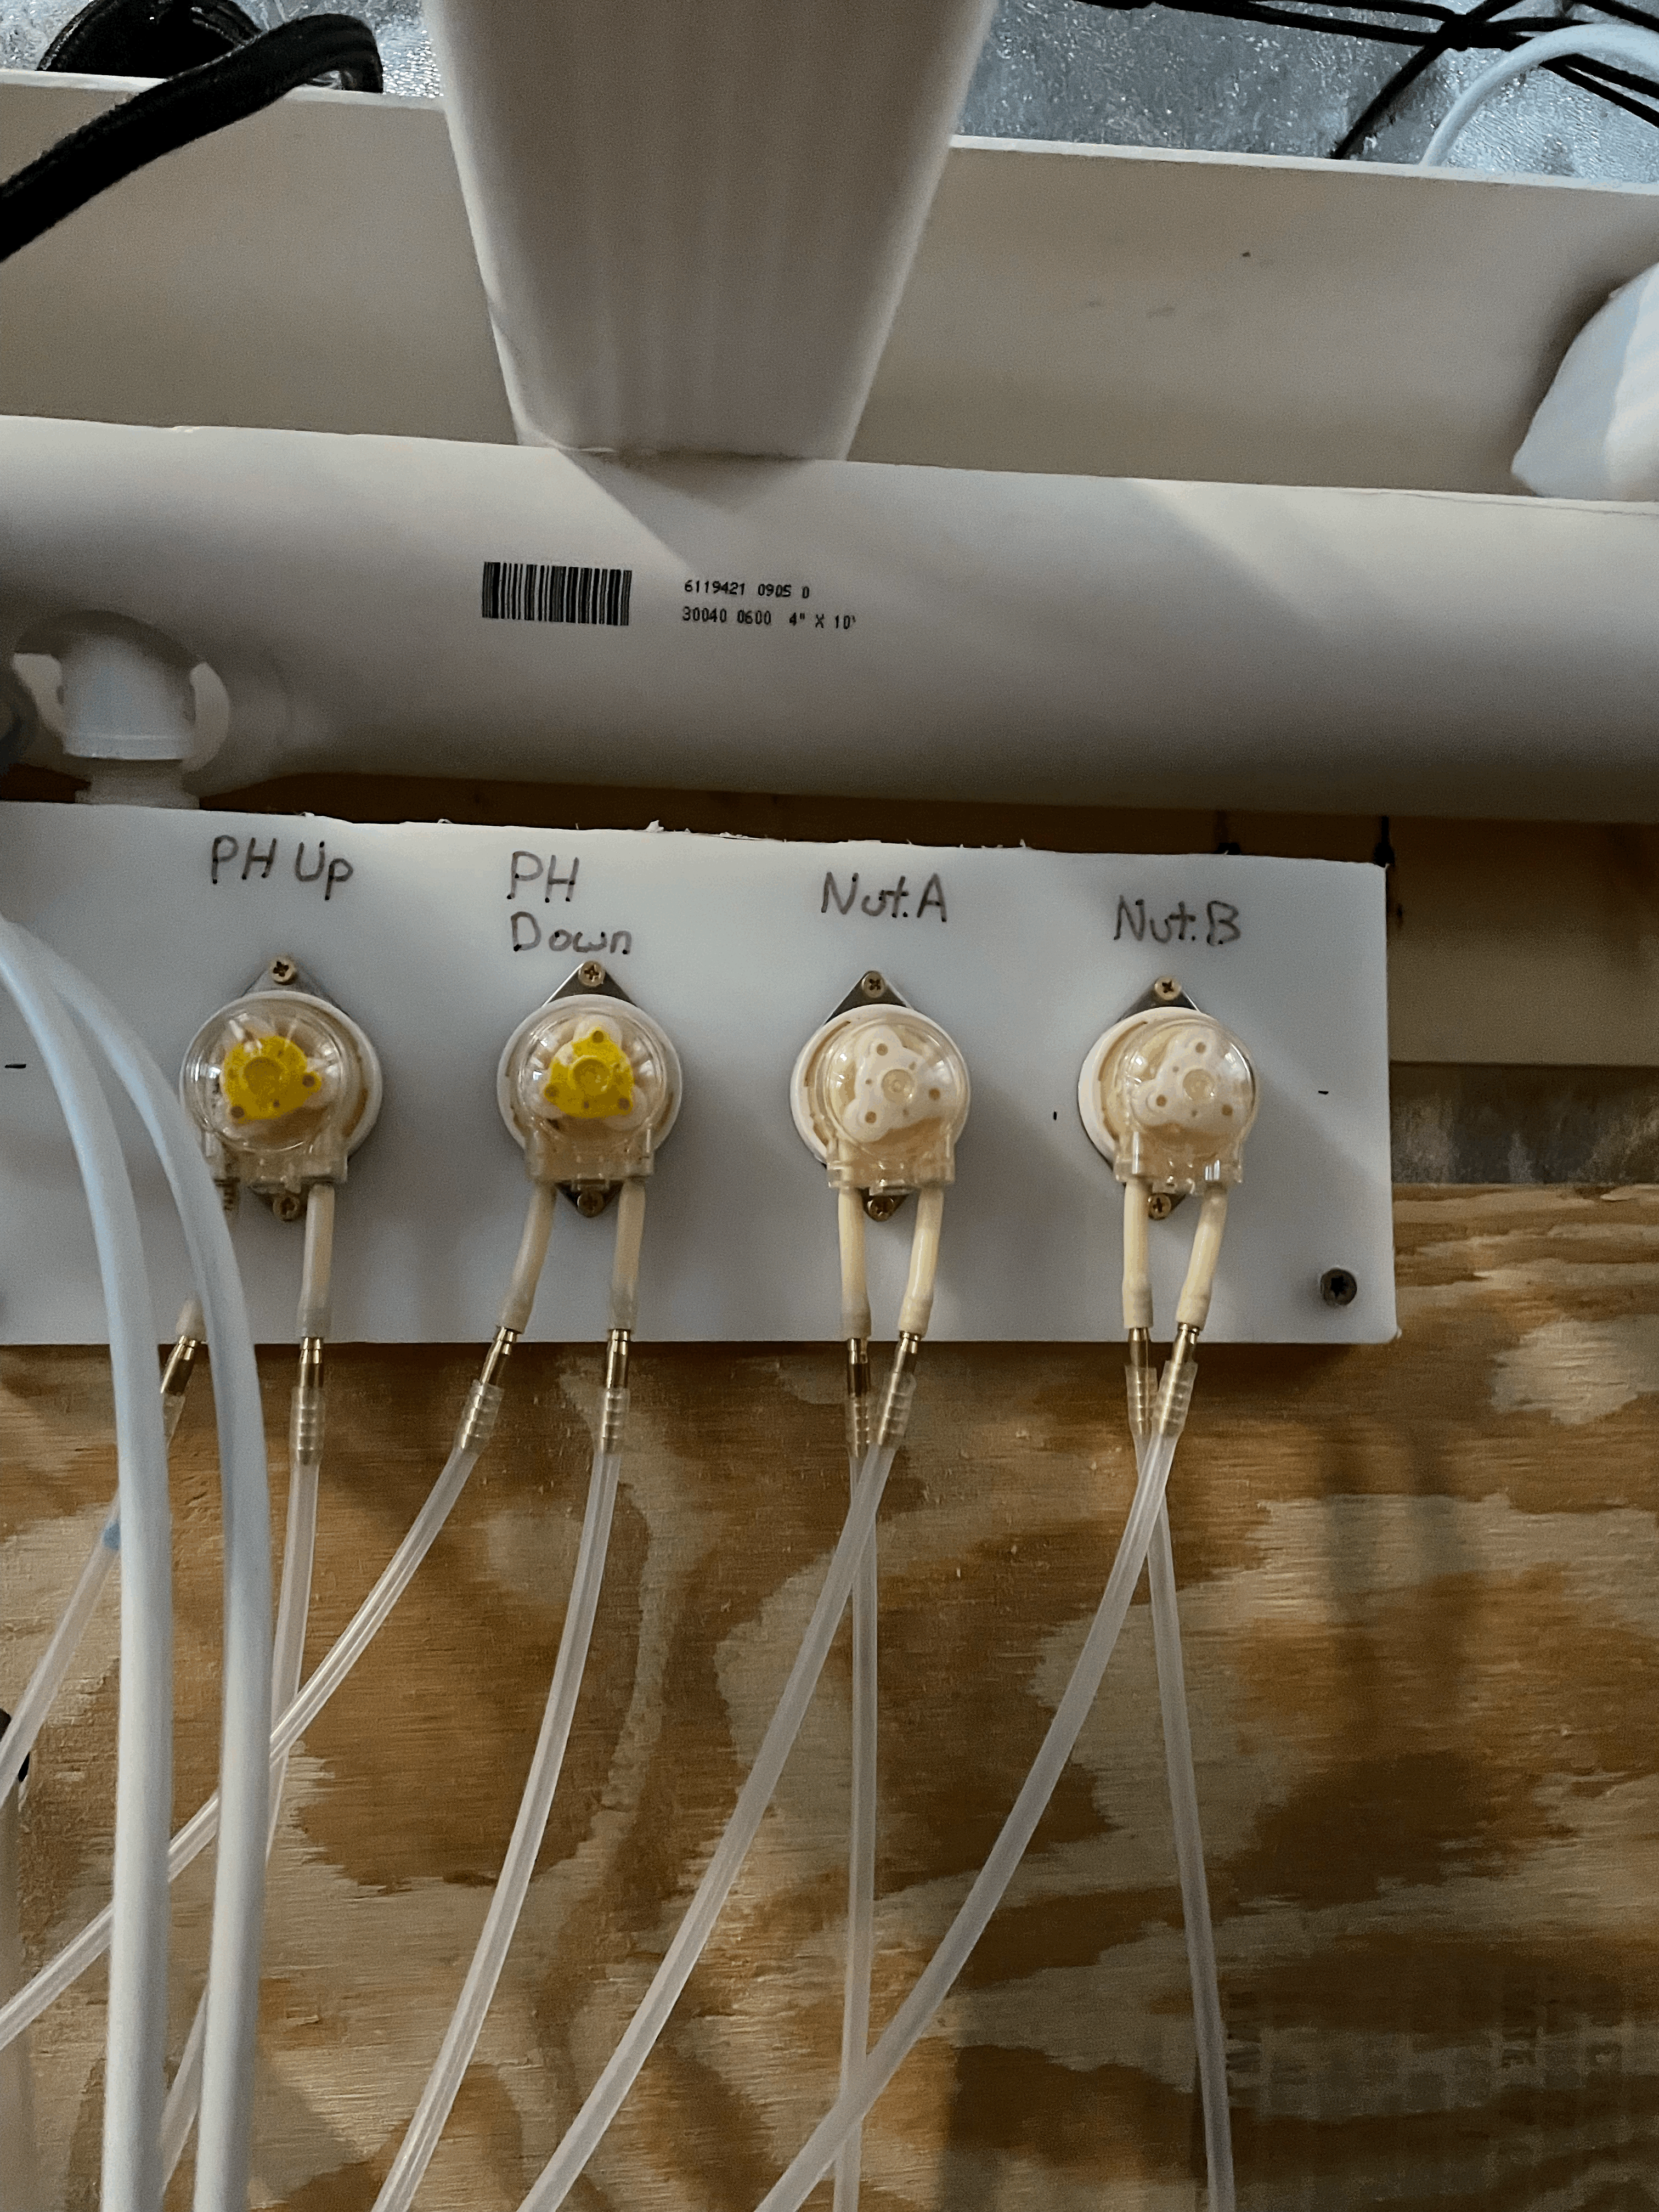
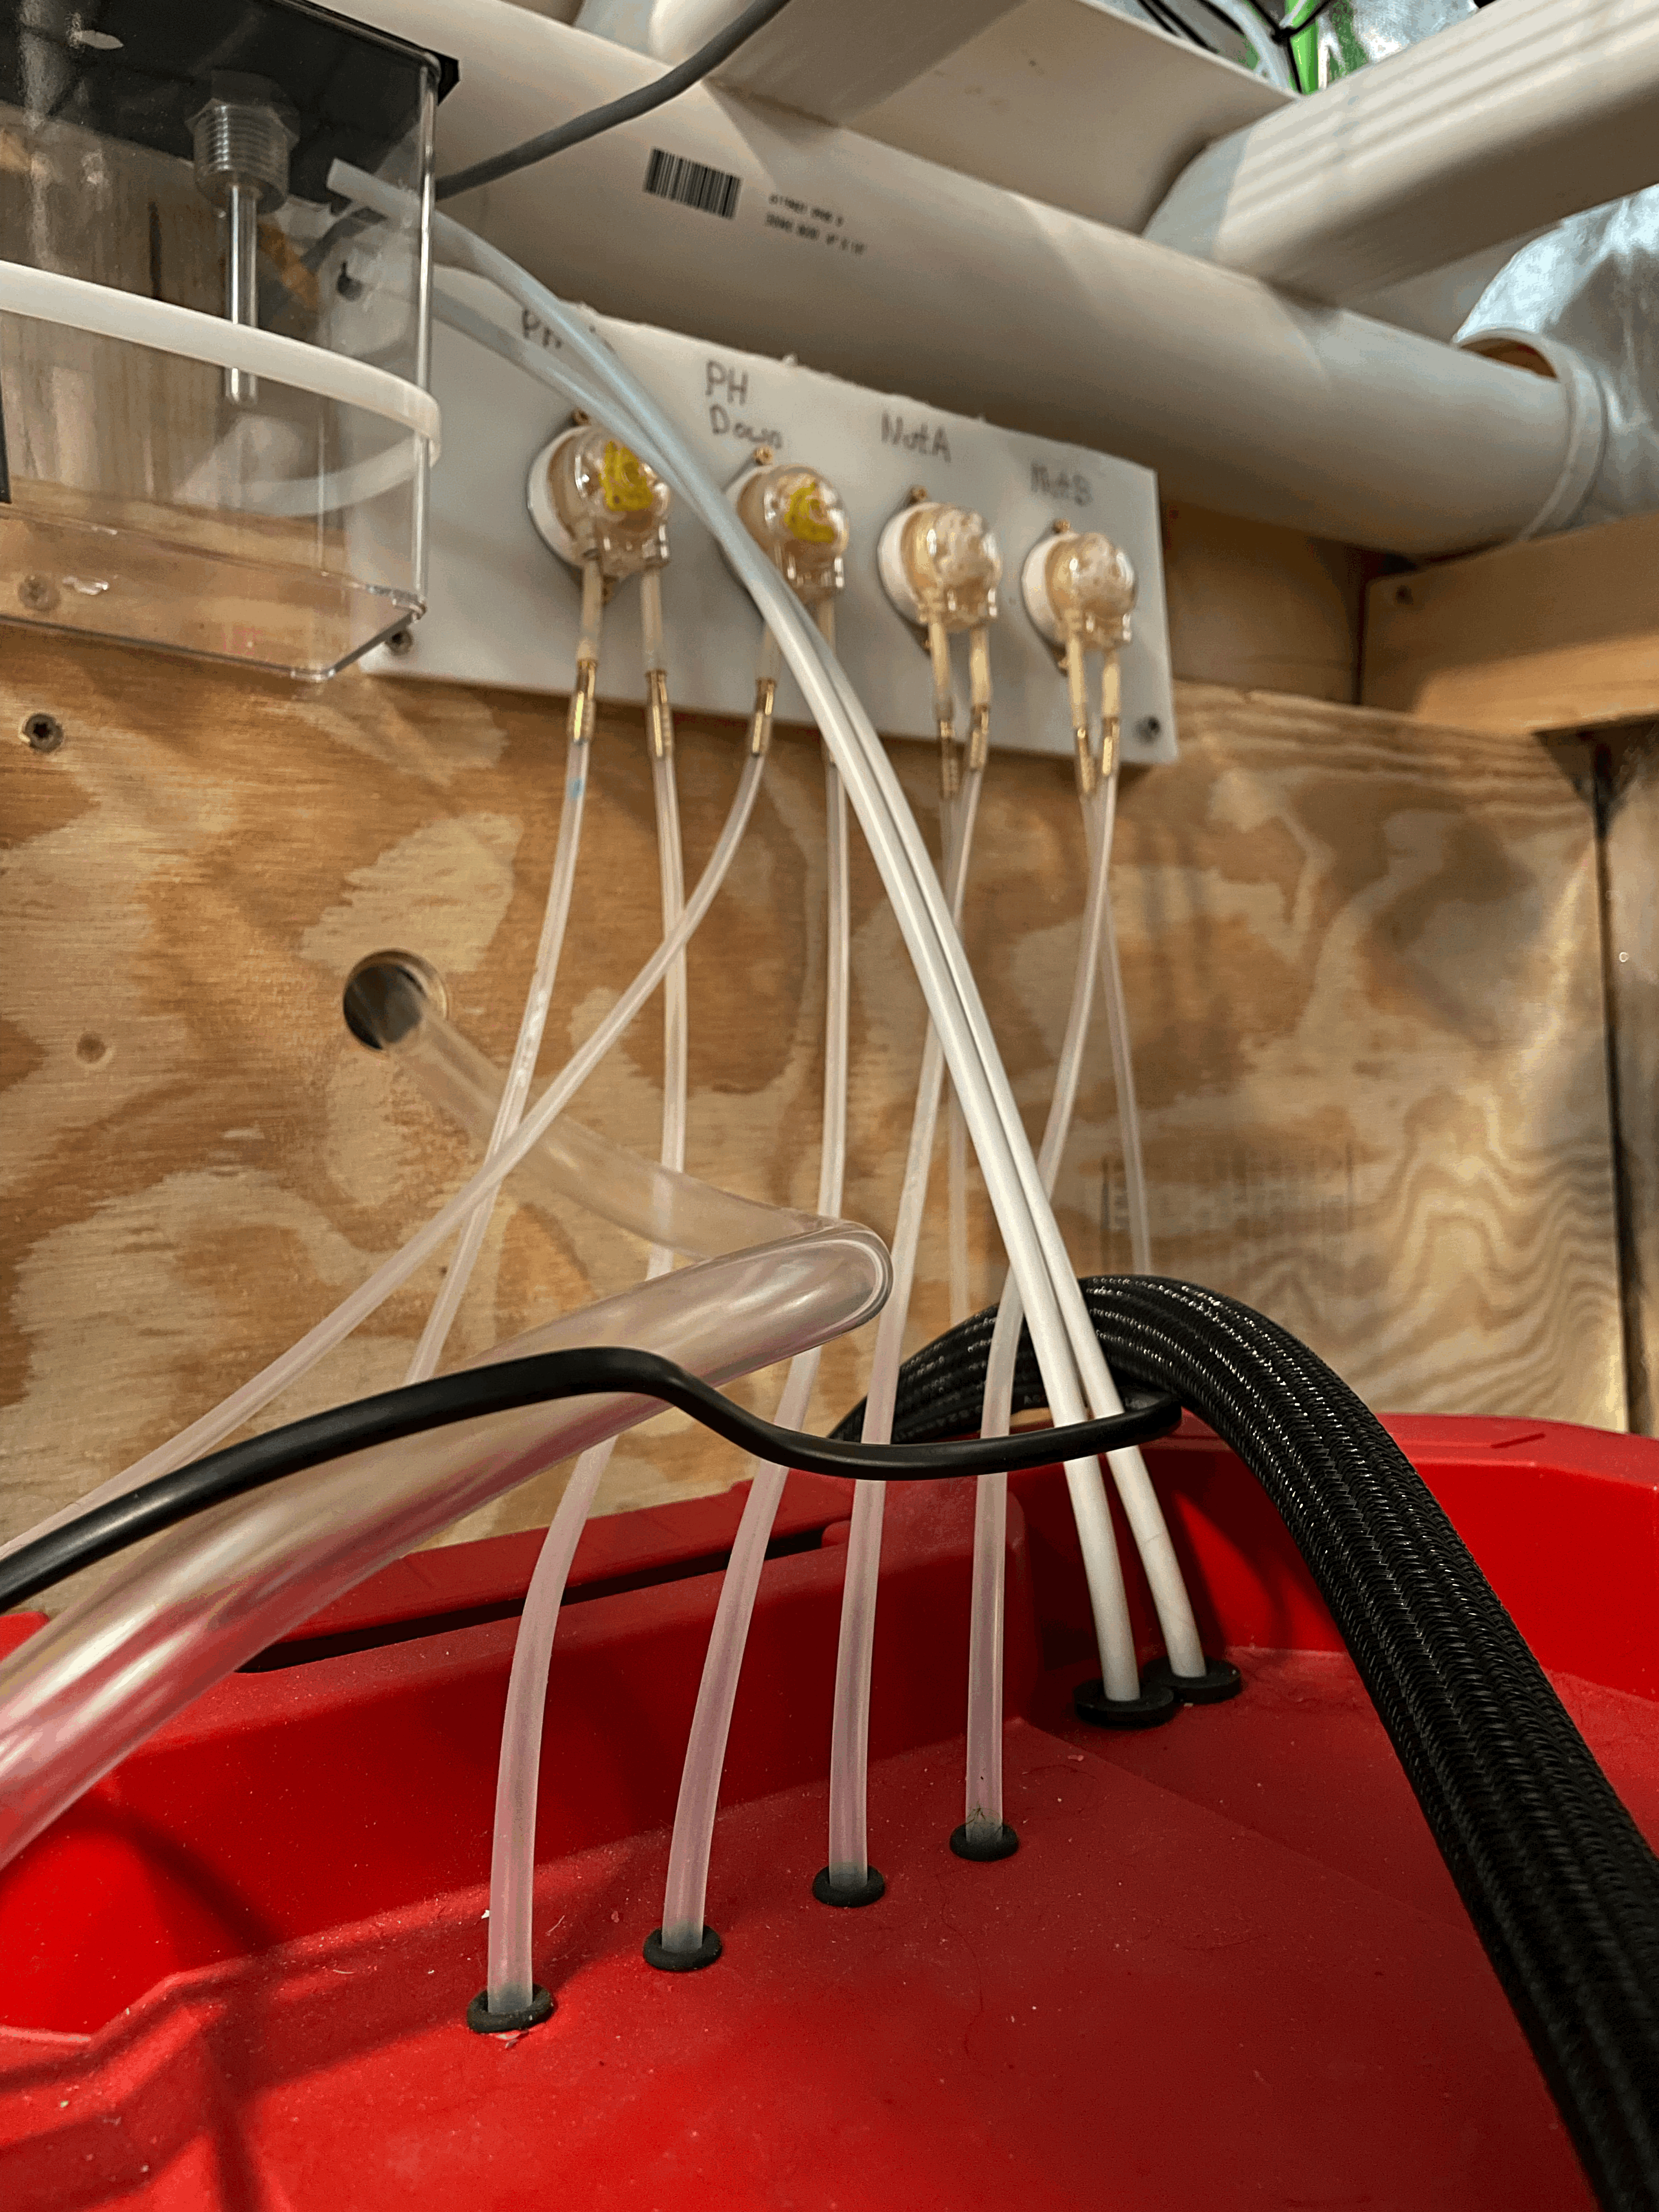
Left: Nutrient / PH Buffer Center: Peristaltic Pumps Right: Output to Reservoir
If the water temperature is out of range a water cooler will bring it back in range
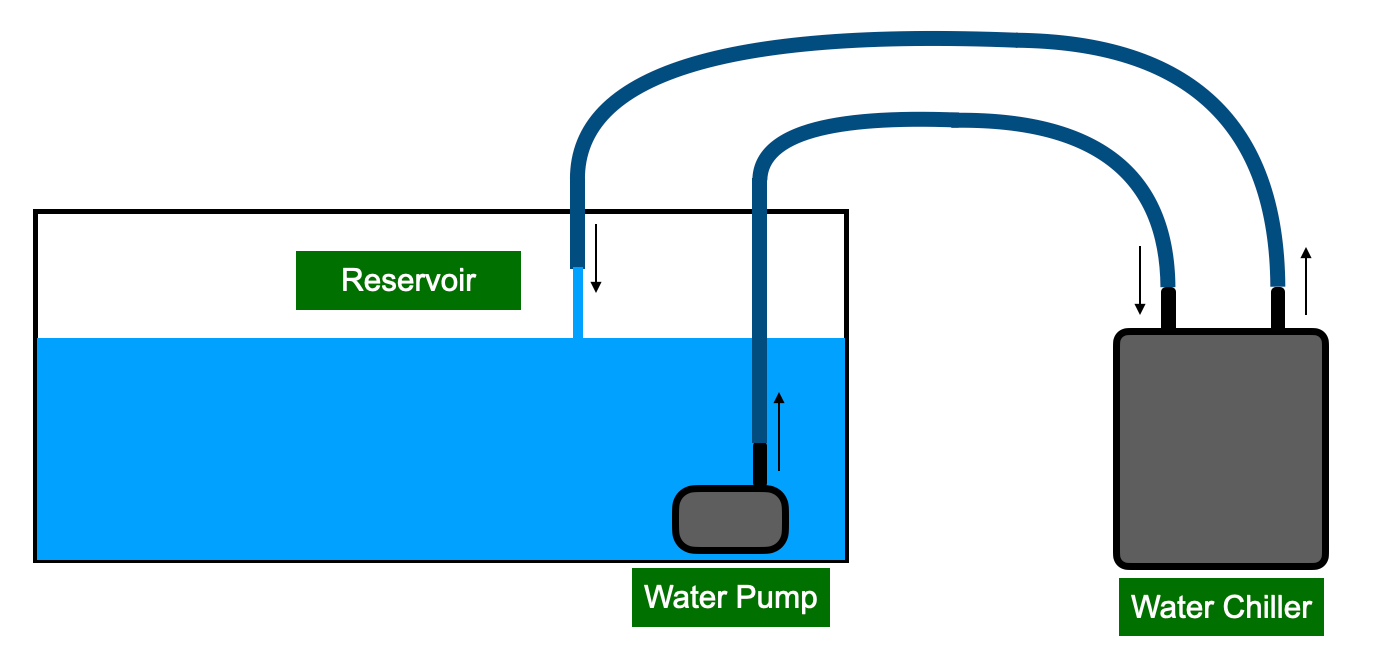
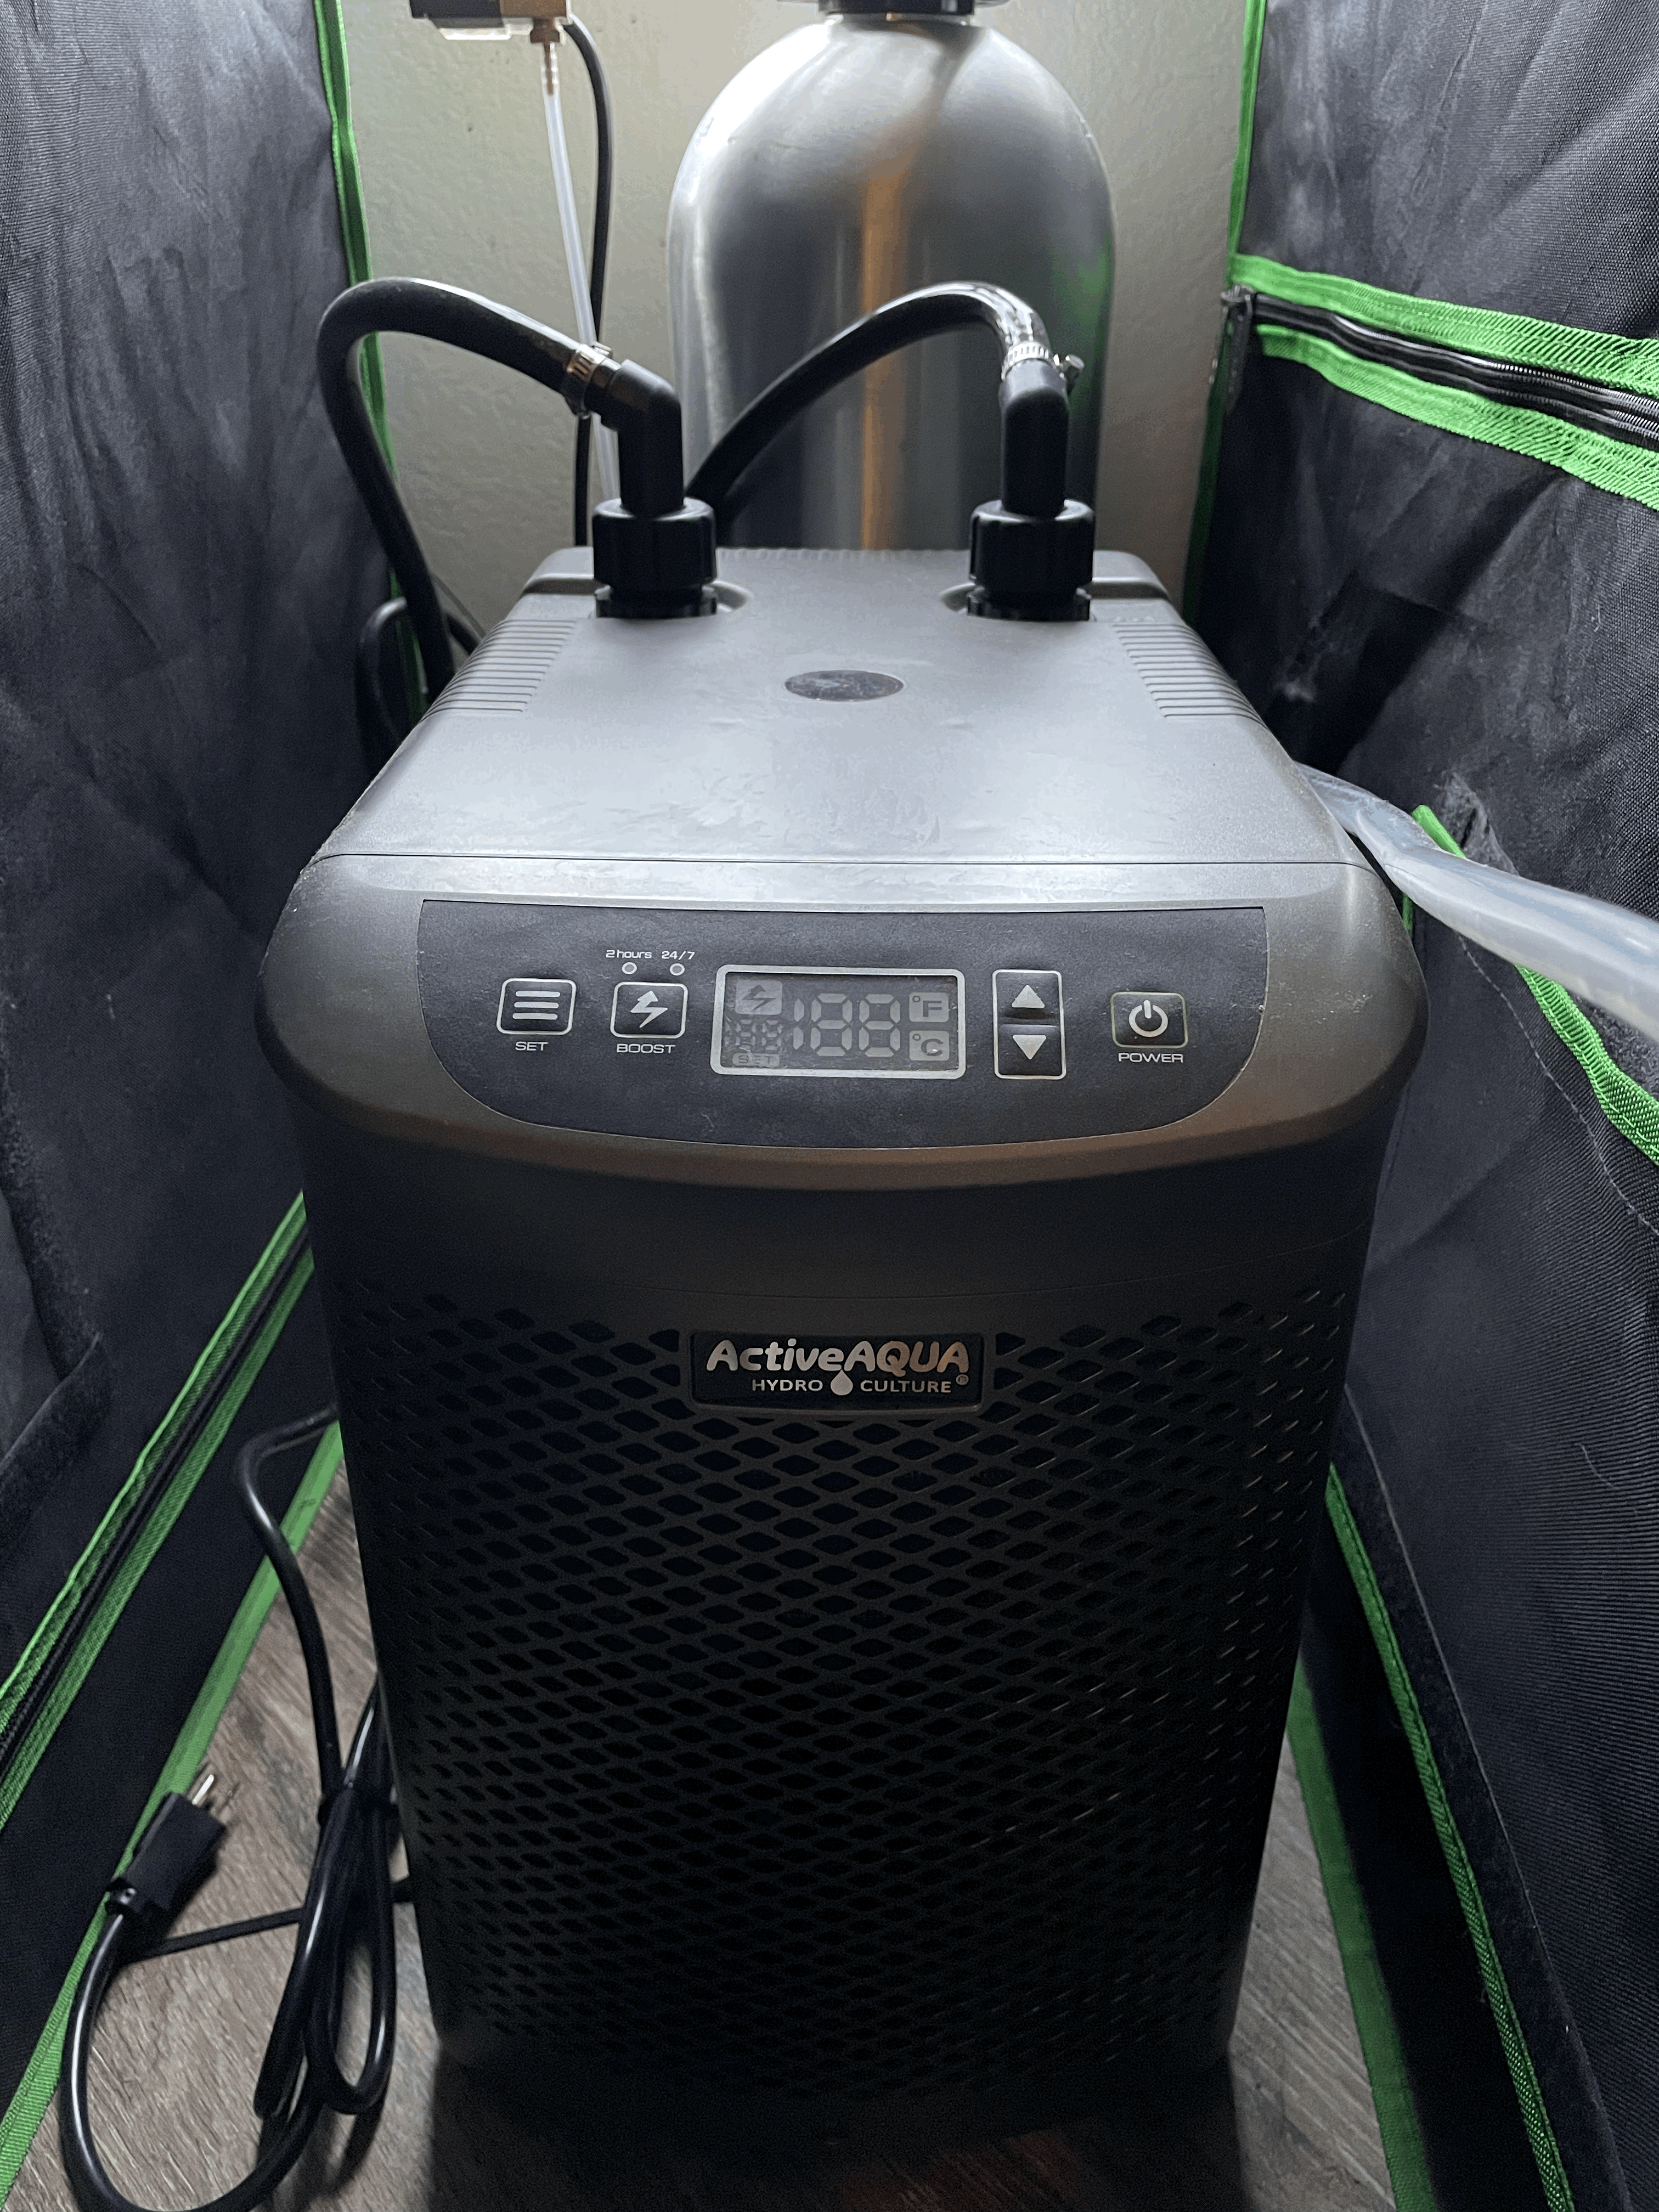
Left: Water Chiller In/output Right: Water Chiller
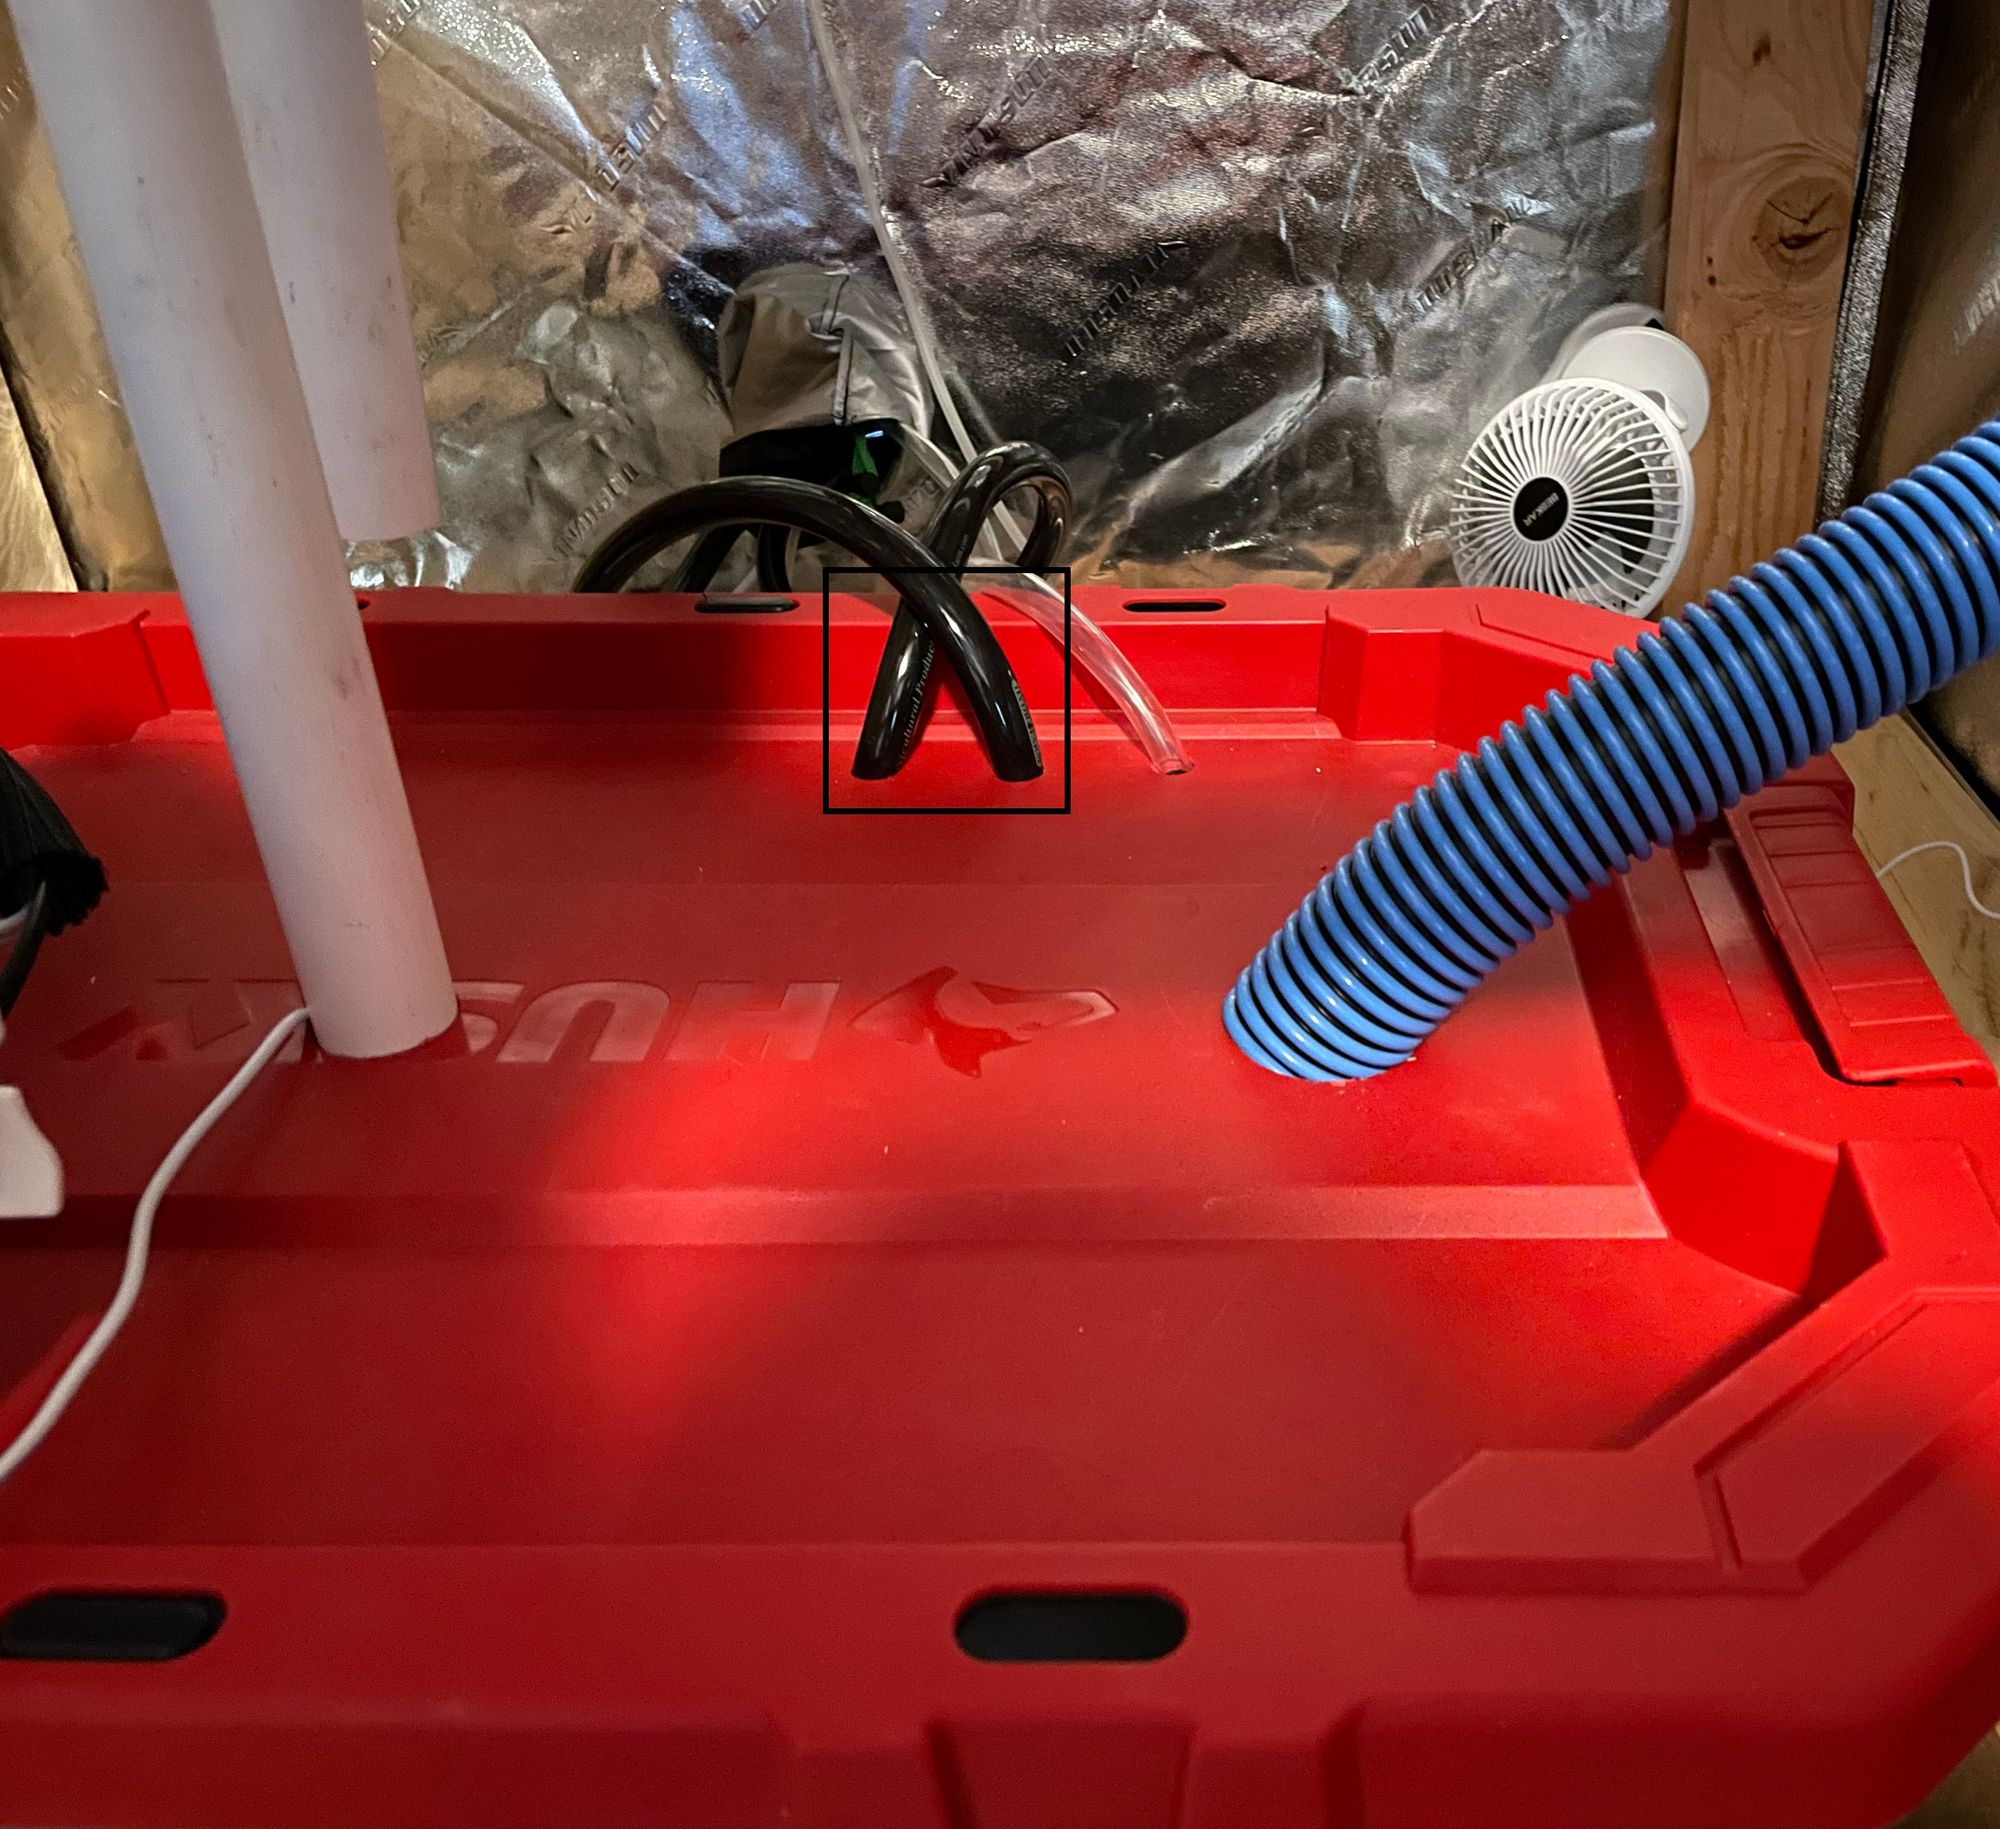
The water flow sensor is installed in between the sample reservoir's water inlet tube

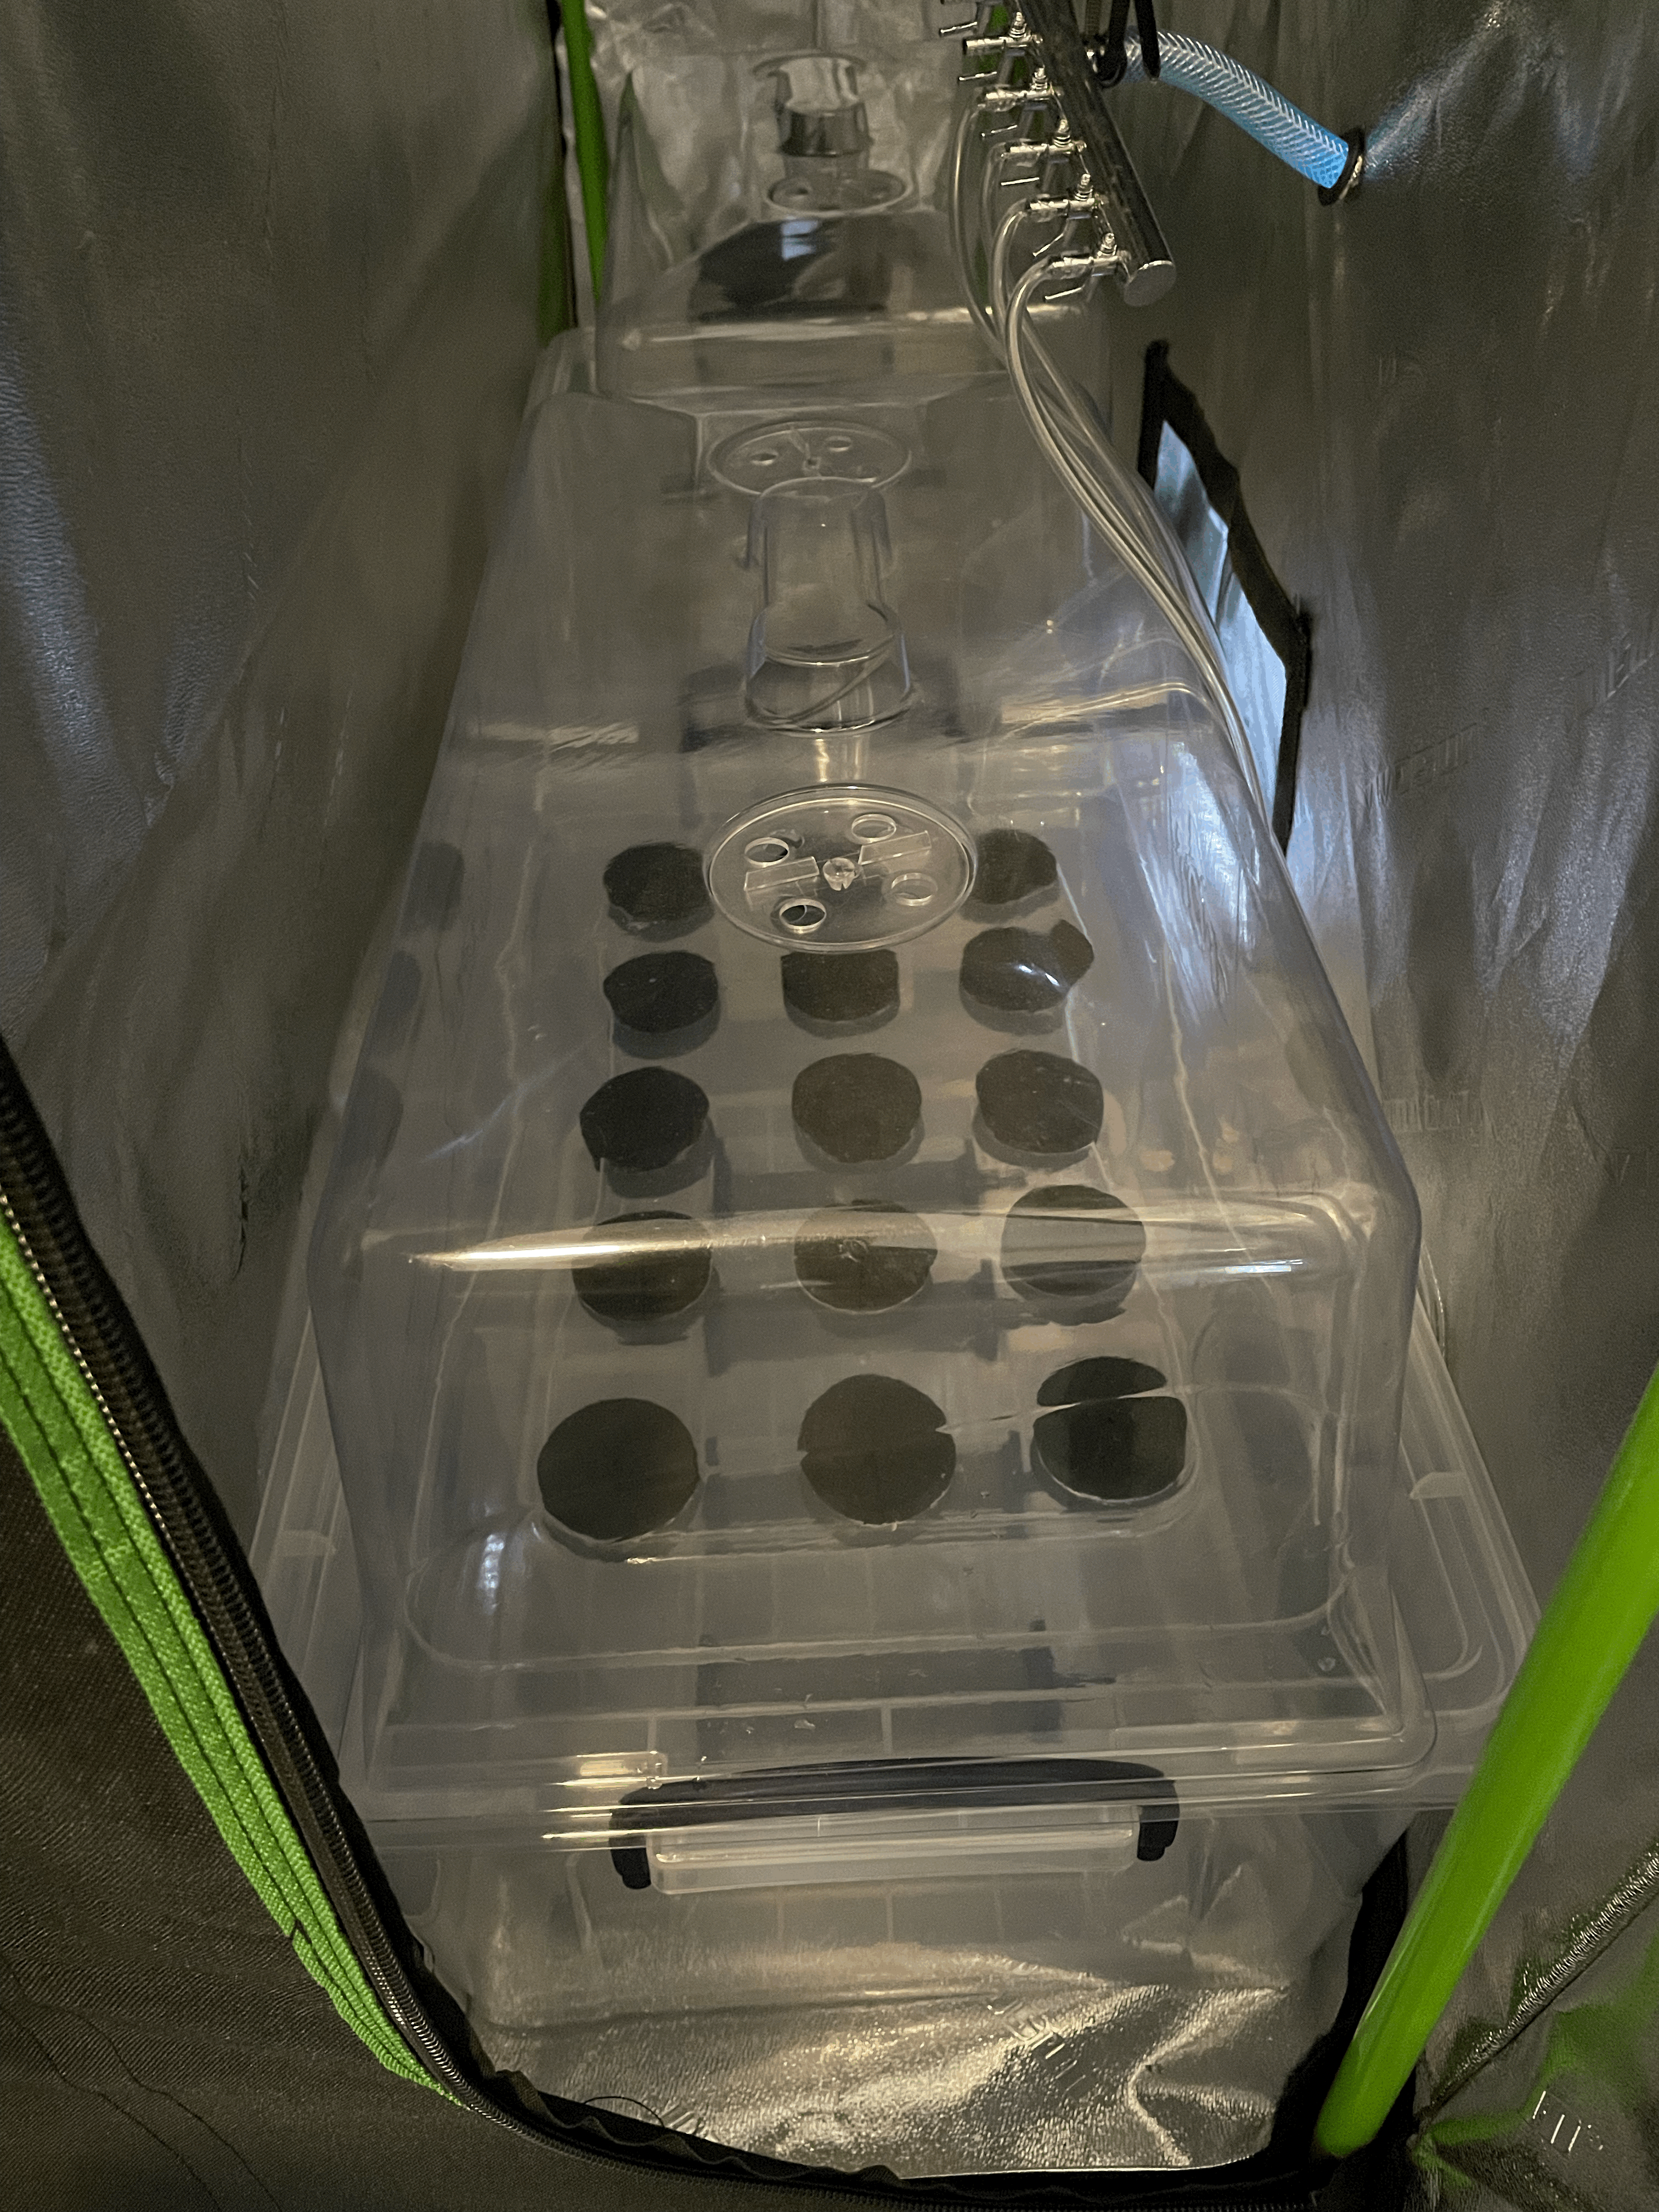
The water level sensor is installed in the reservoir to a PVC pipe. The water level sensor floats on top of the water. If the water level falls the sensor will drop and send an alert
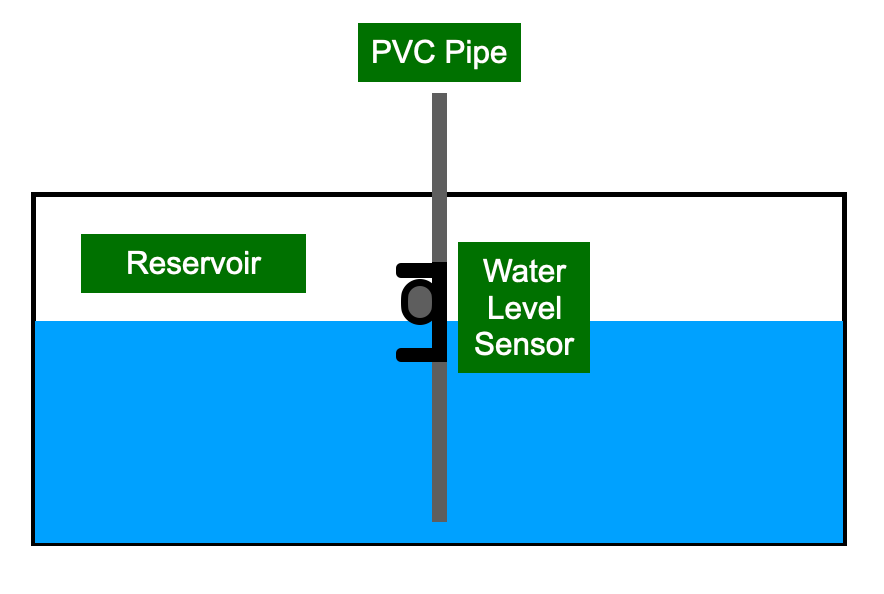
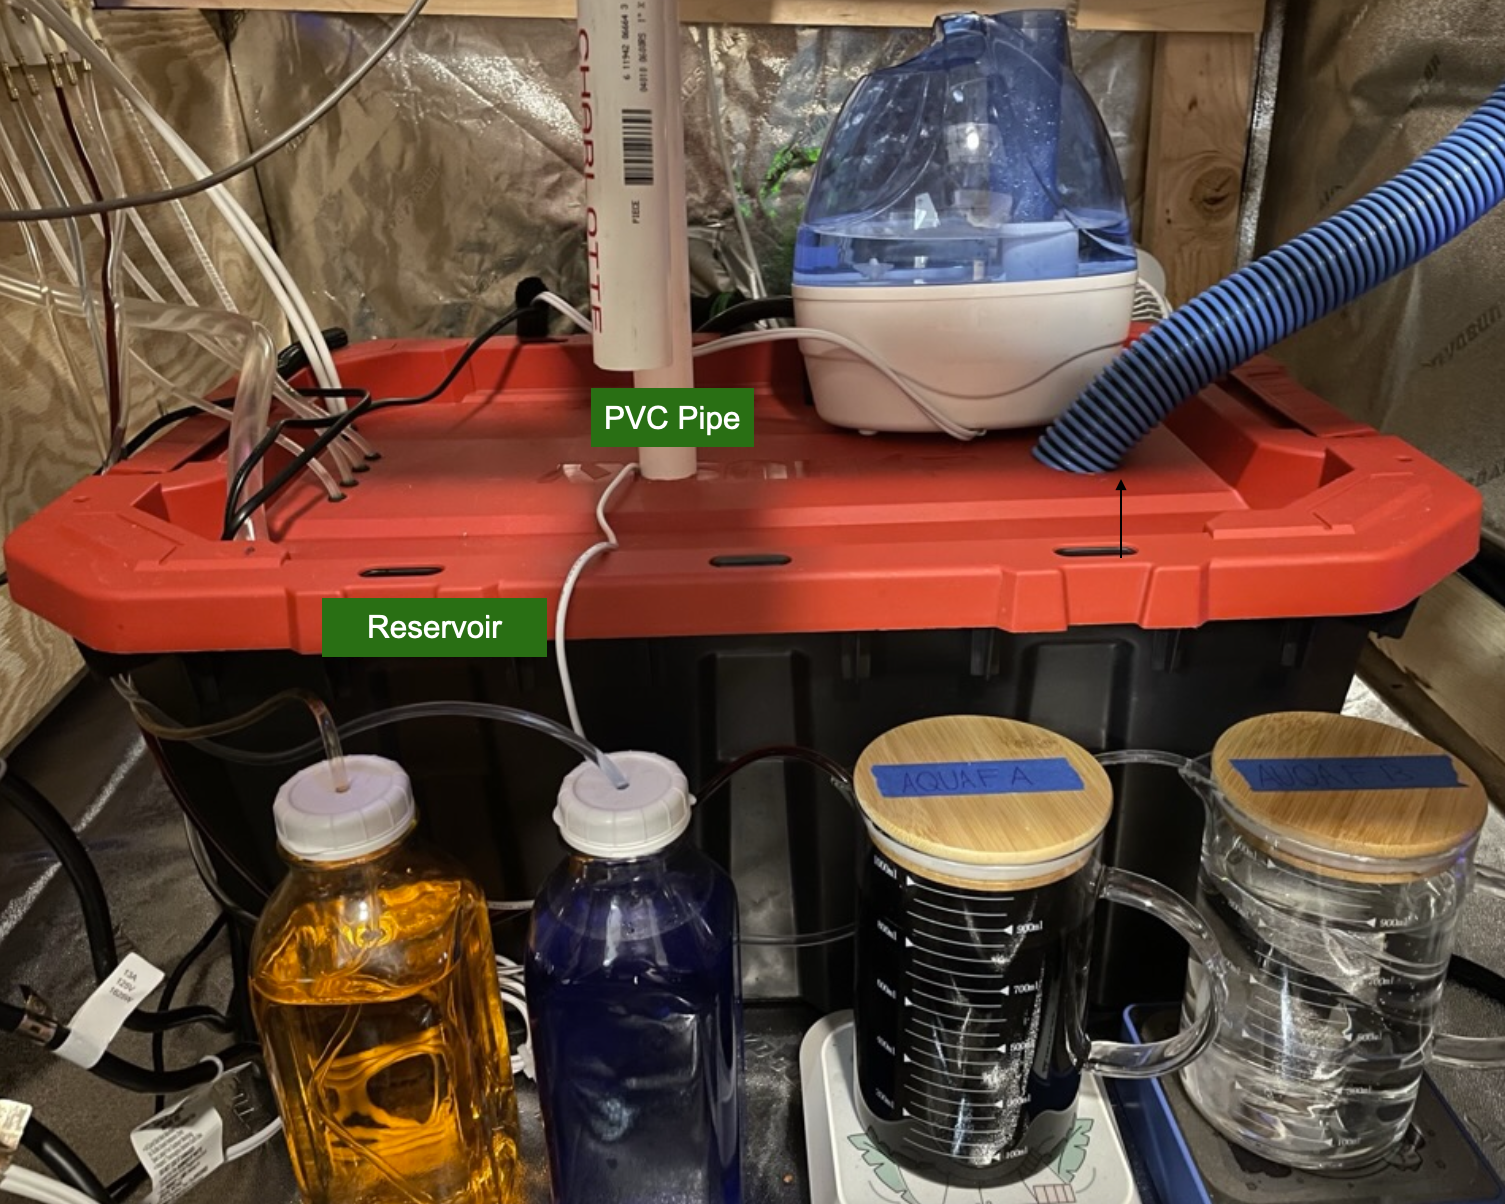
Left: Water Level Sensor Diagram Right: Reservoir & Water Level PVC
An air-stone is installed in the reservoir to maximize the dissolved oxygen levels
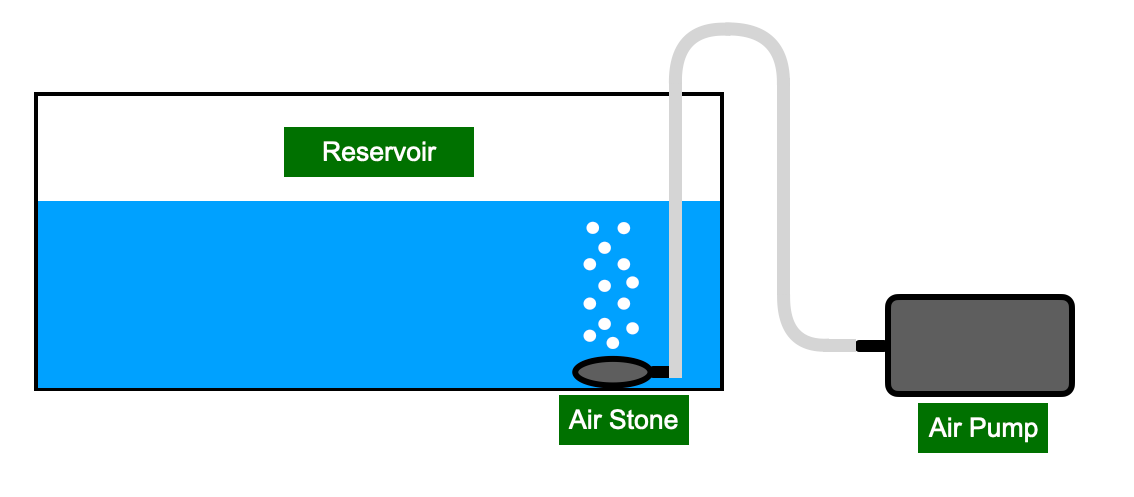
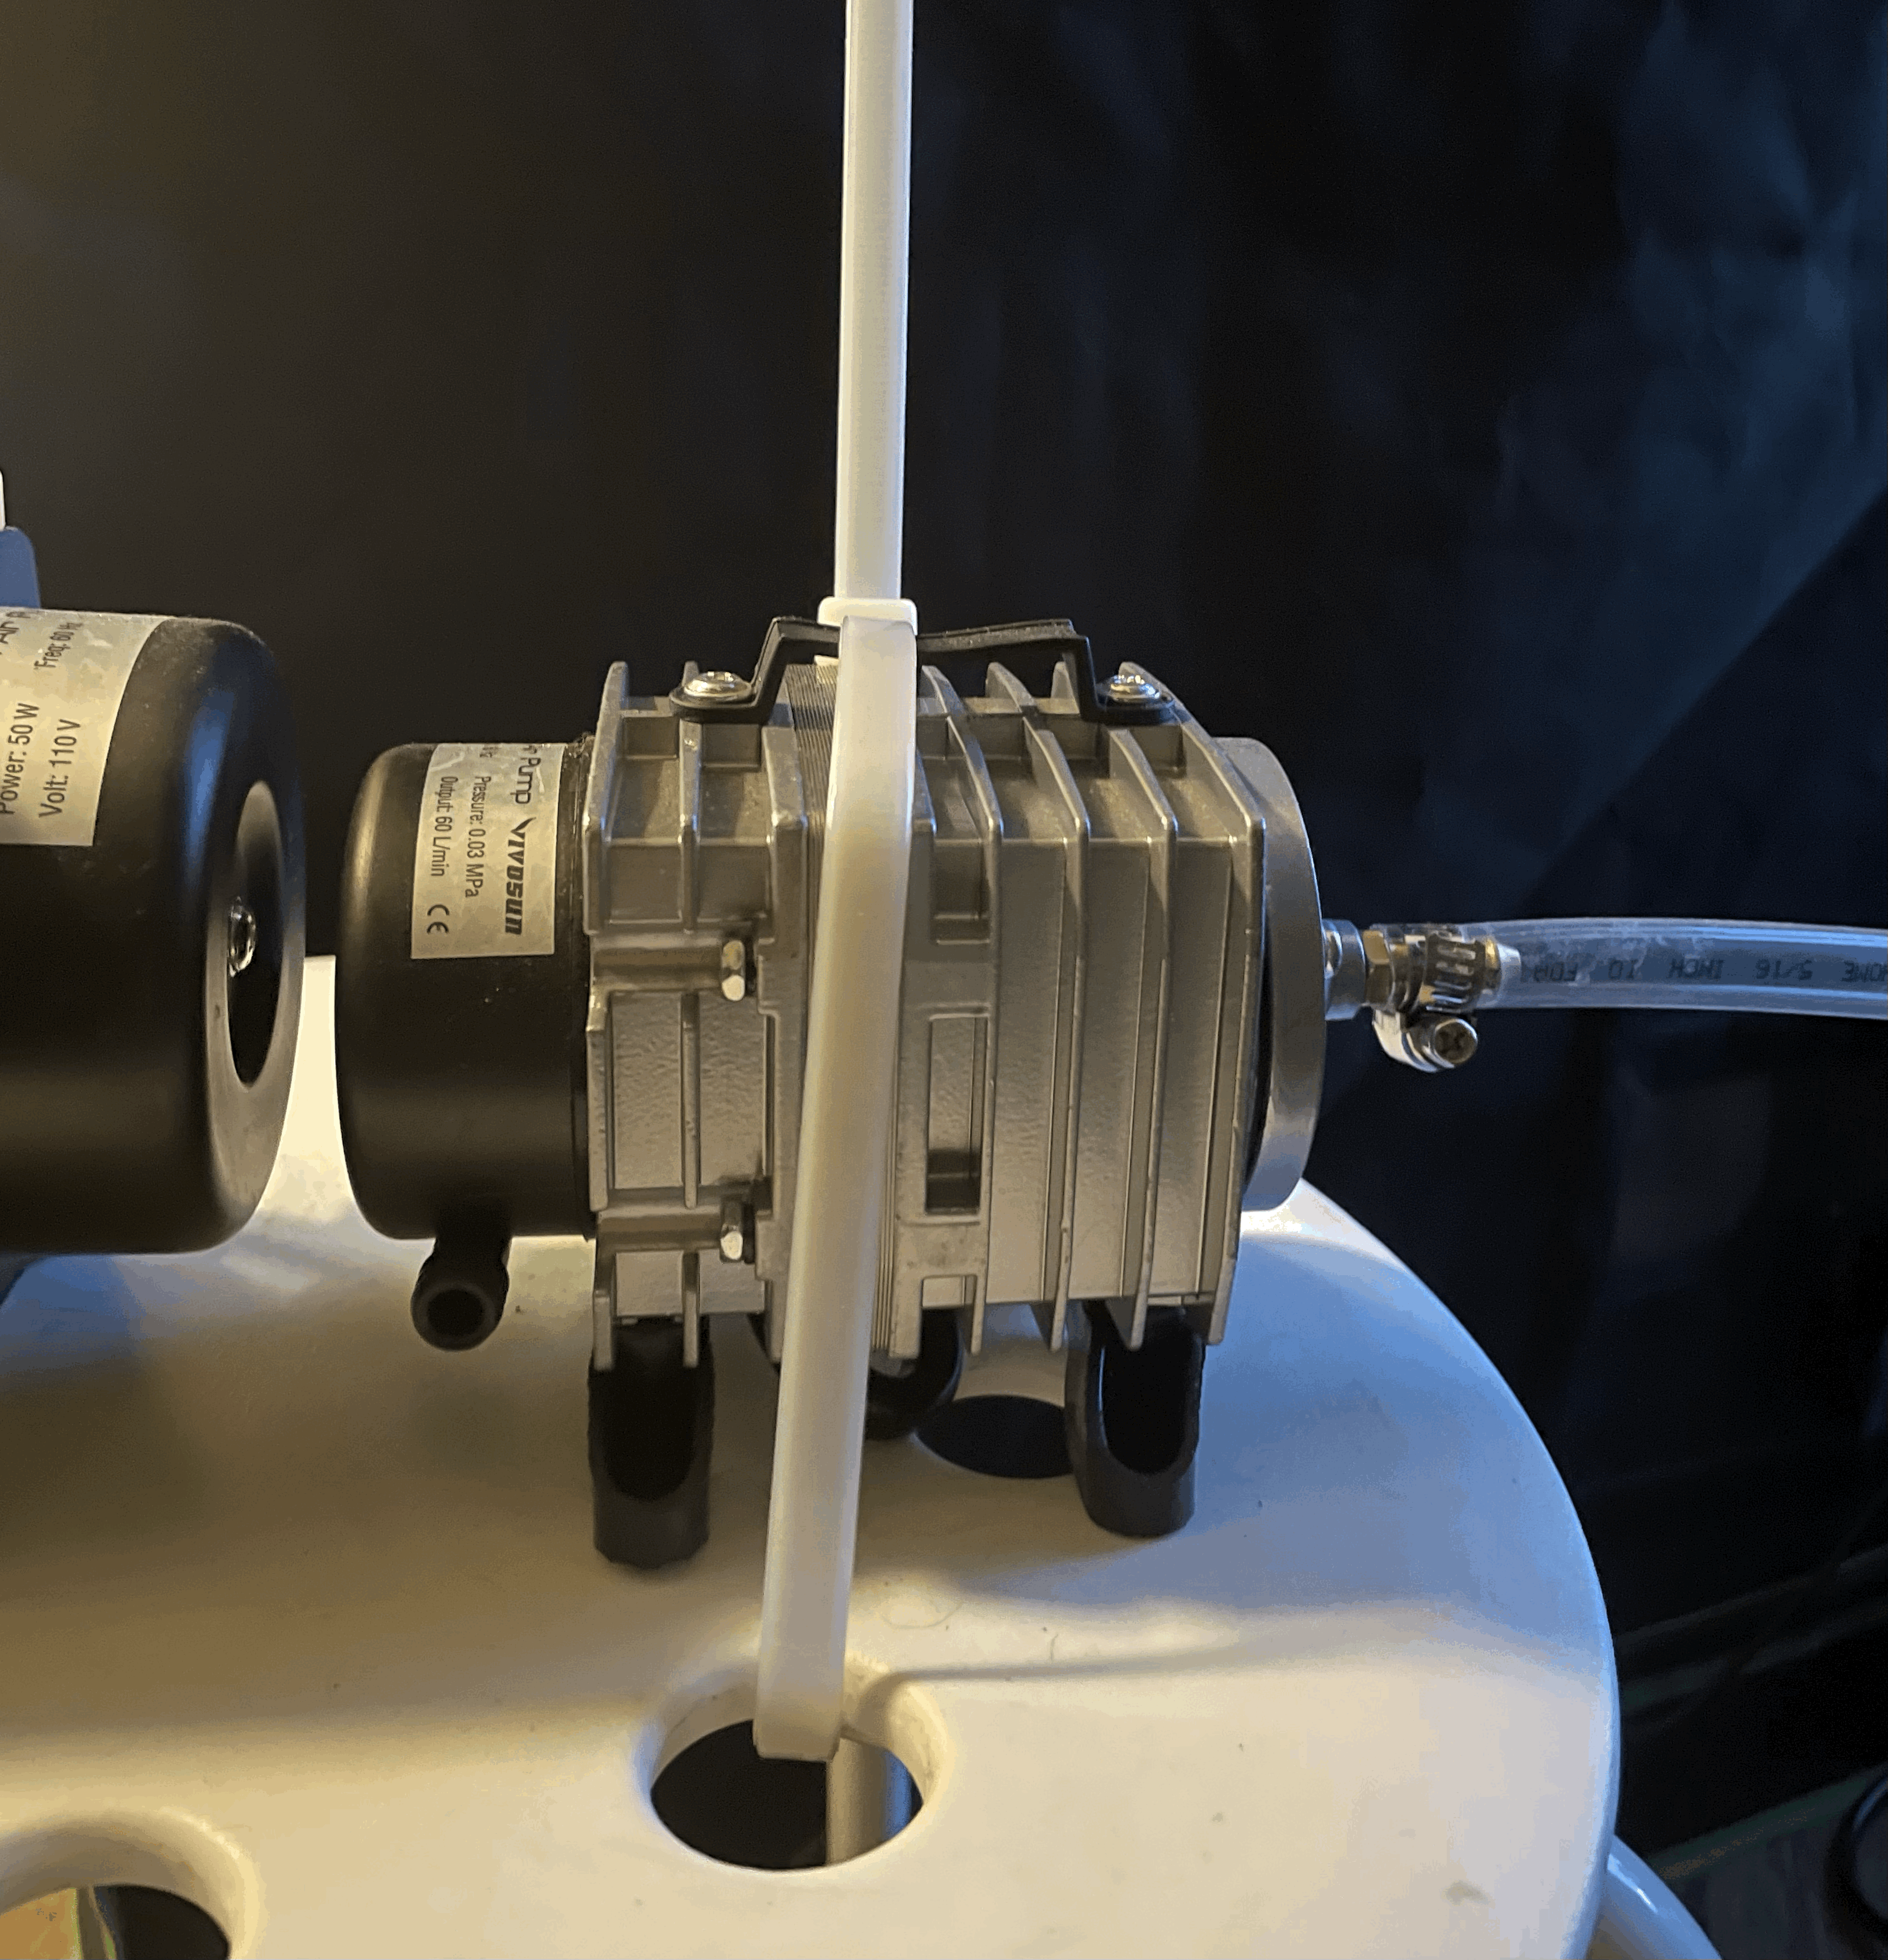
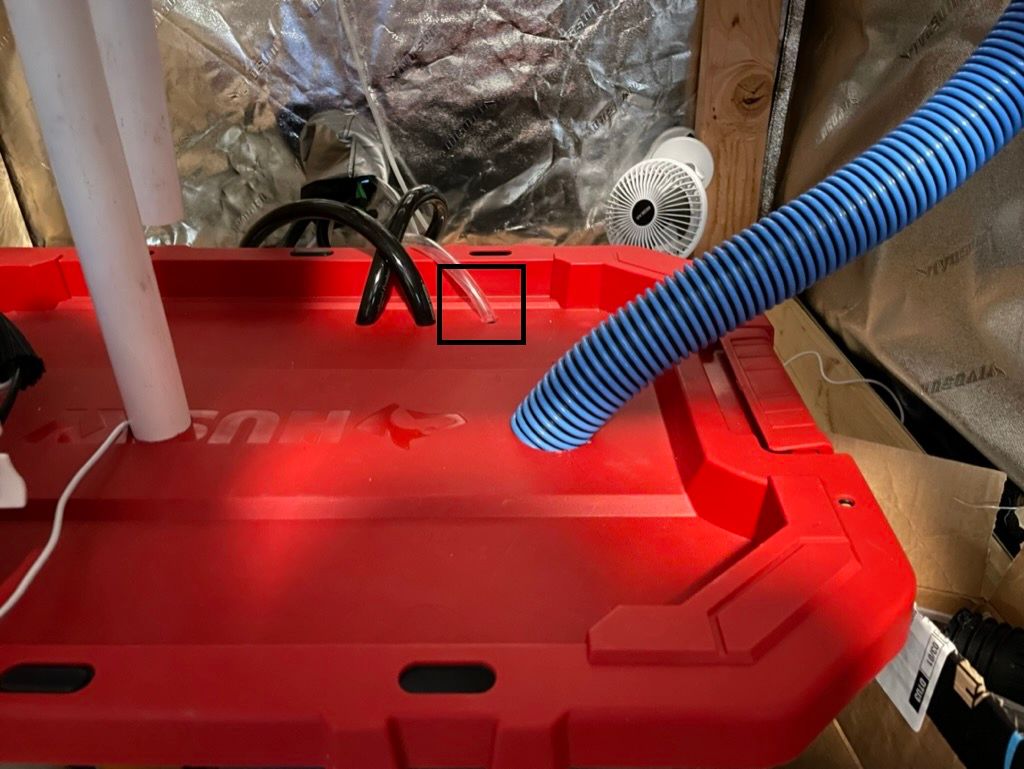
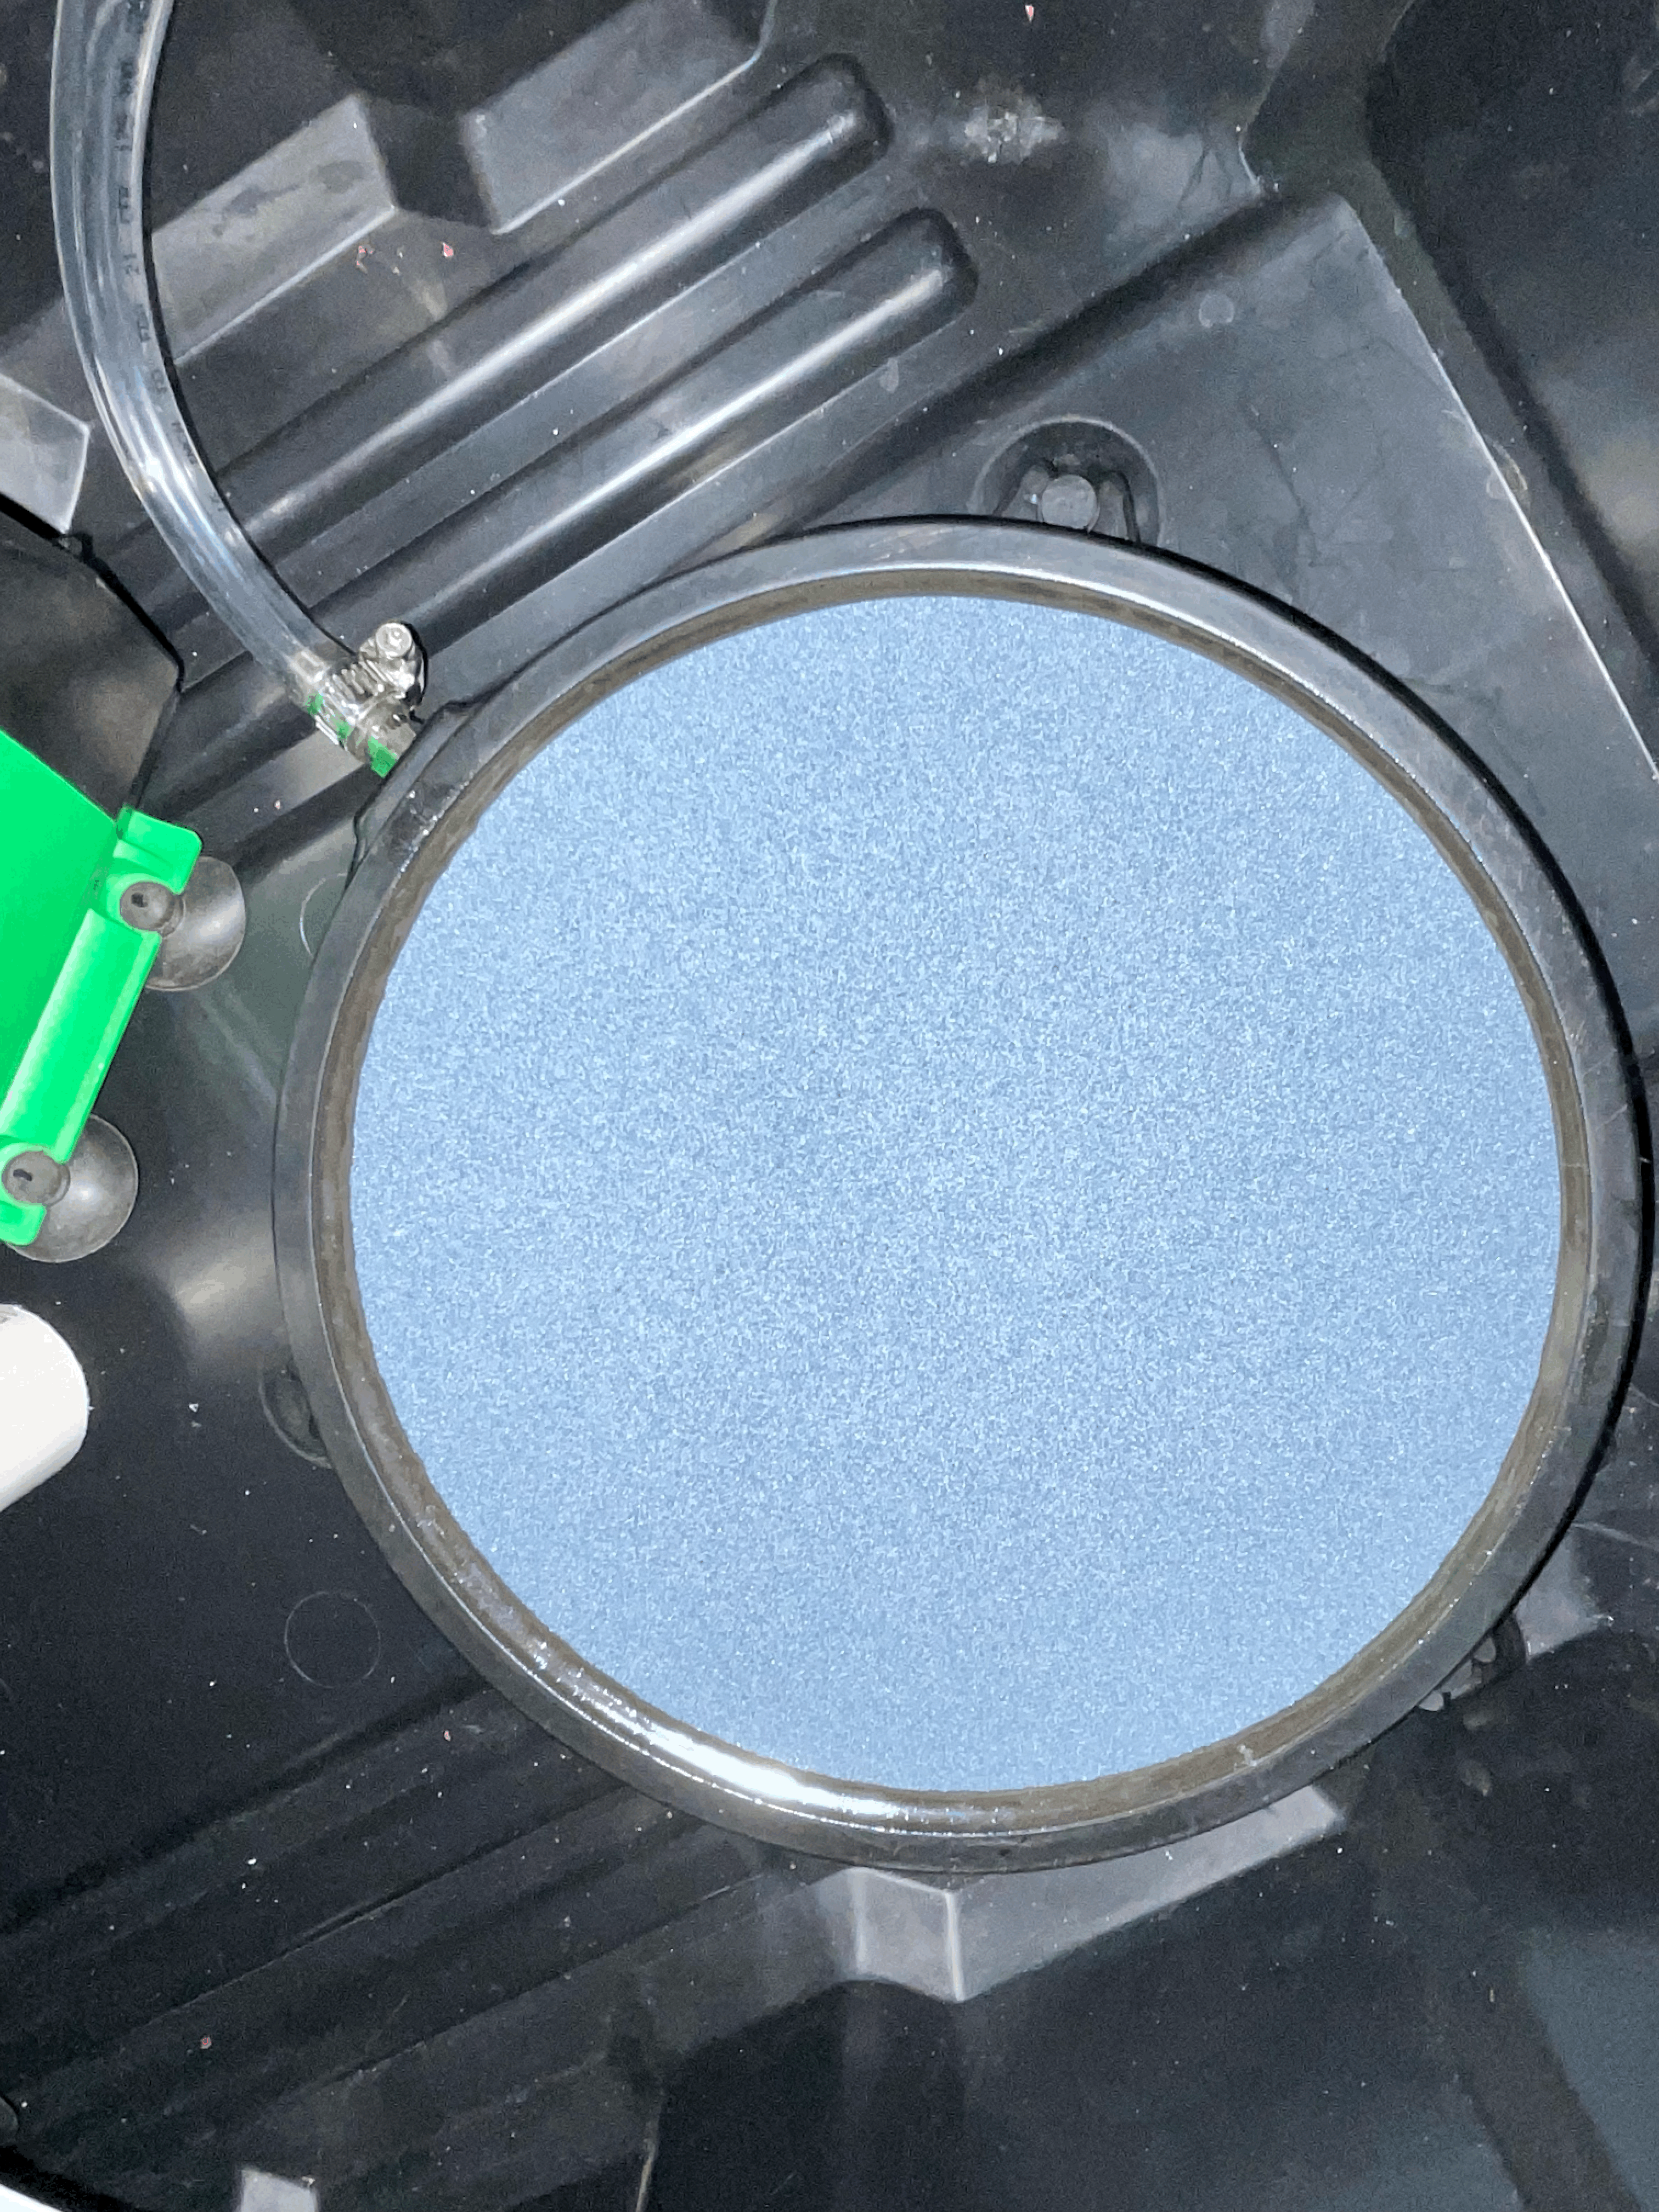
Air Pump to Air Stone
5. Air Environment
The air temperature / humidity sensor is installed at the plant canopy level
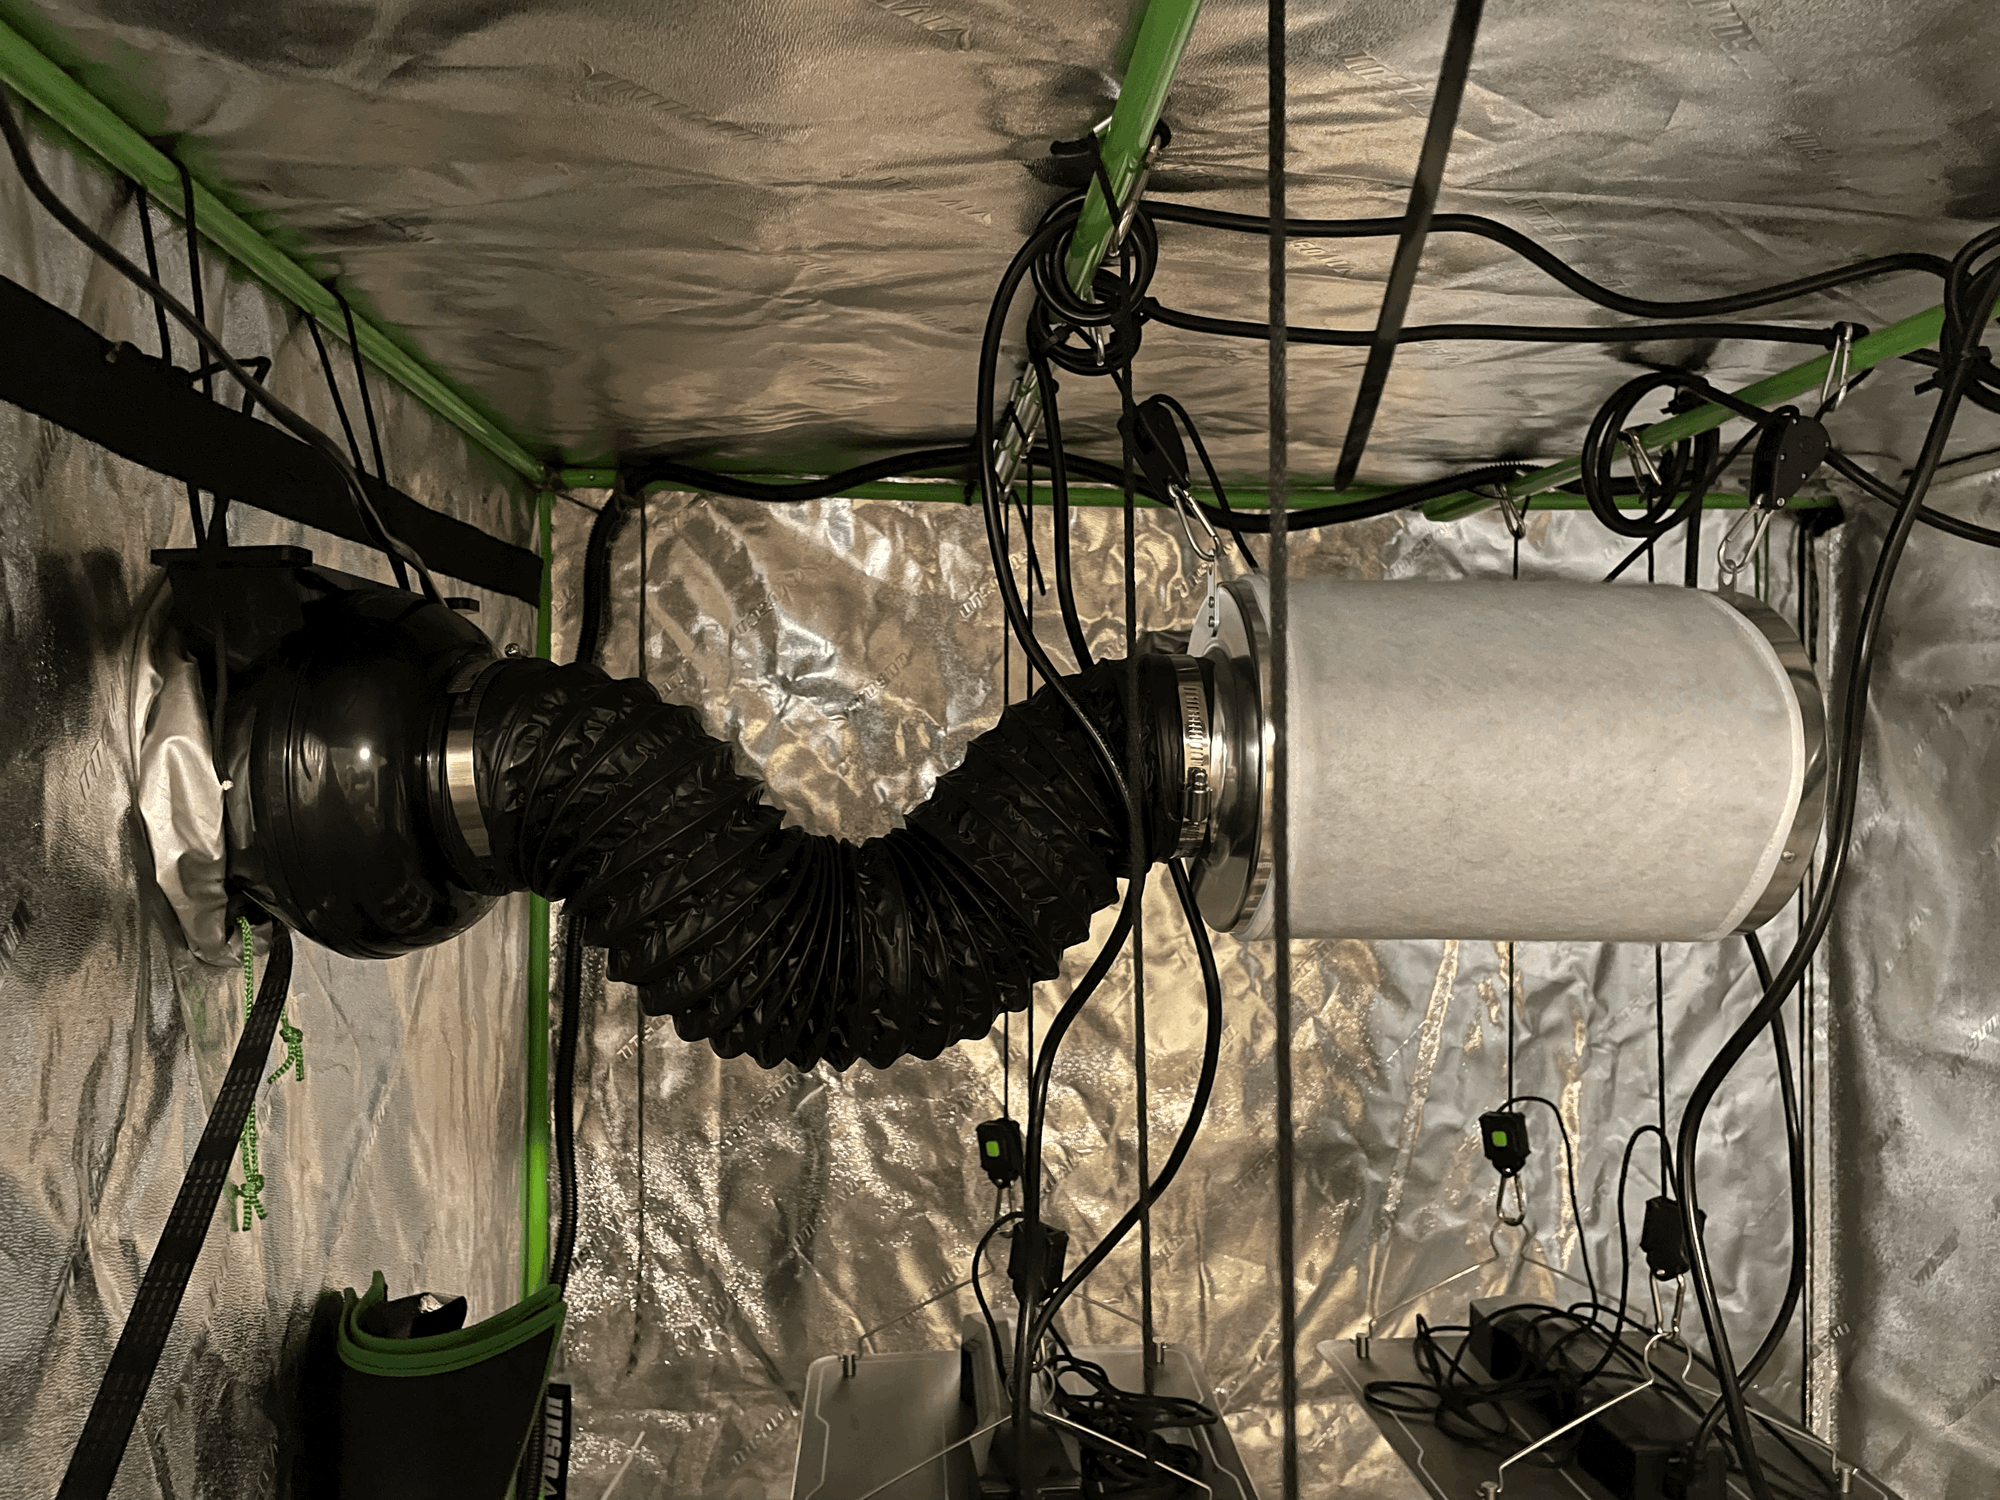
If the temperature or humidity is too high then an exhaust fan will turn on
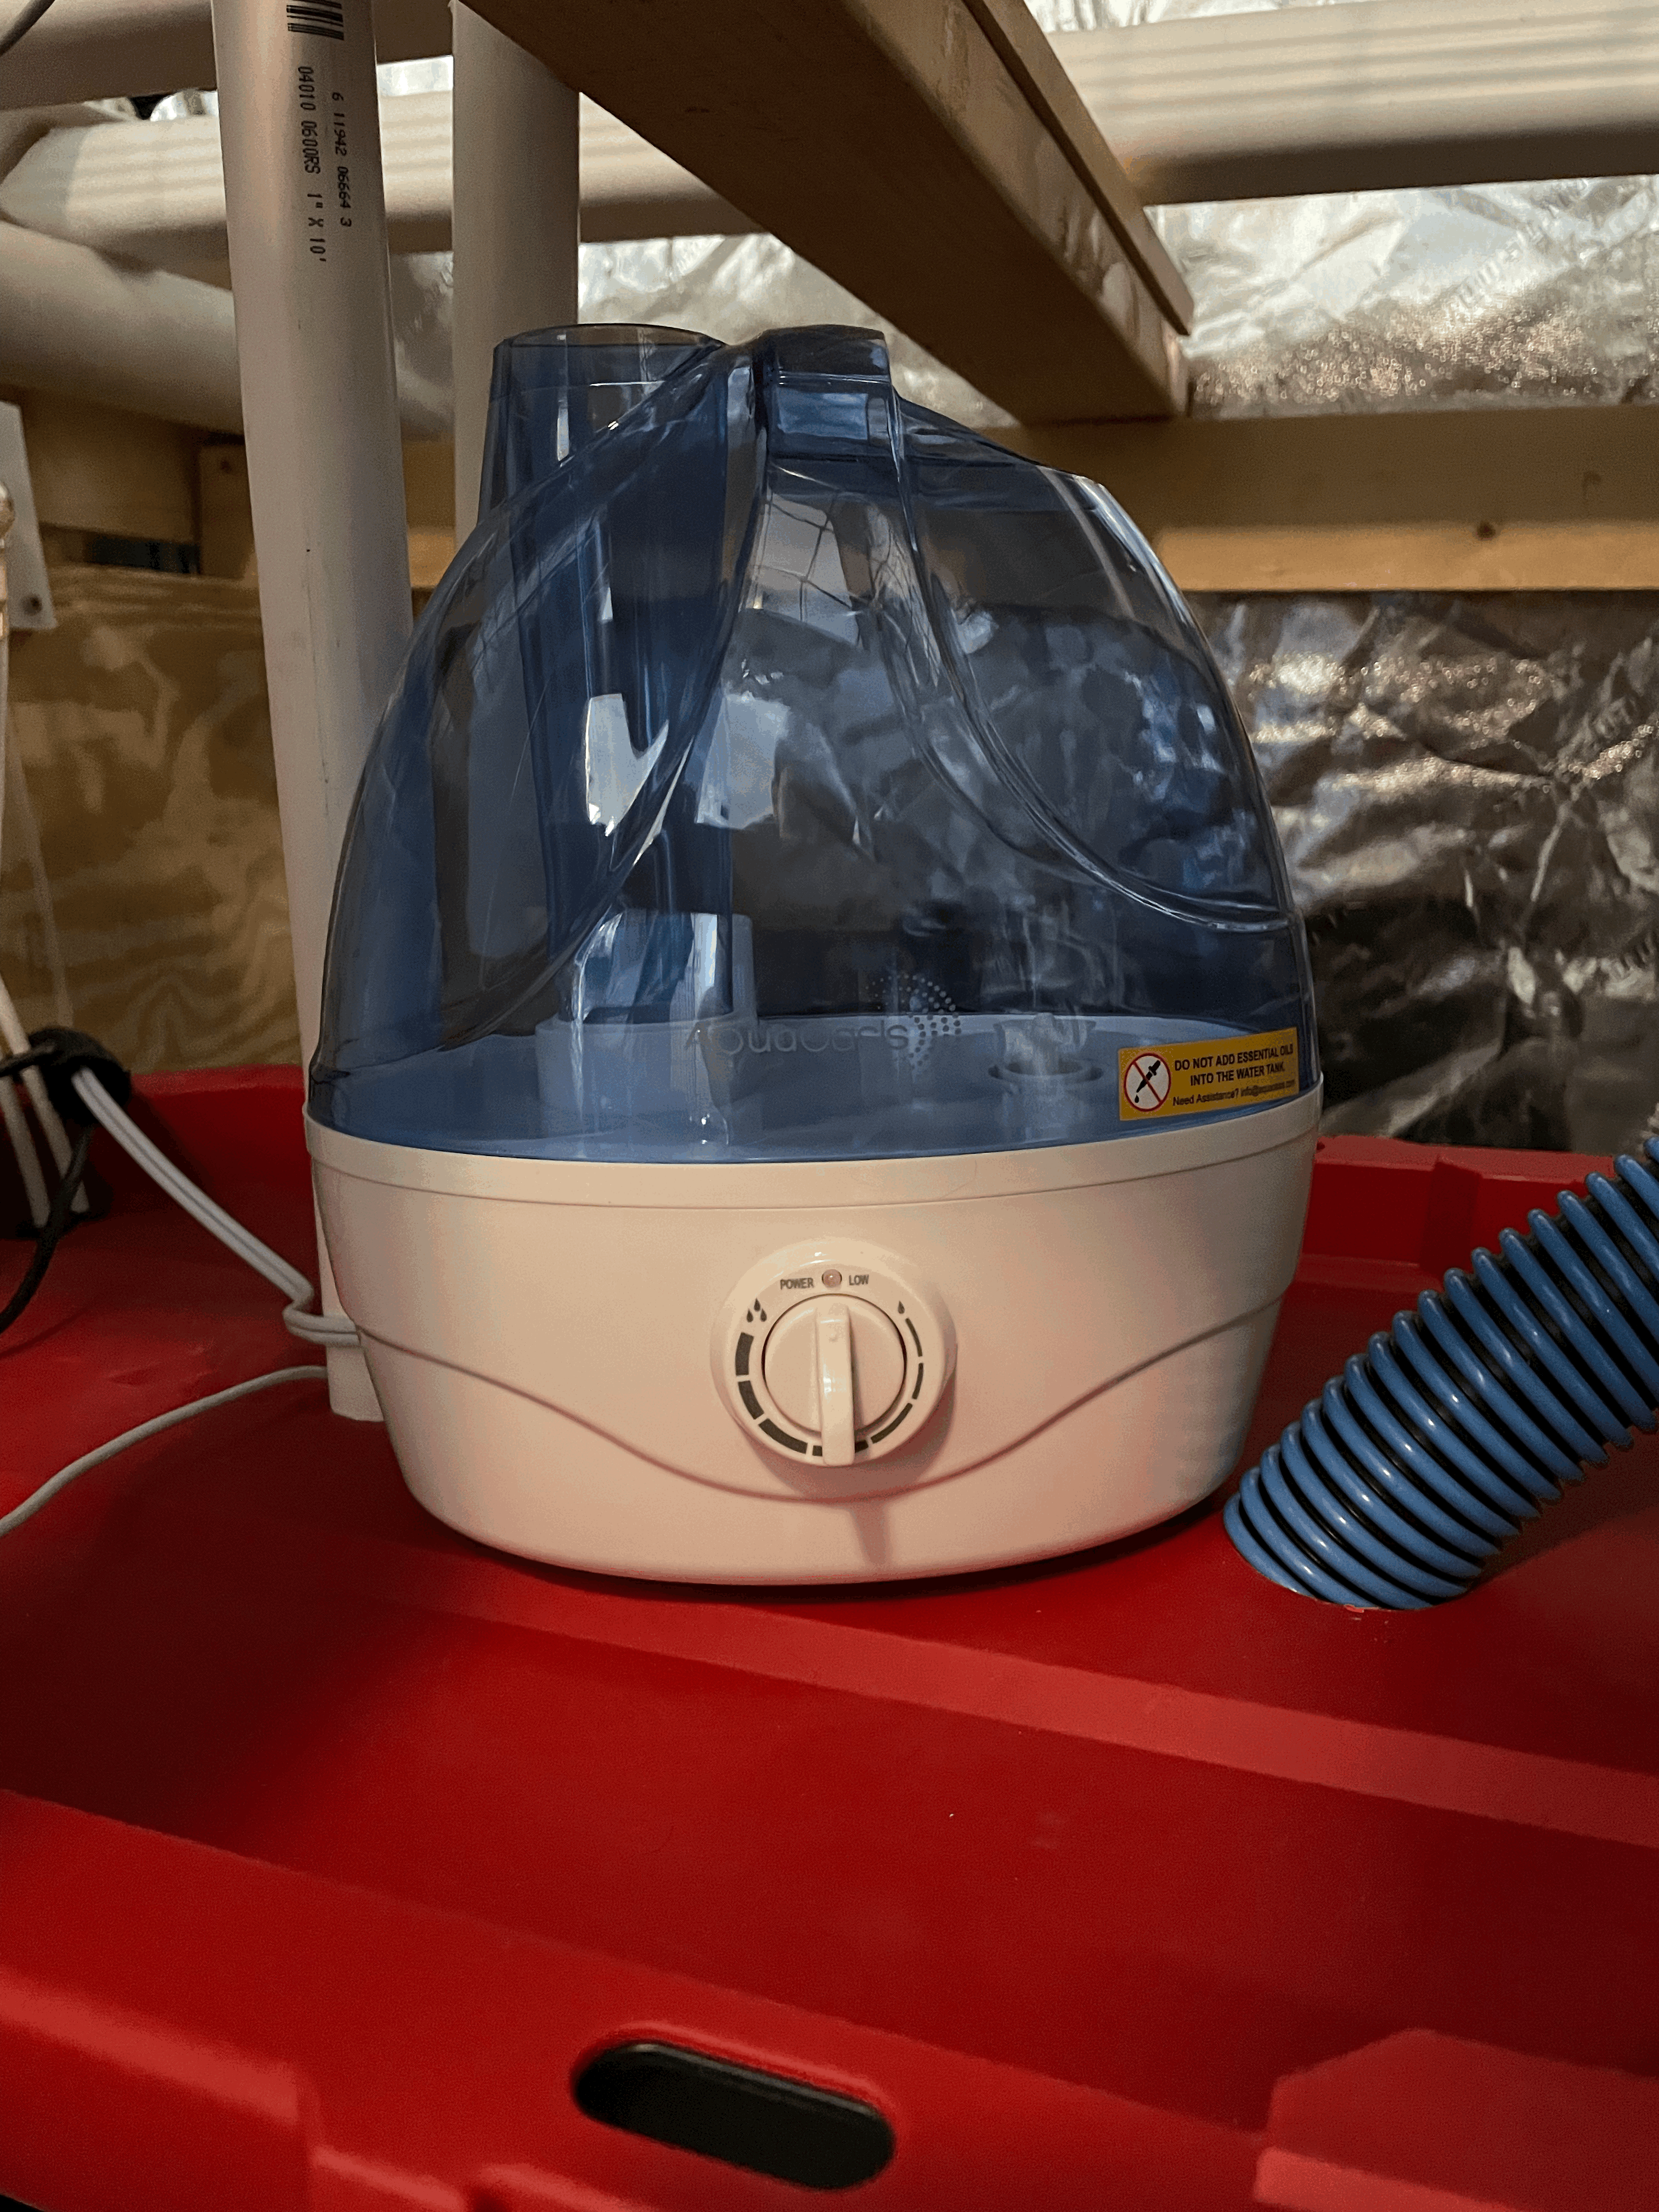
If the humidity is too low then a humidifier will turn on
The CO2 sensor is installed in a PVC tee to prevent interference from the strong light intensity
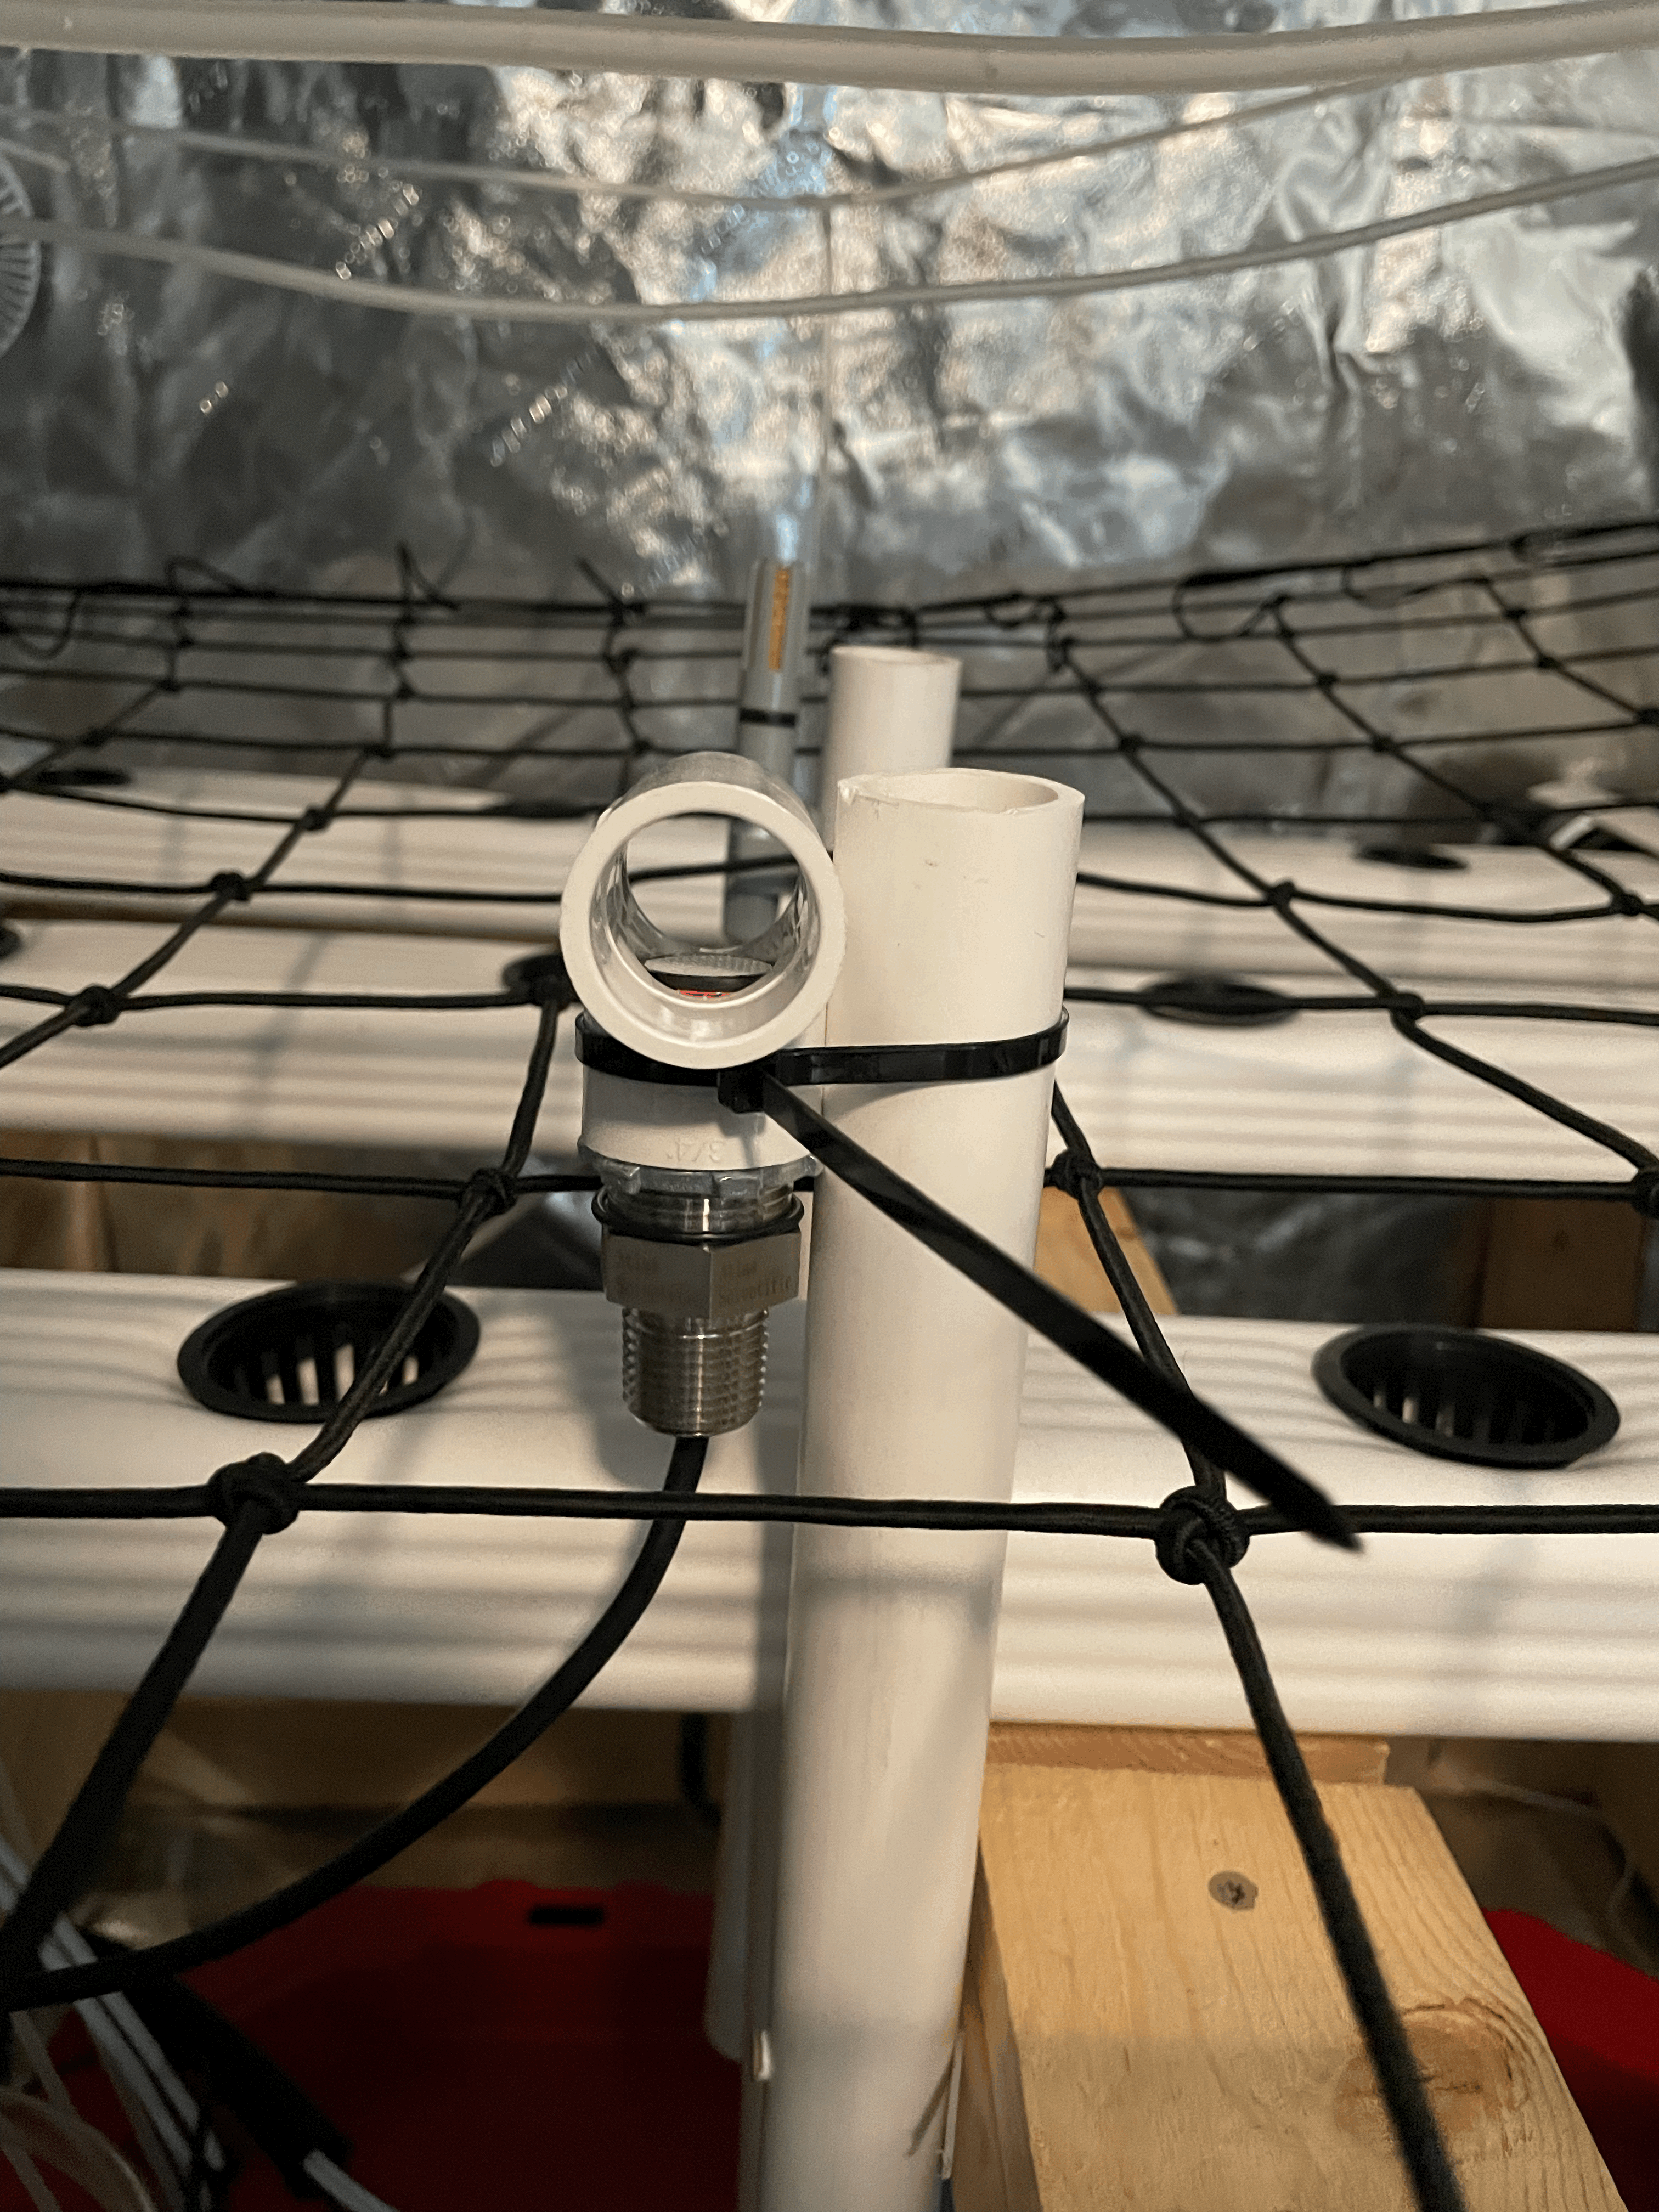
If the CO2 levels are low the CO2 regulator will briefly turn on adding CO2 to the tent
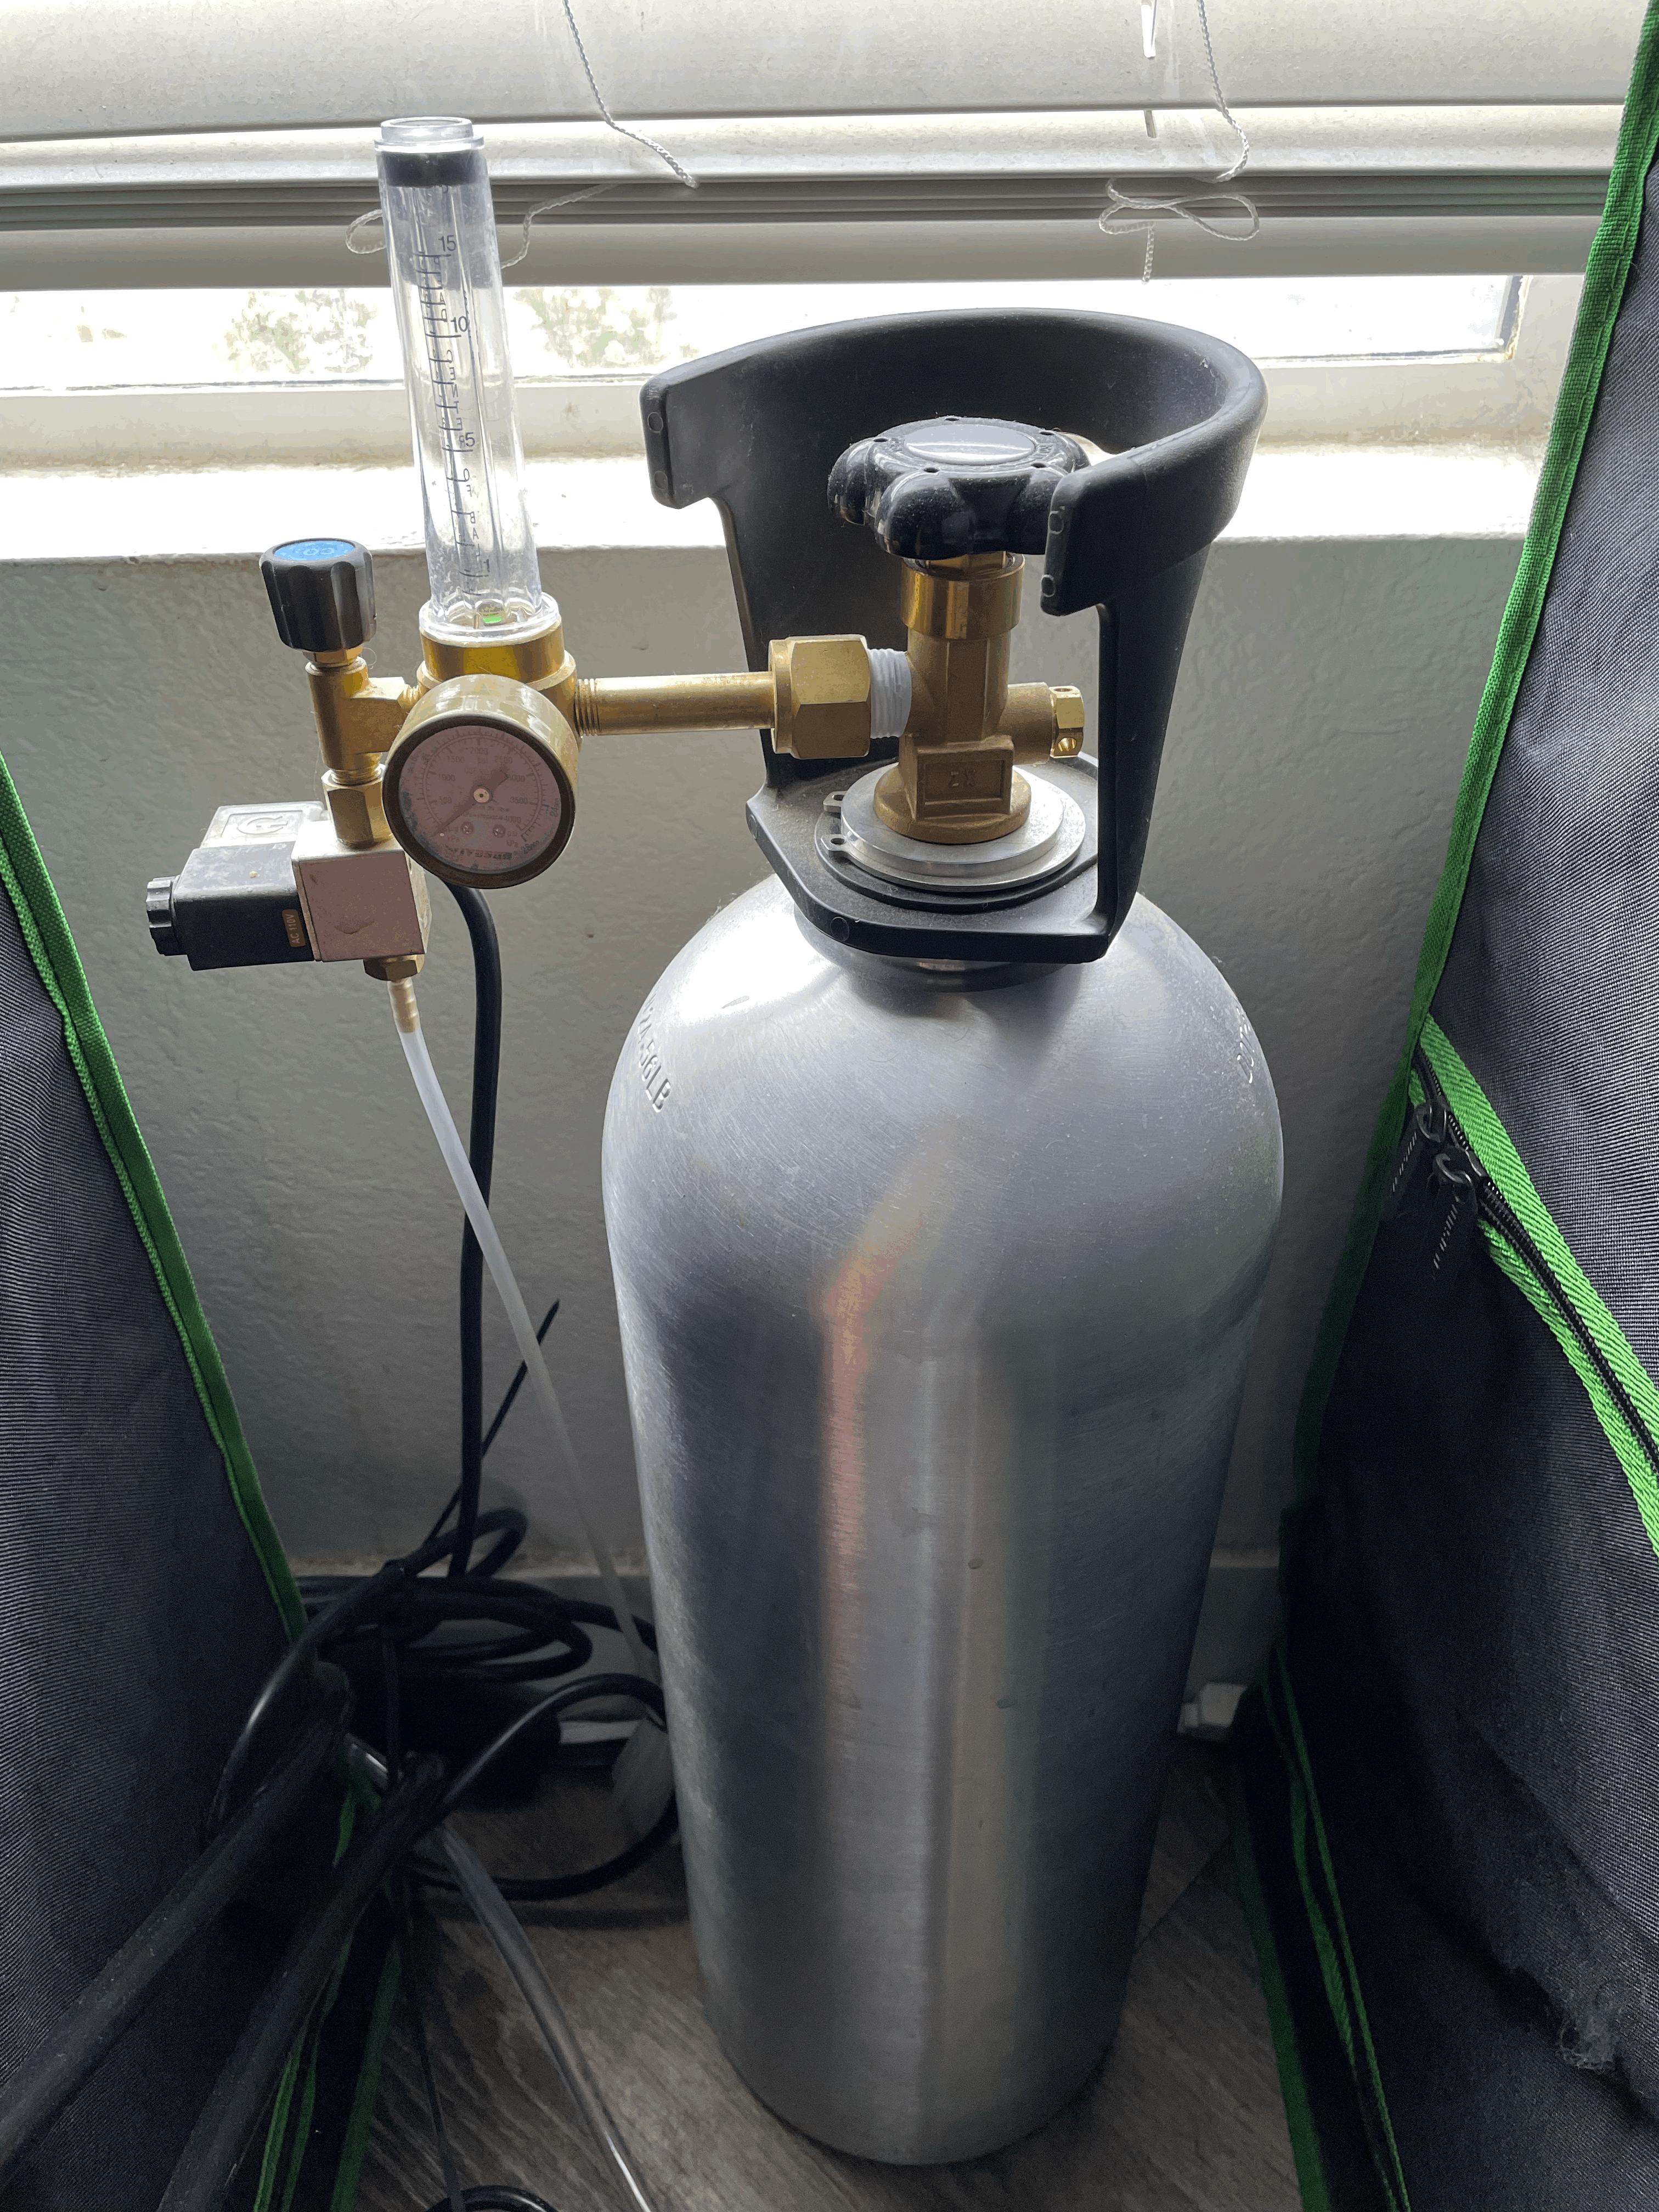
In the tent the CO2 is released through a CO2 shower. Small fans in each corner break the plants boundary layer allowing the plant to uptake the CO2
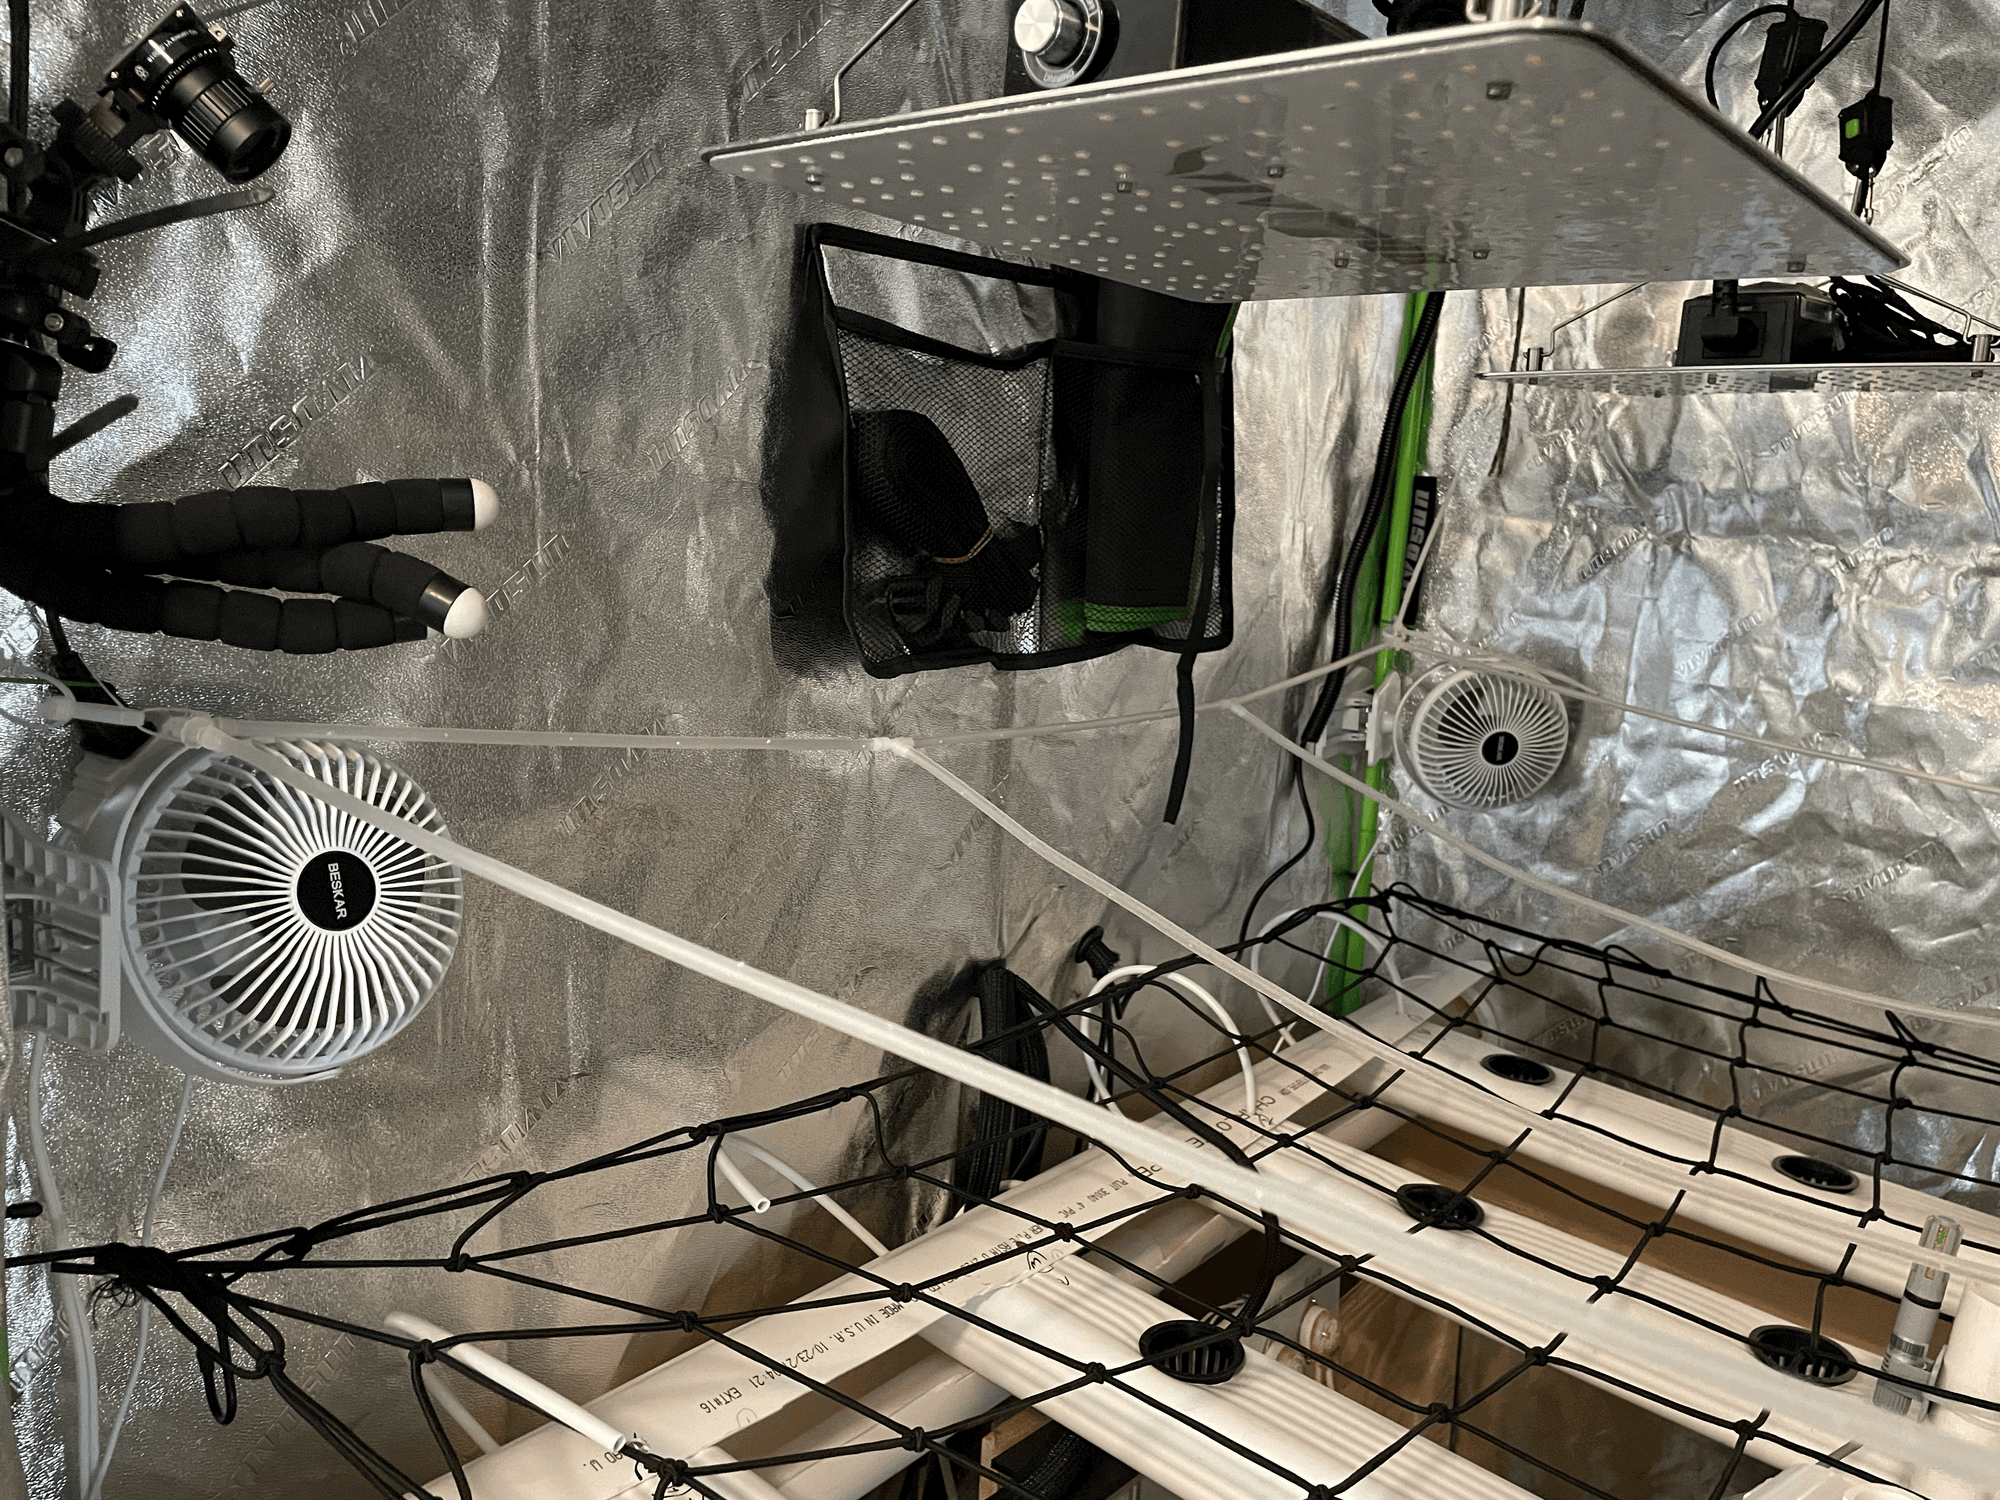
Left: CO2 Shower Right: Fans
6. Power Control Box
The power control box was created to automate the humidifier, exhaust fan, and CO2 regulator. Mechanical and solid state relays are installed in a junction box. GPIO pins from the Raspberry Pi create a high or low voltage signal that will turn the outlet on or off

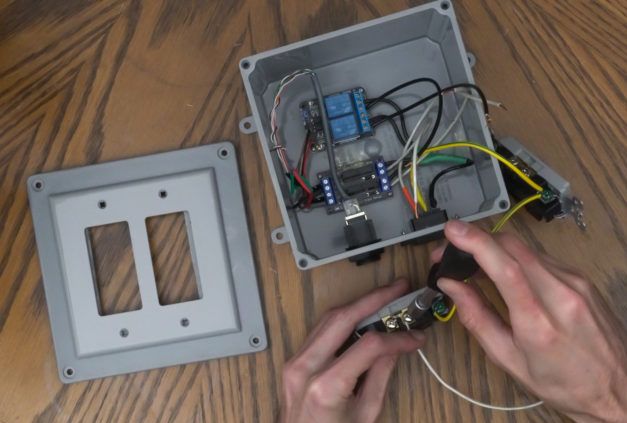
Left: Relay Wiring Right: Relay Installed in Junction Box [https://kylegabriel.com/]
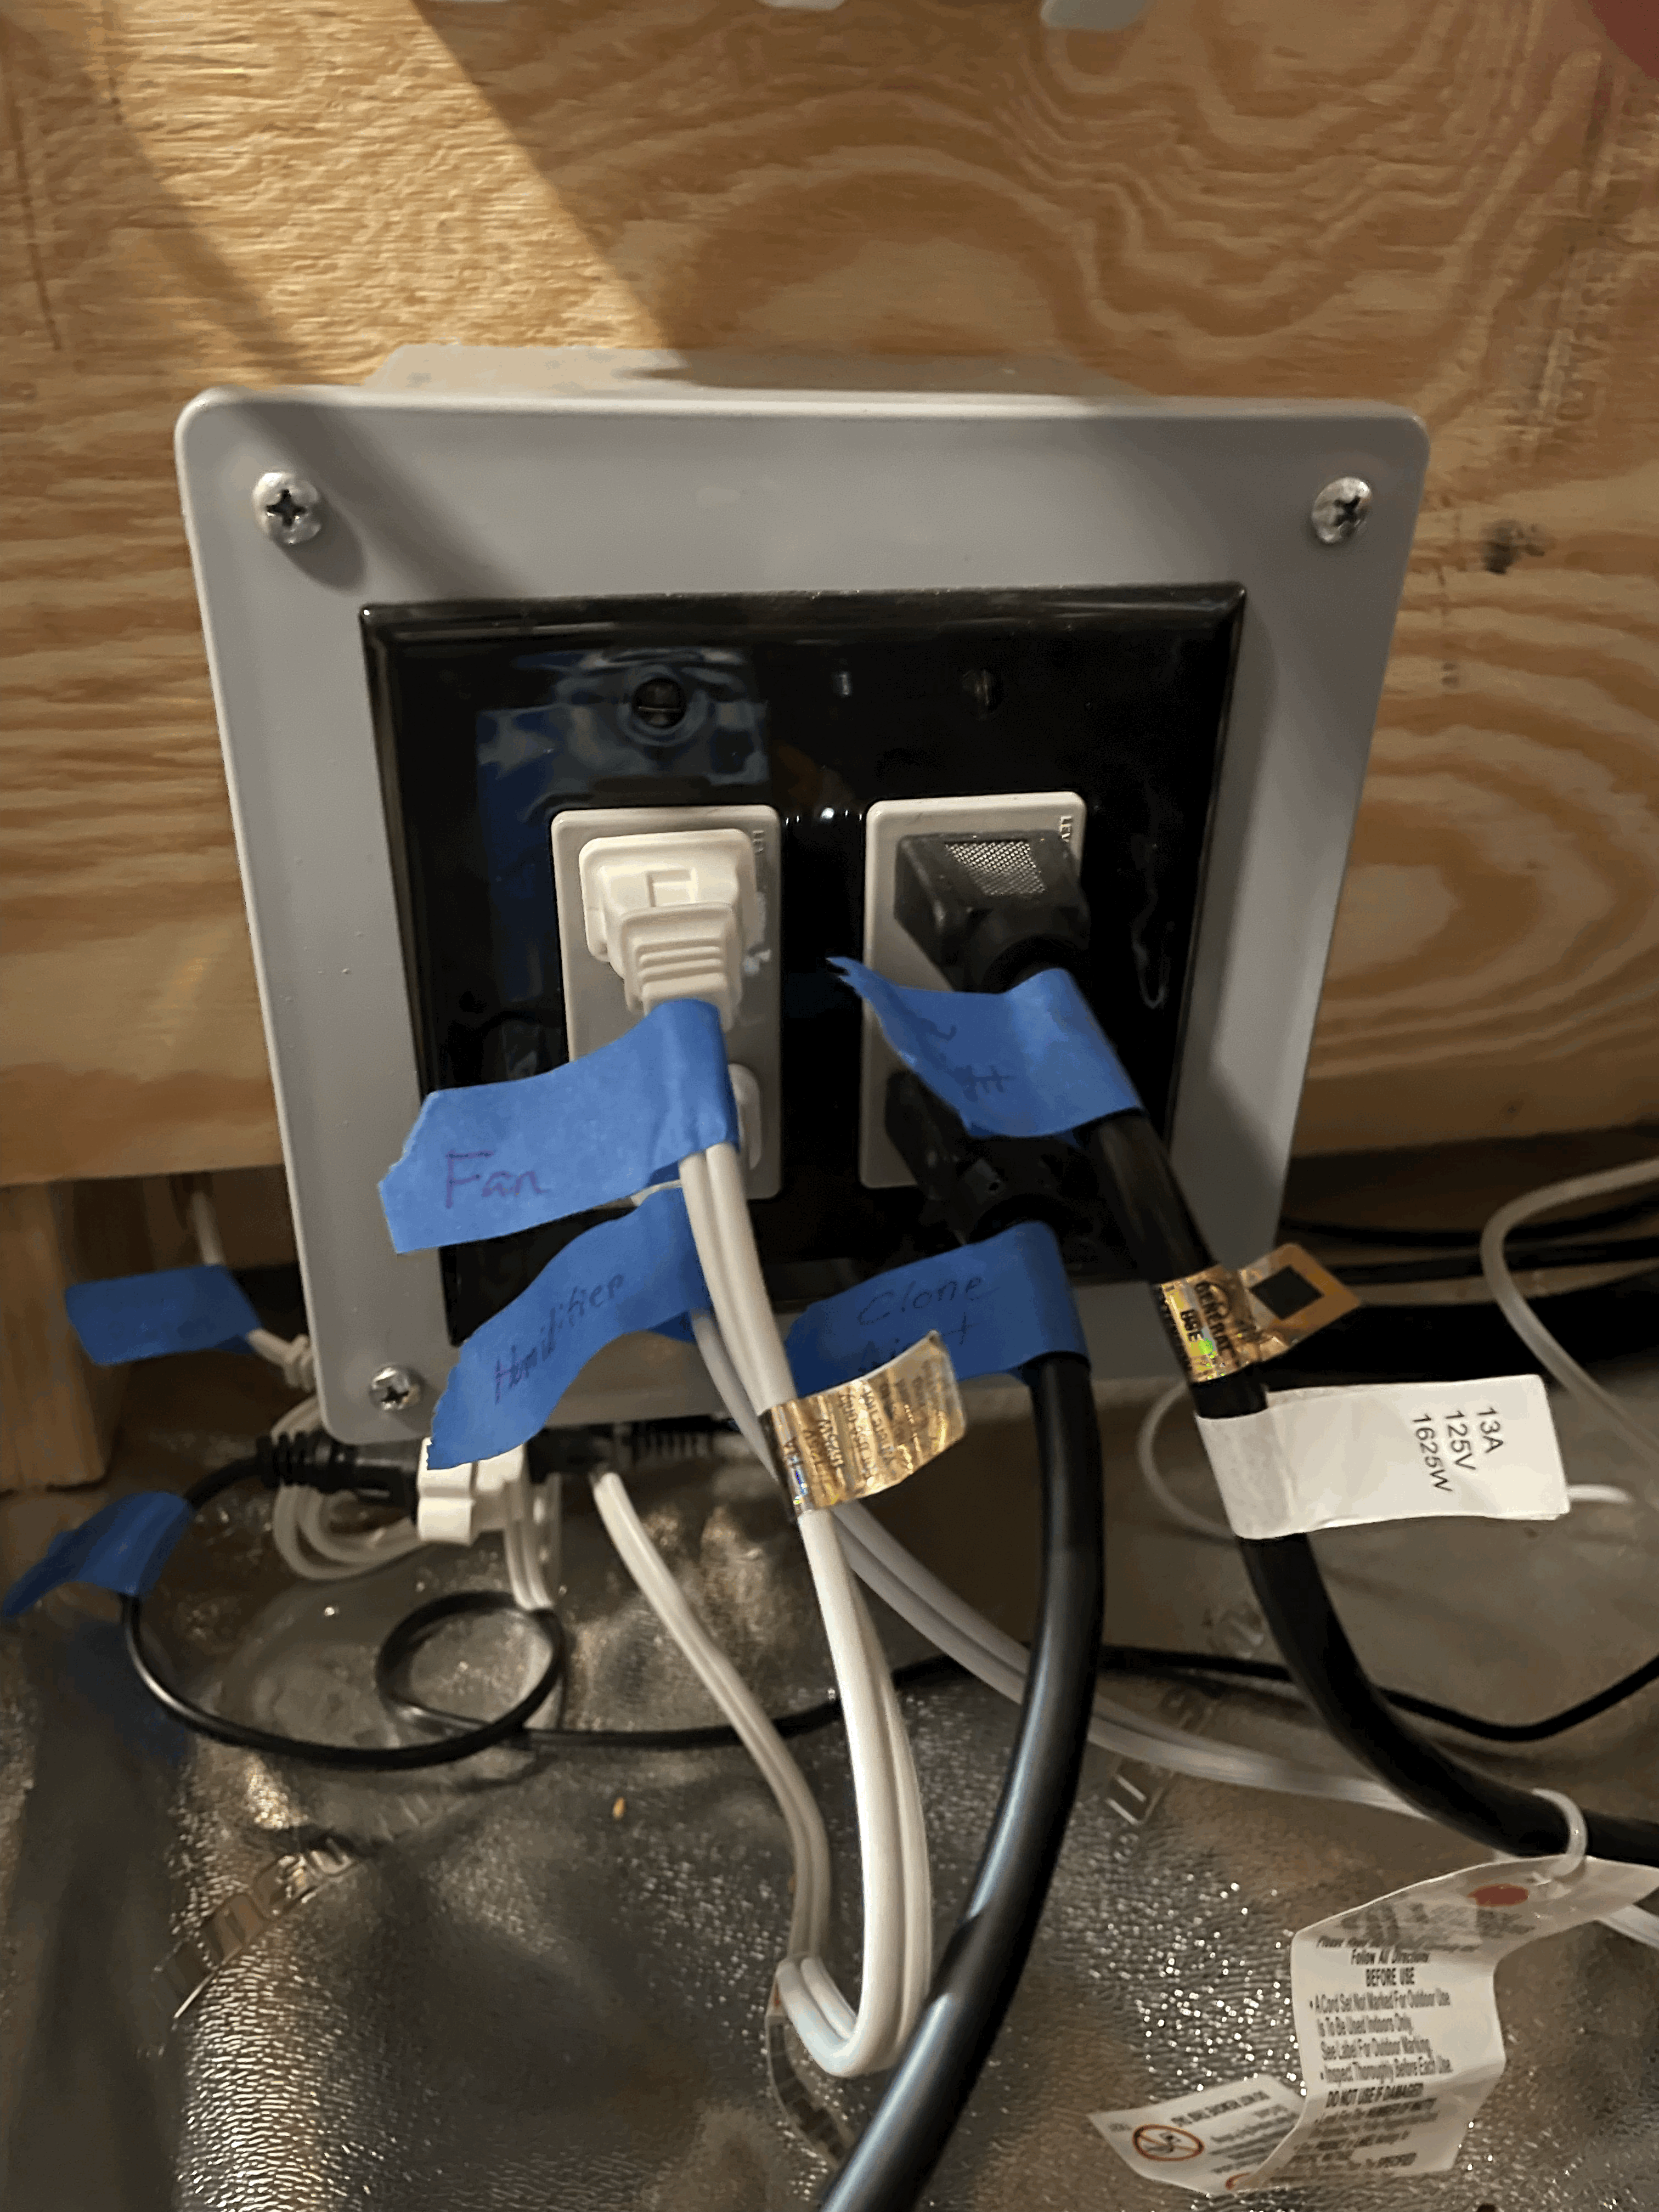
Four 100 watt lights are also connected to the power control box. This allows them to be placed on a schedule
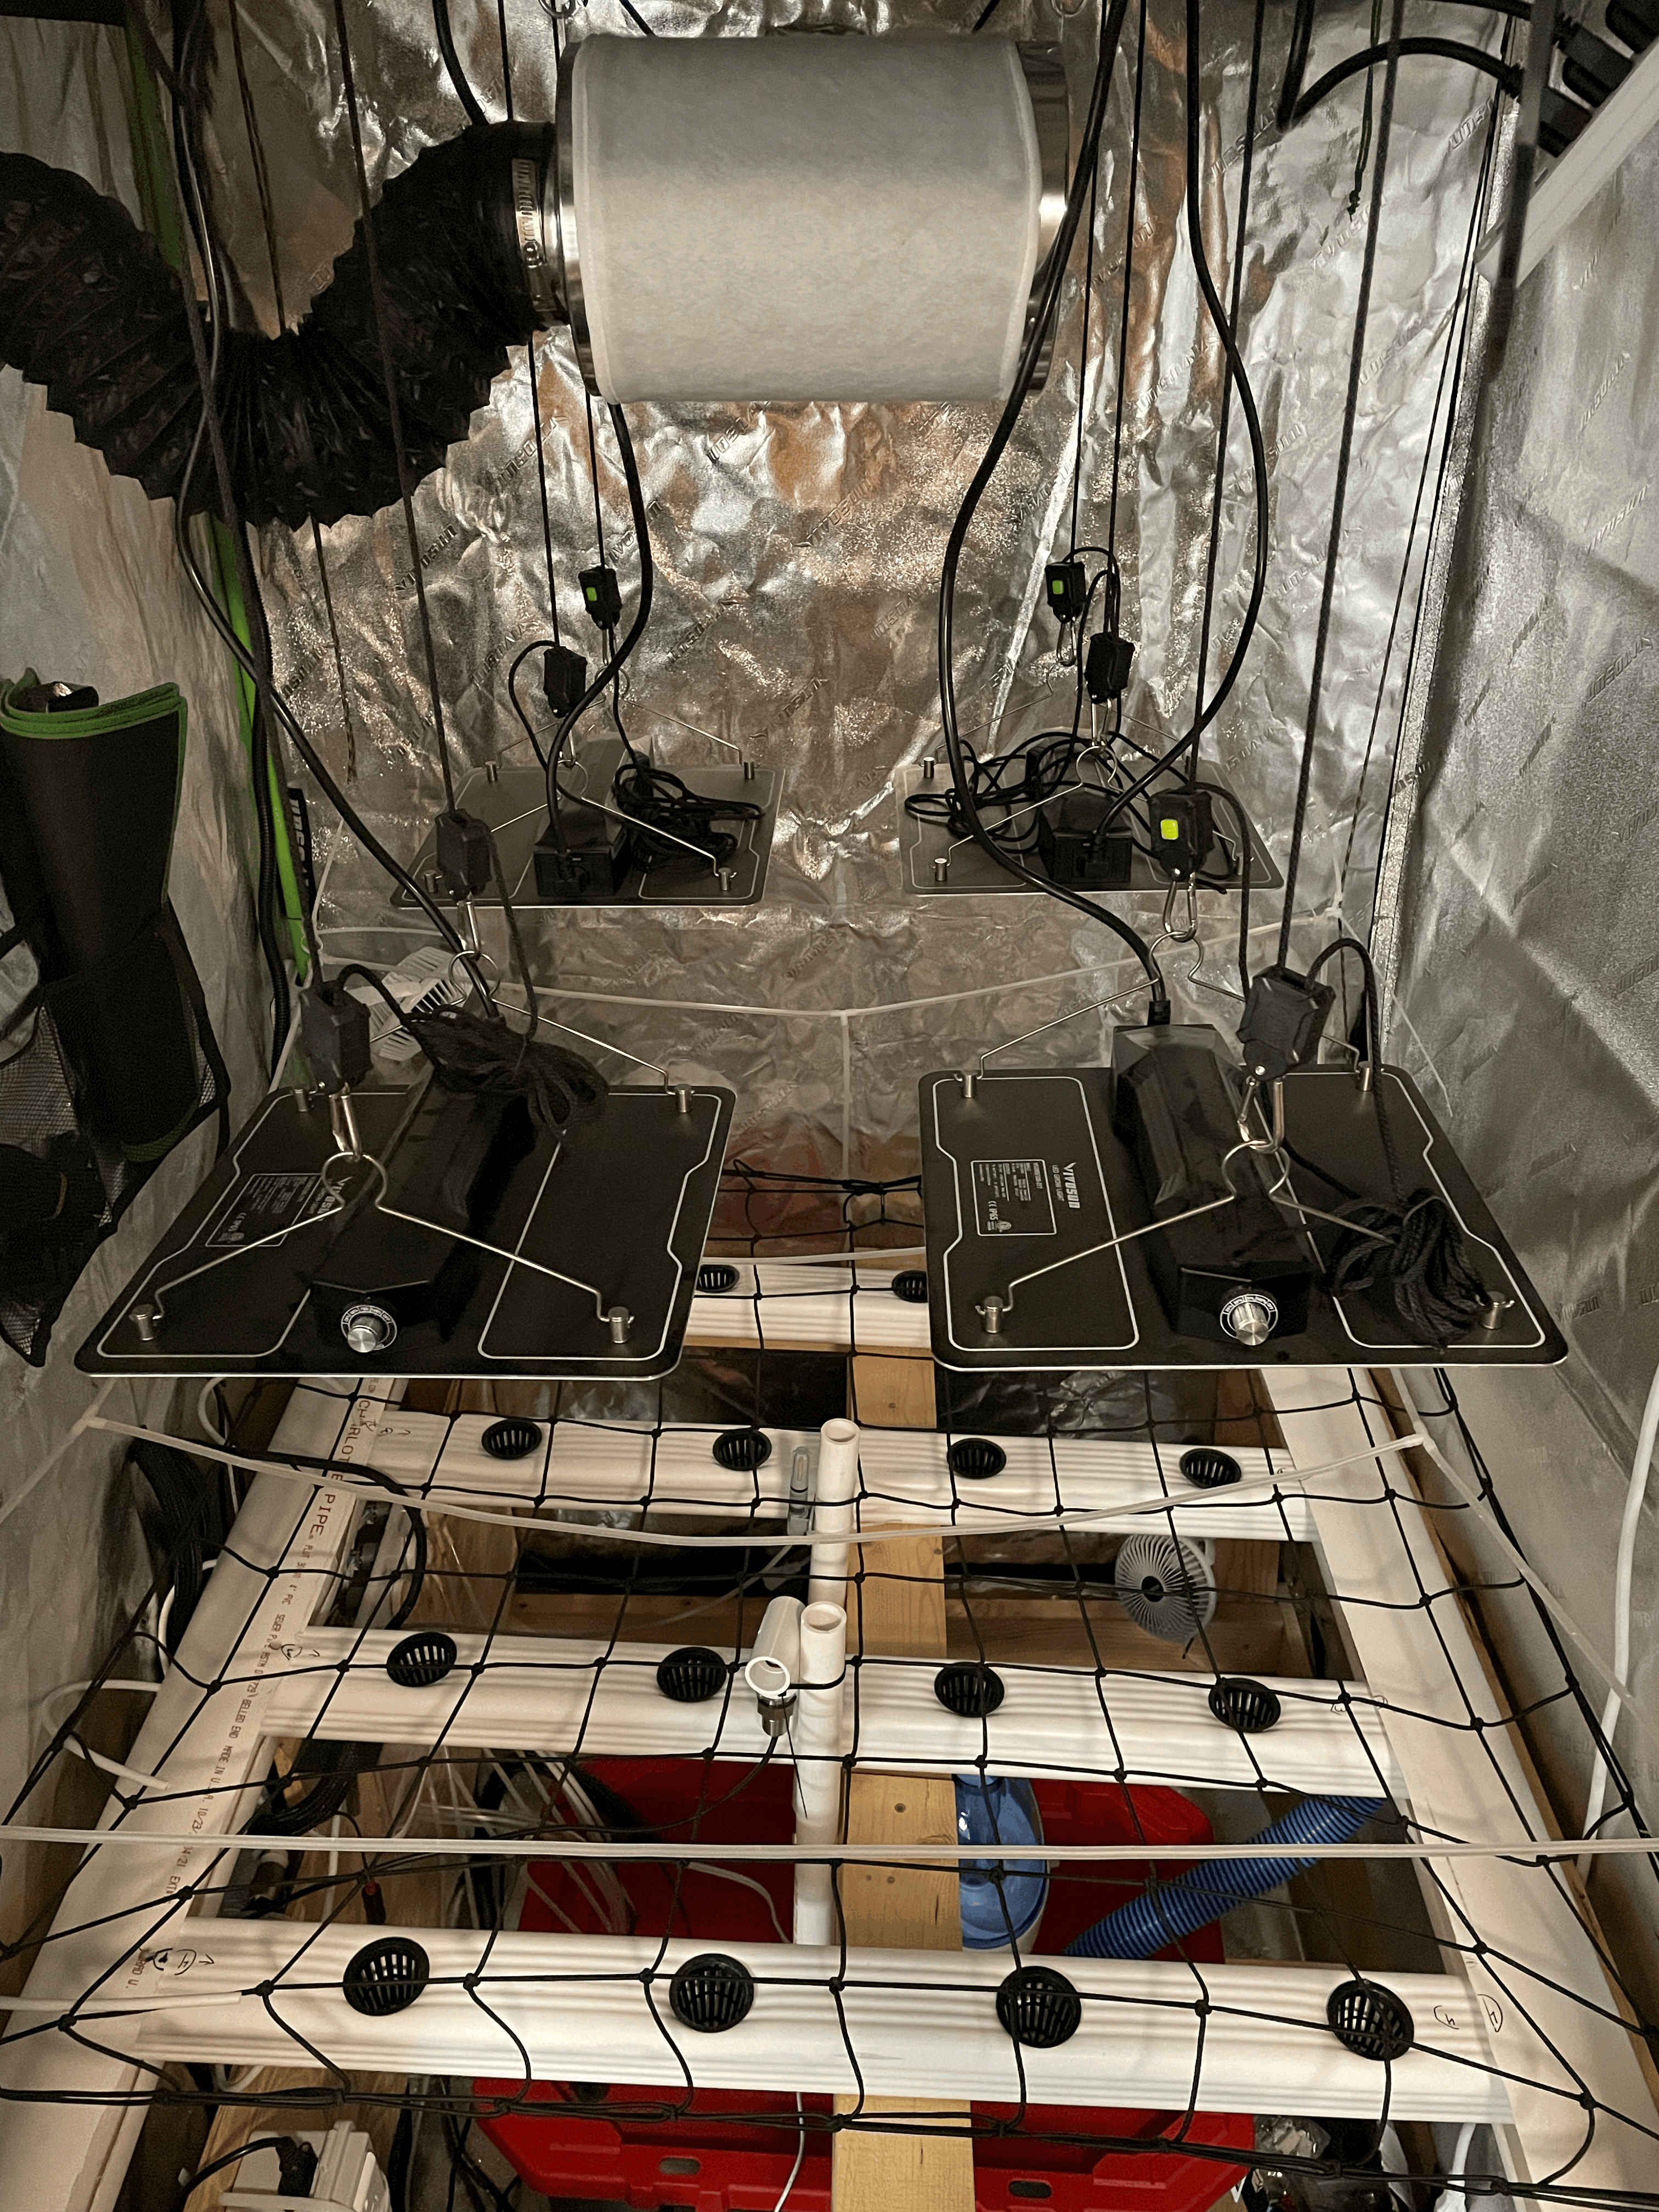
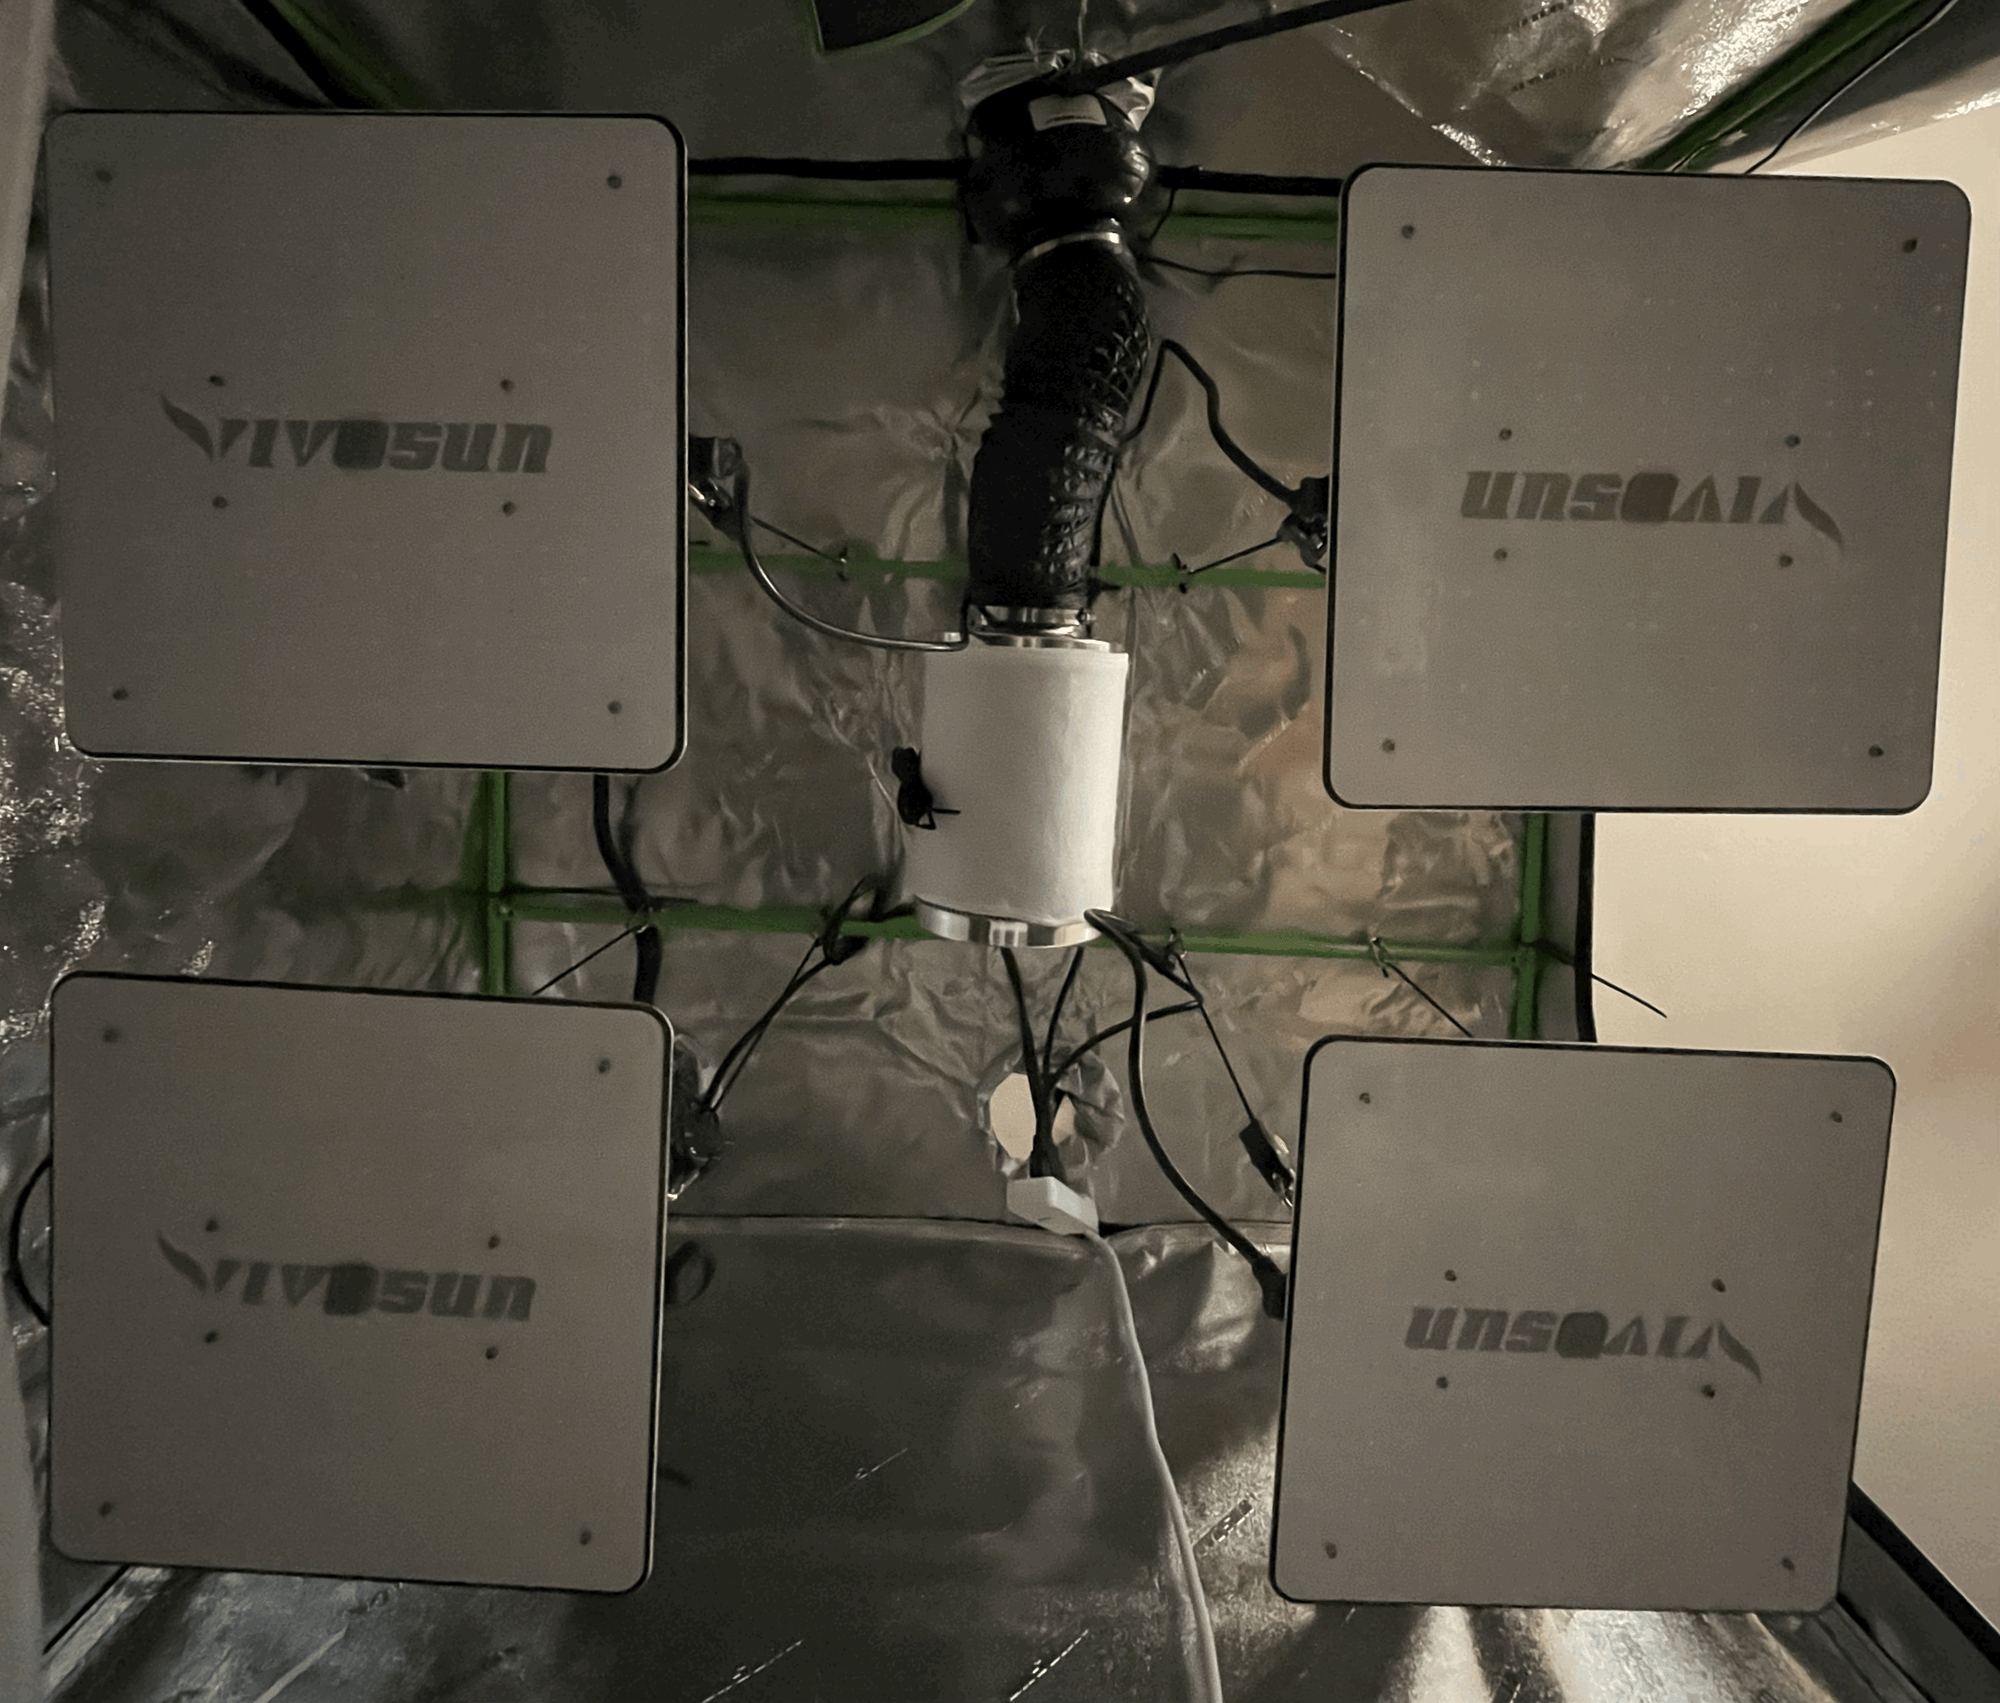
Top and Bottom View of Lights
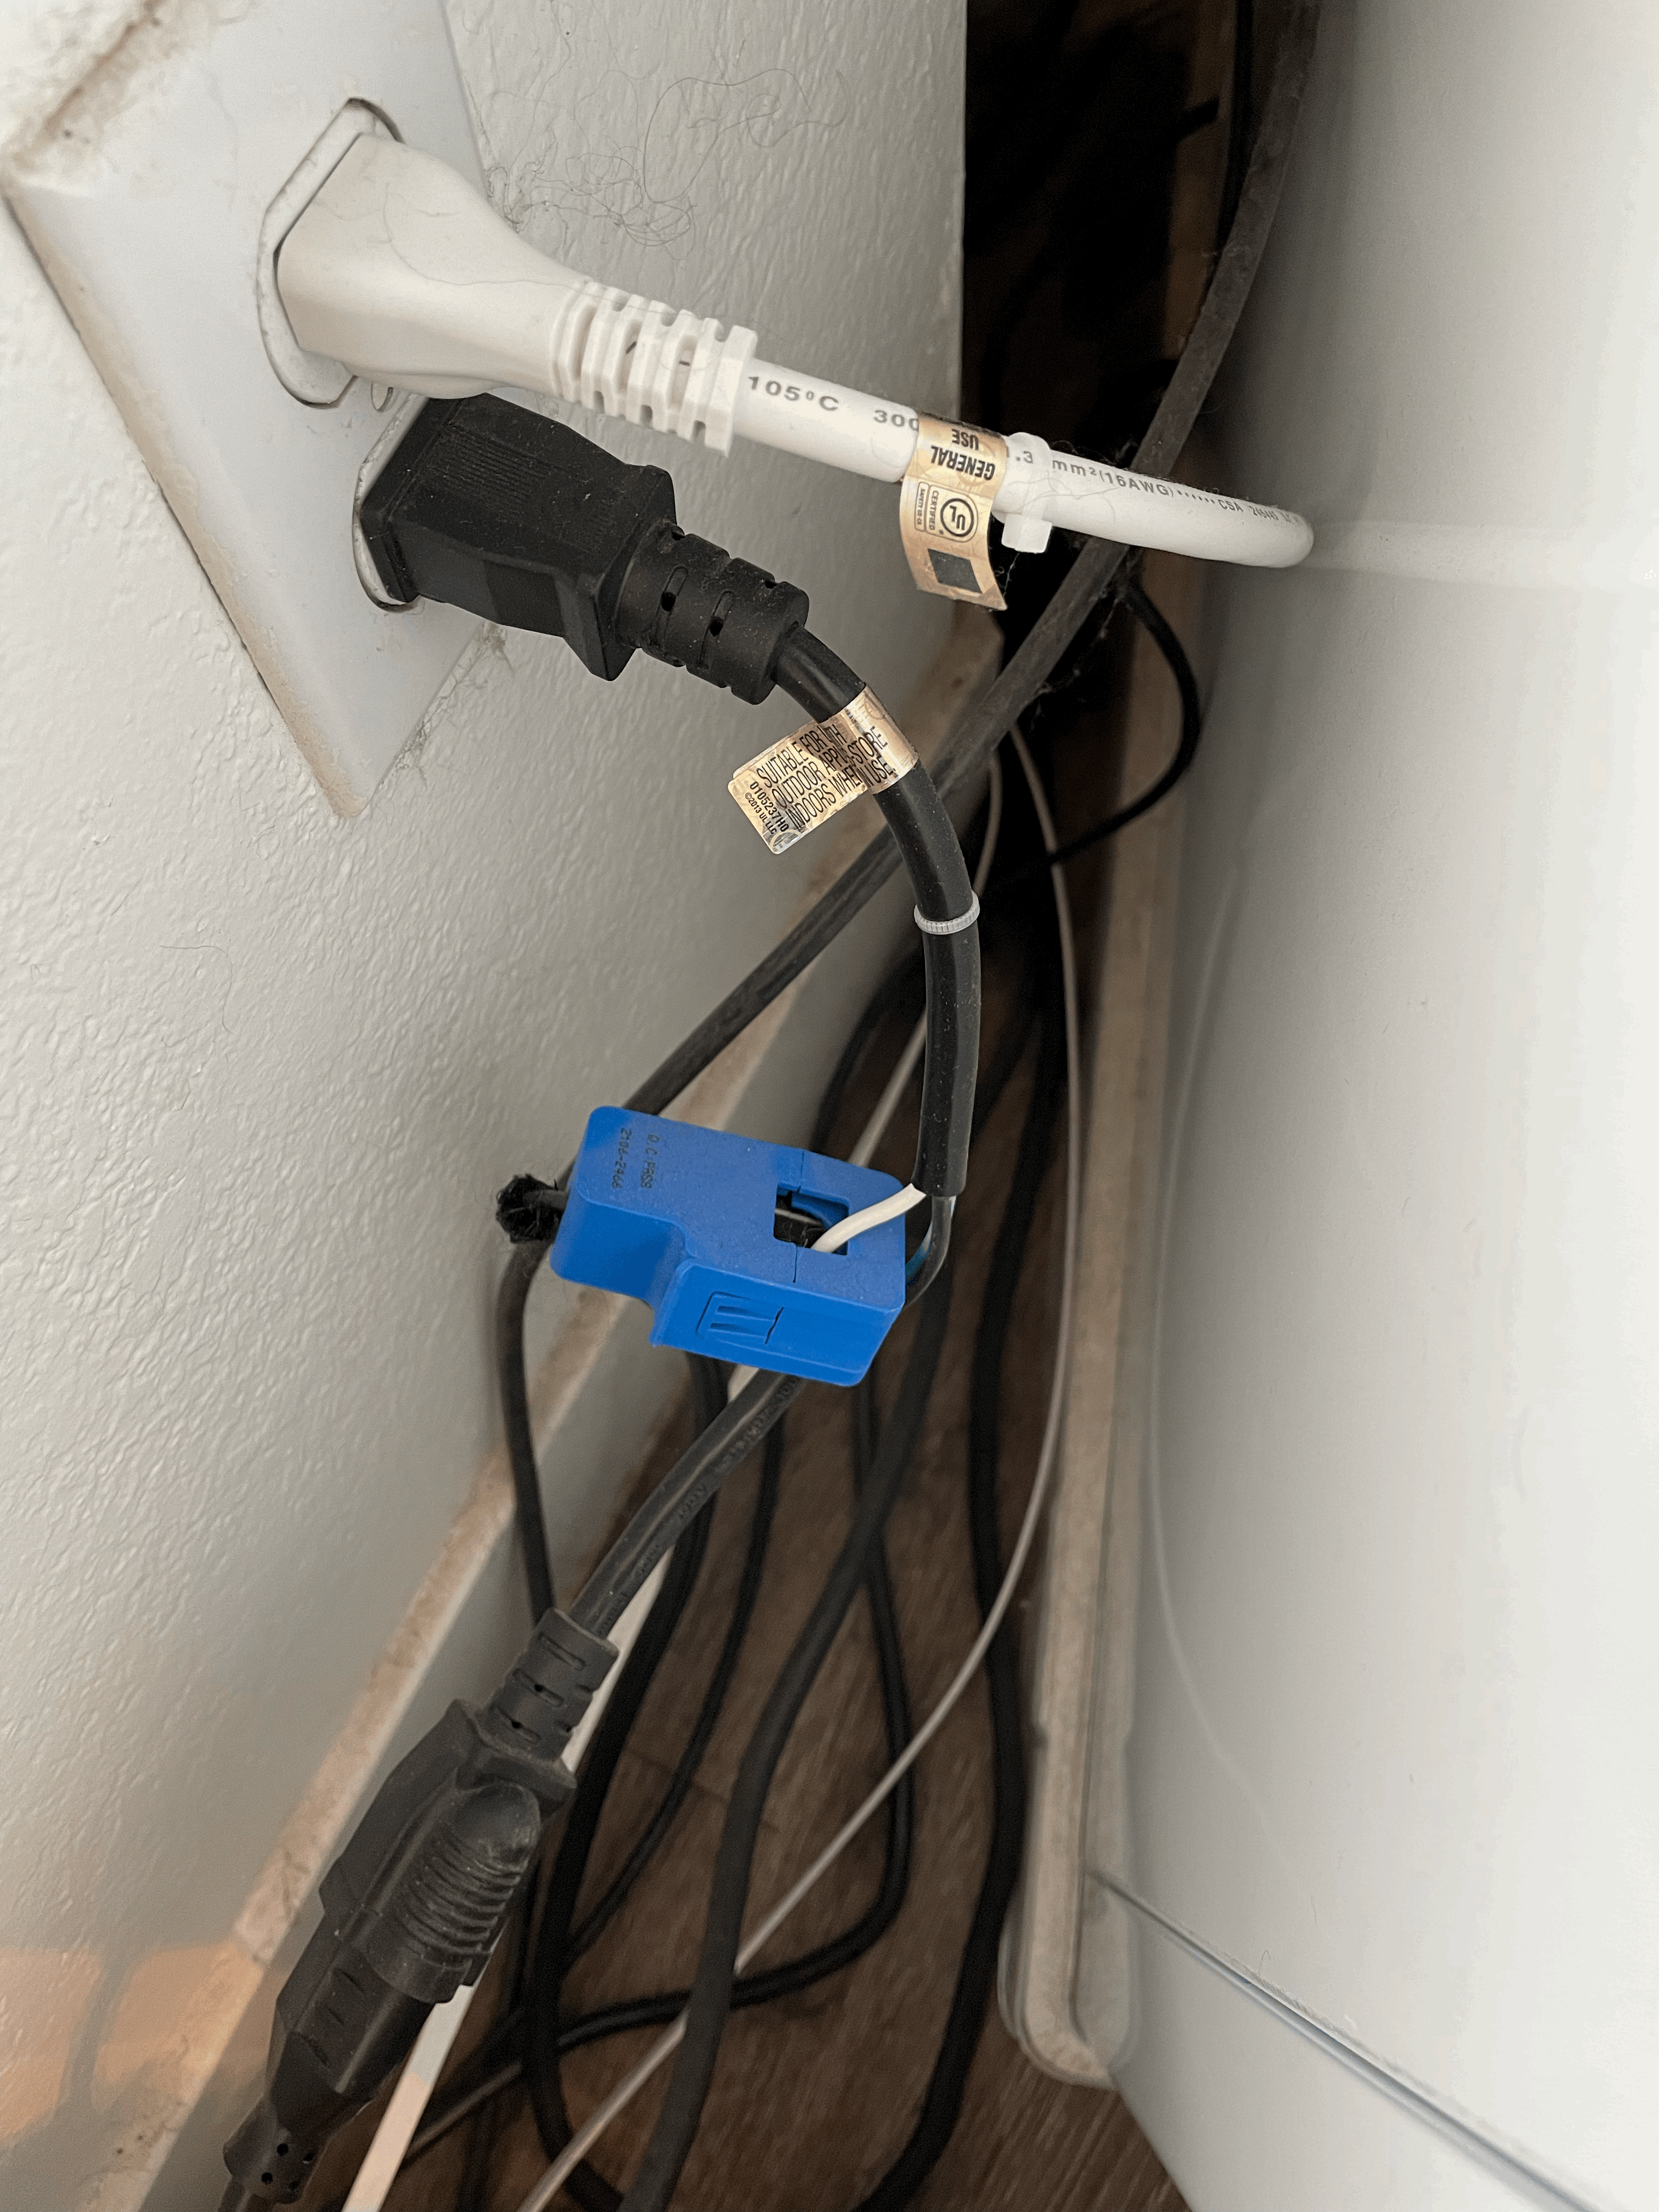
To measure the electrical current draw from the power control box an AC voltage sensor is installed around the power cable
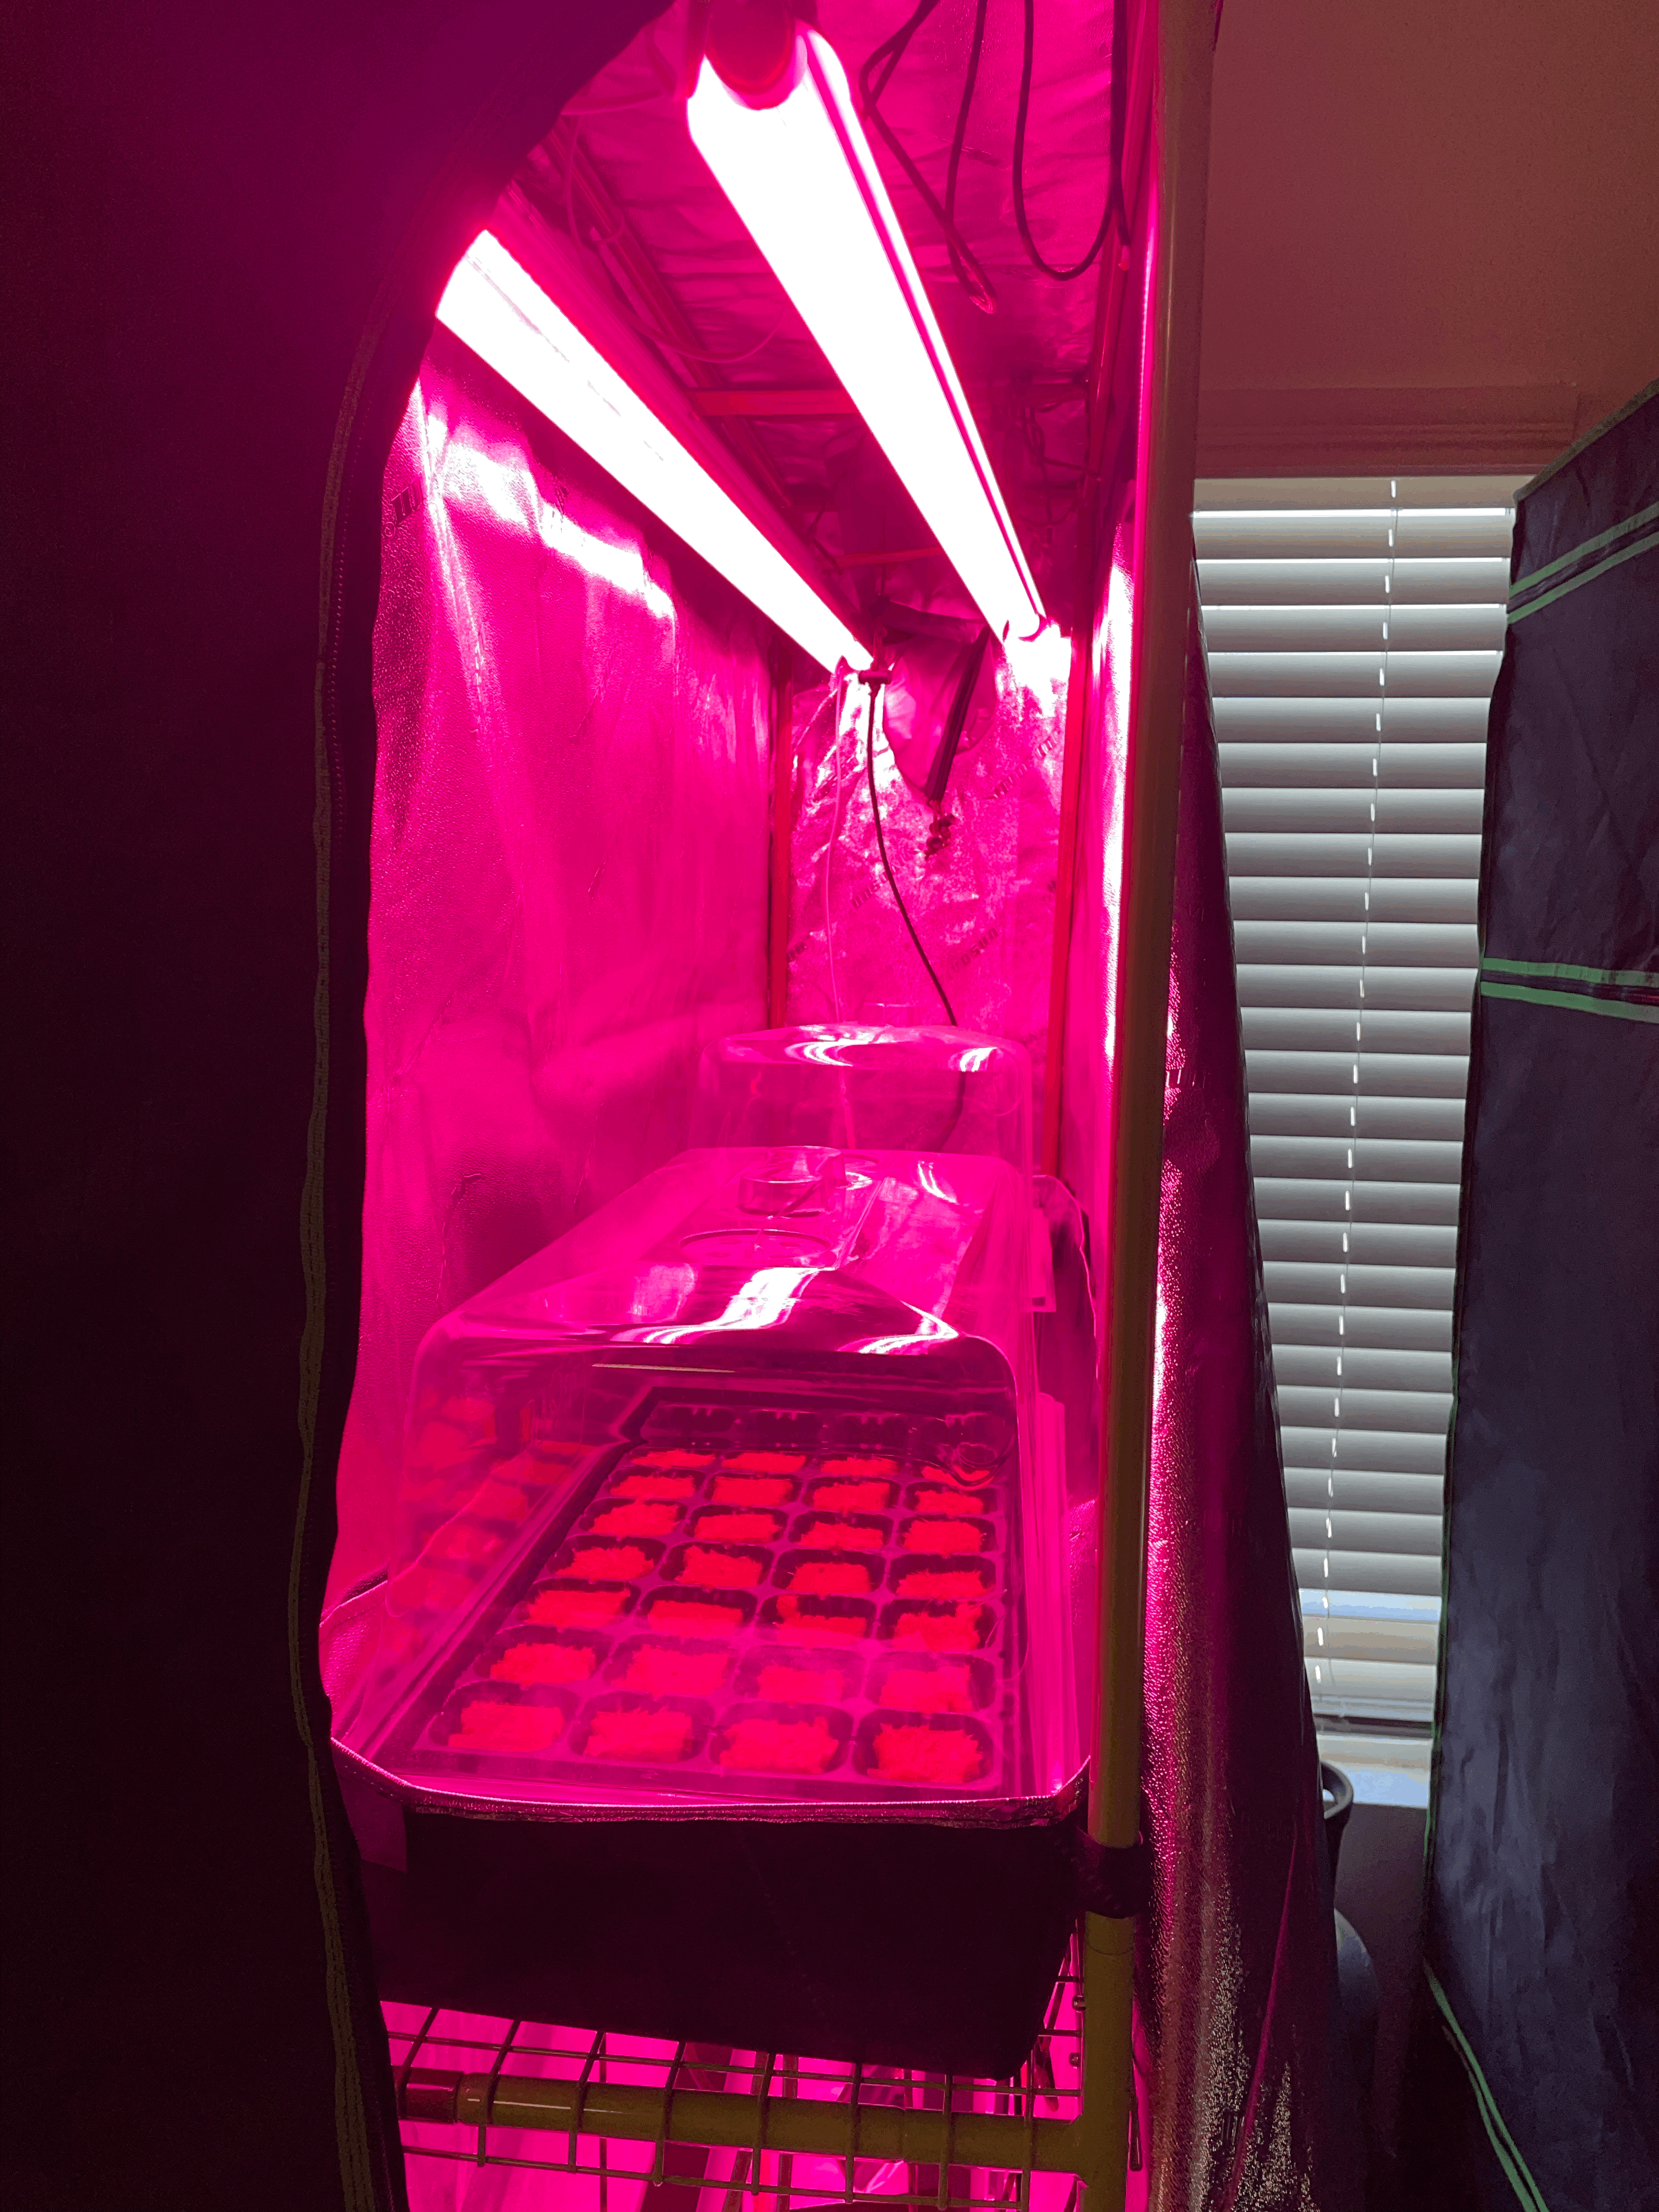
7. Nursery
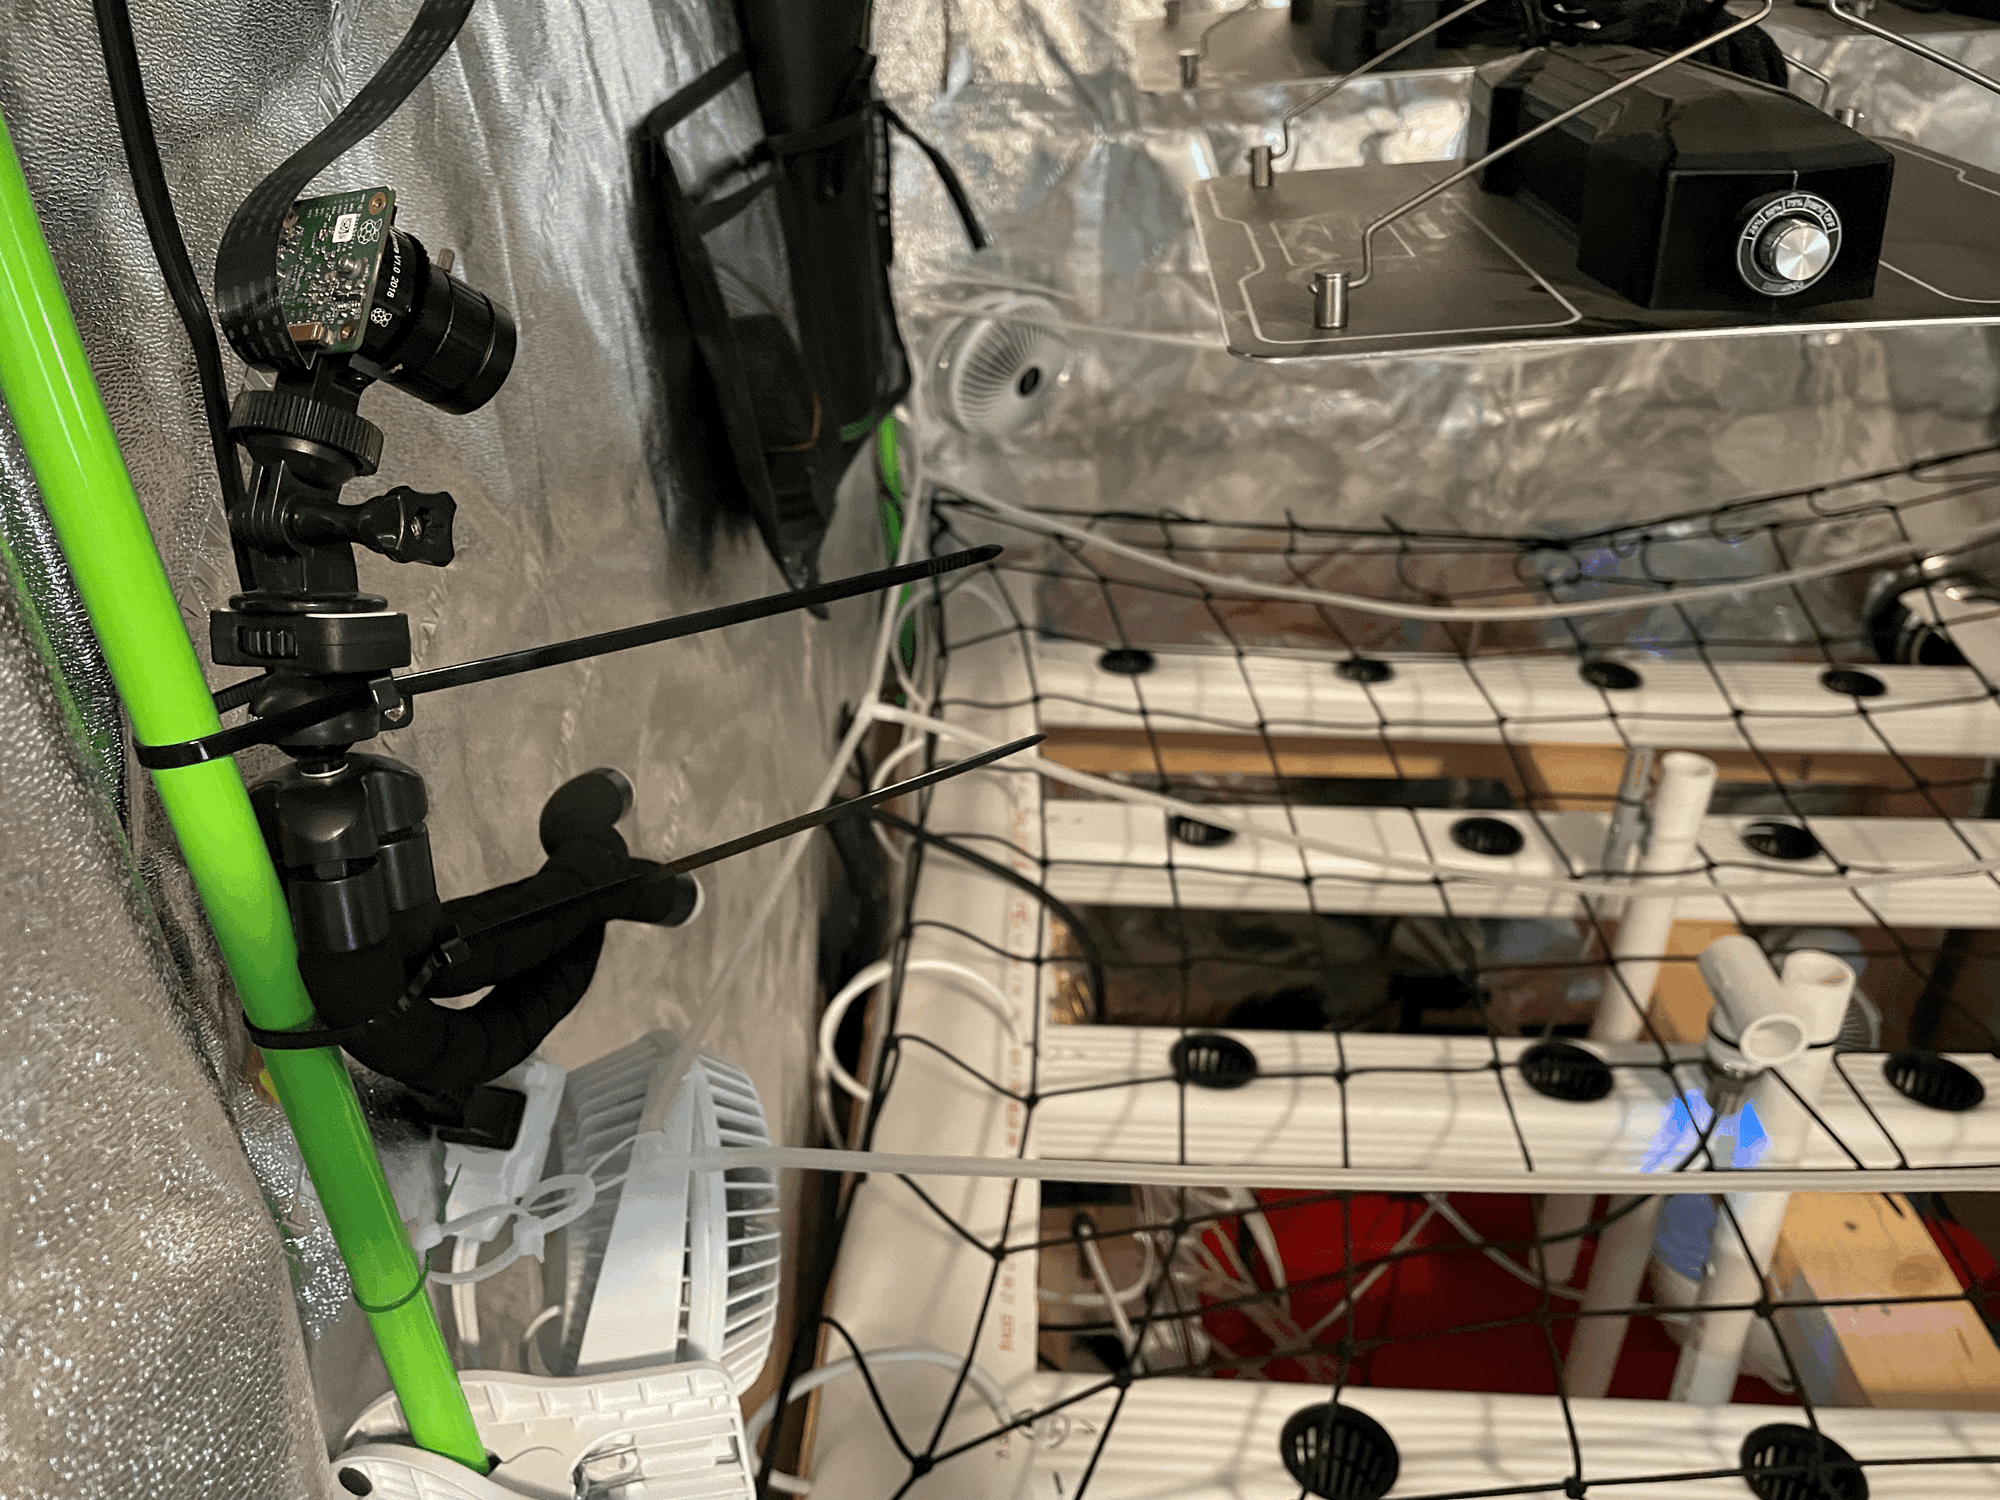
The tent is split into two sides. The larger side is the hydroponics and the smaller side is the nursery. The nursery is split into a top and bottom half. The top half is for seedlings. I use a Raspberry Pi camera module to monitor the seedlings and let me know when they are ready to be moved to the hydroponics. You can read more about that here
Austin Bergman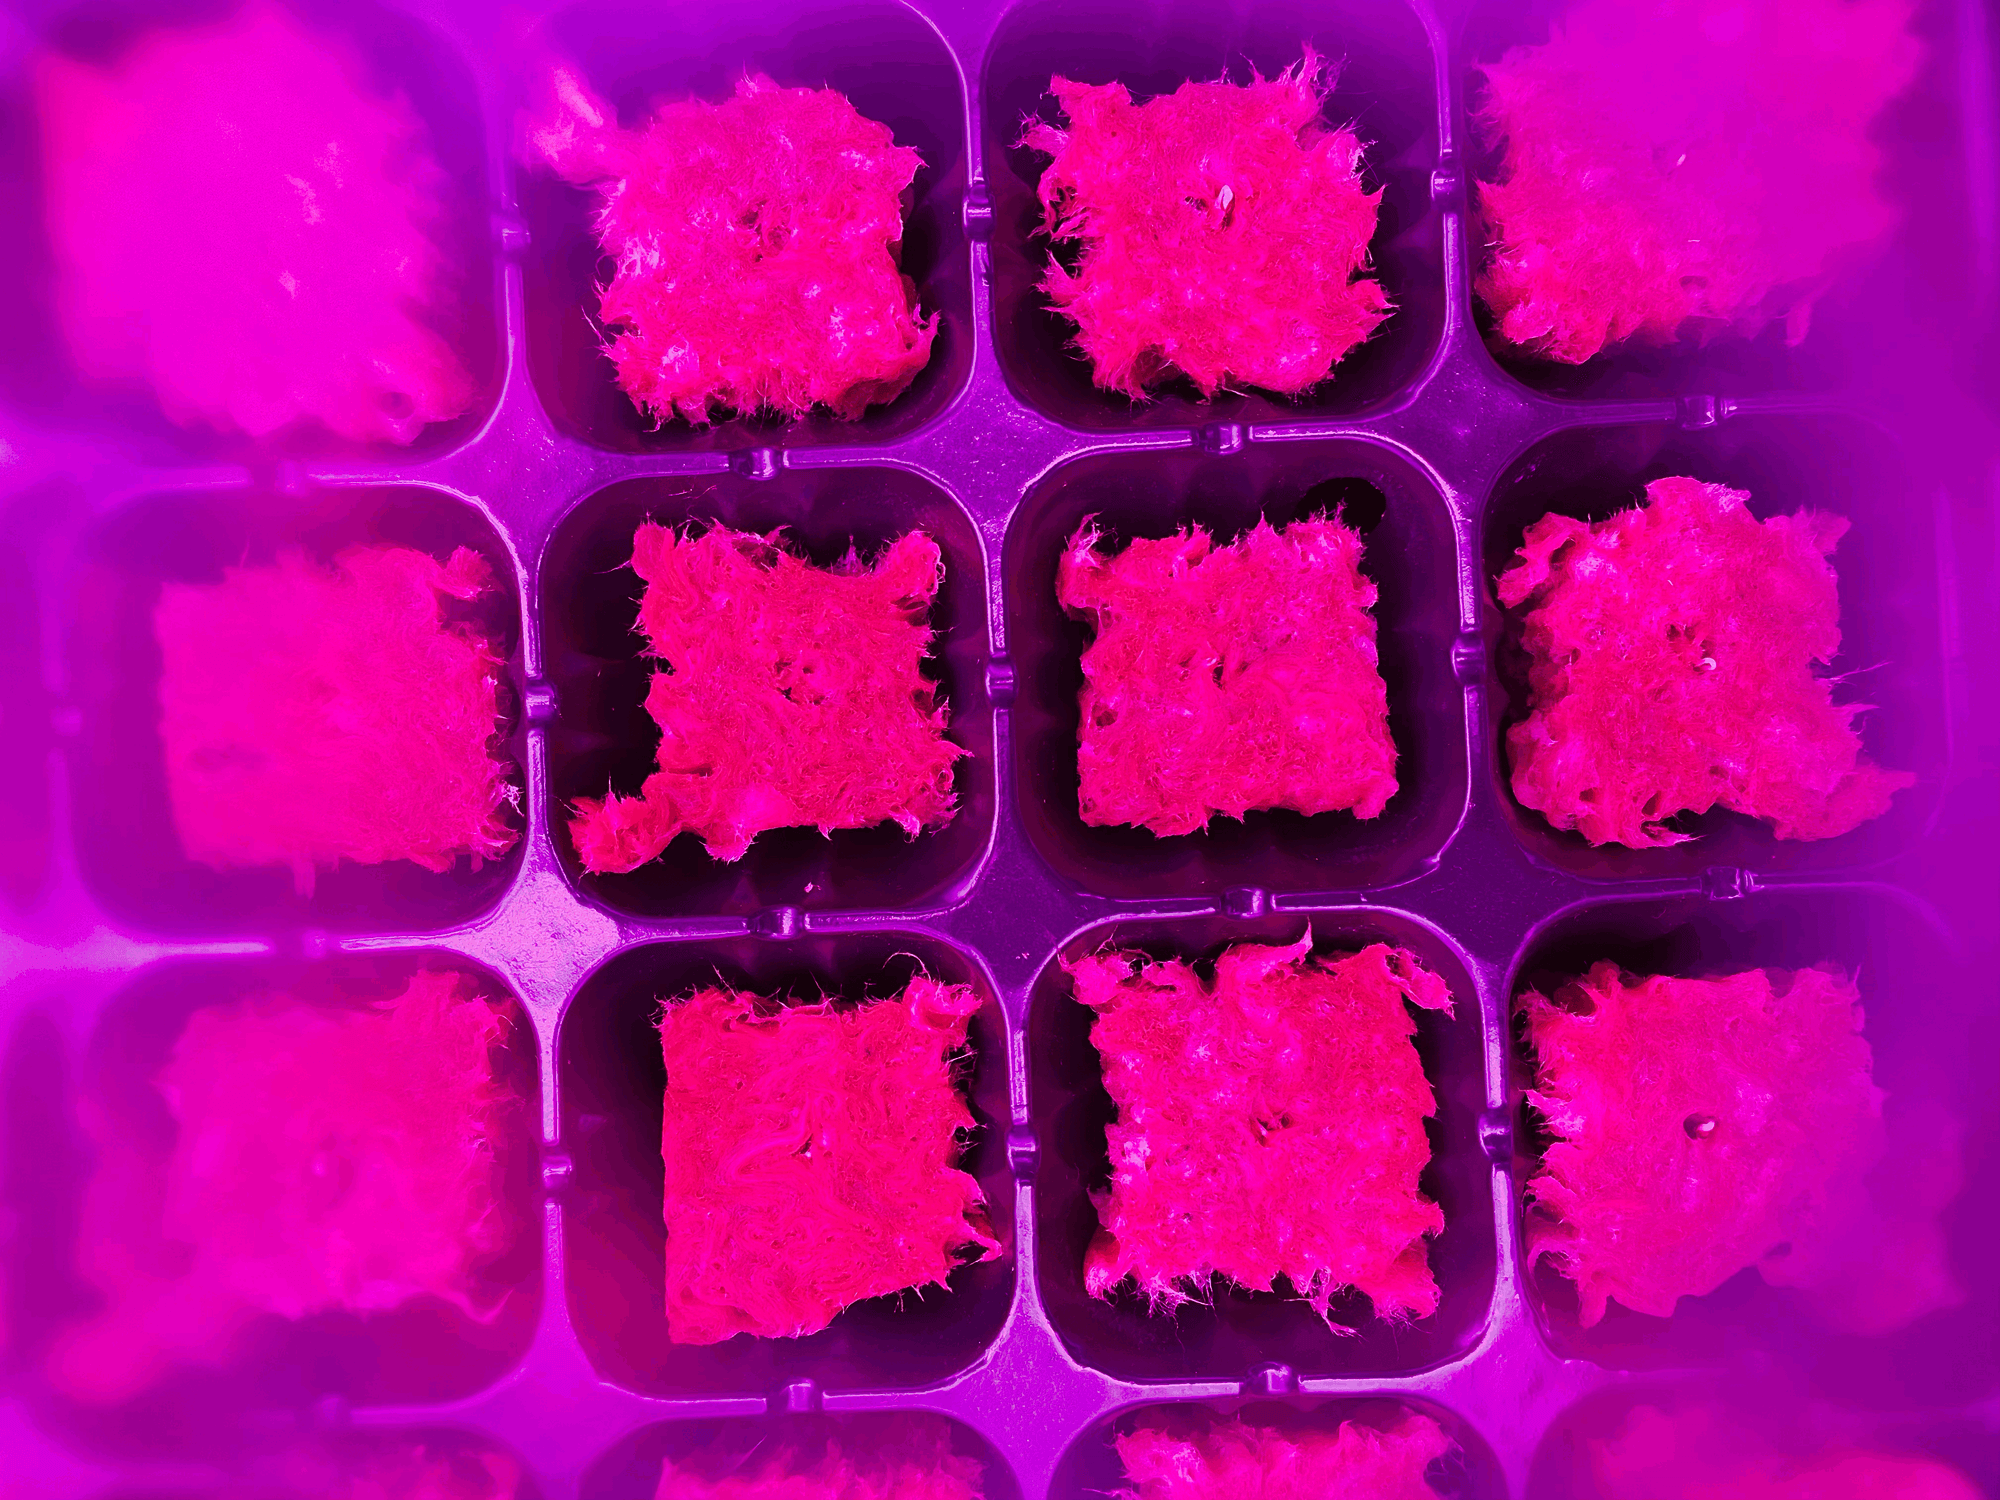
The bottom half of the nursery is for the clone propagation tanks. You can read more about the build here
Austin Bergman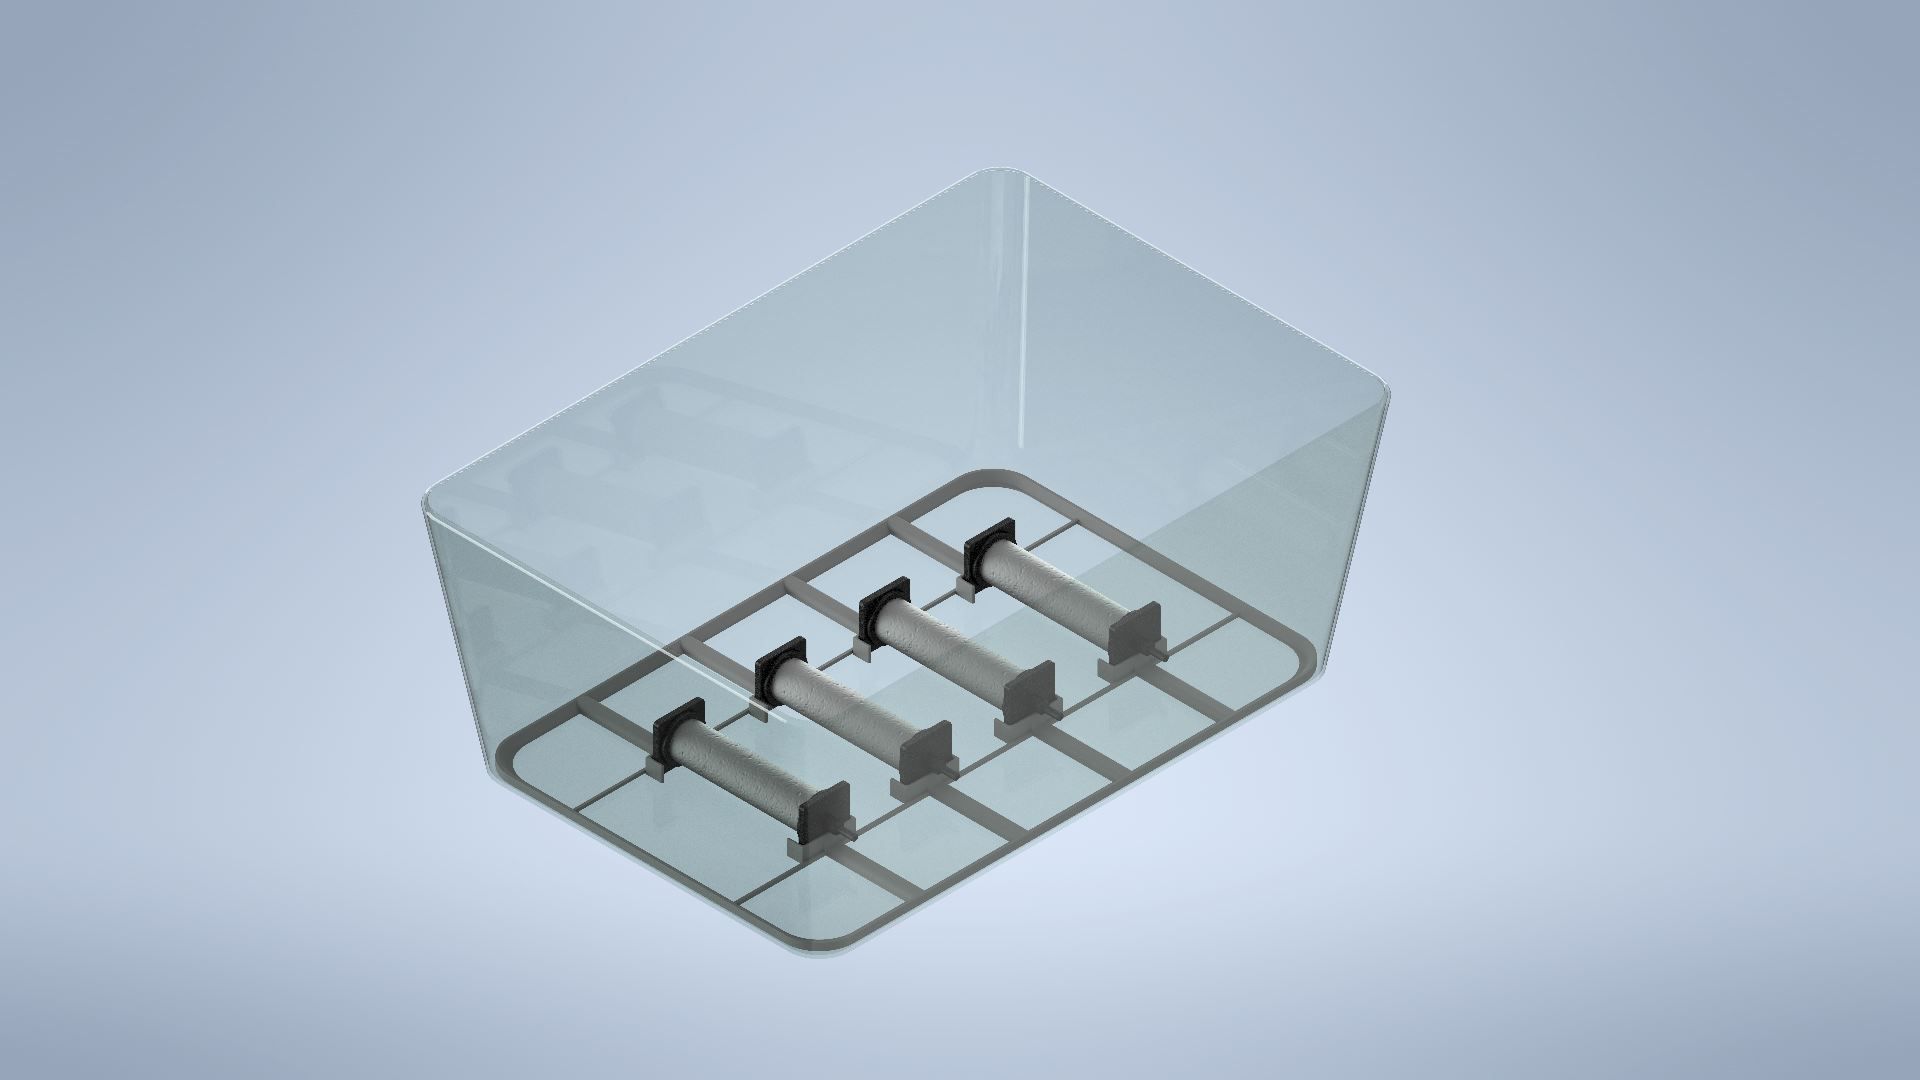
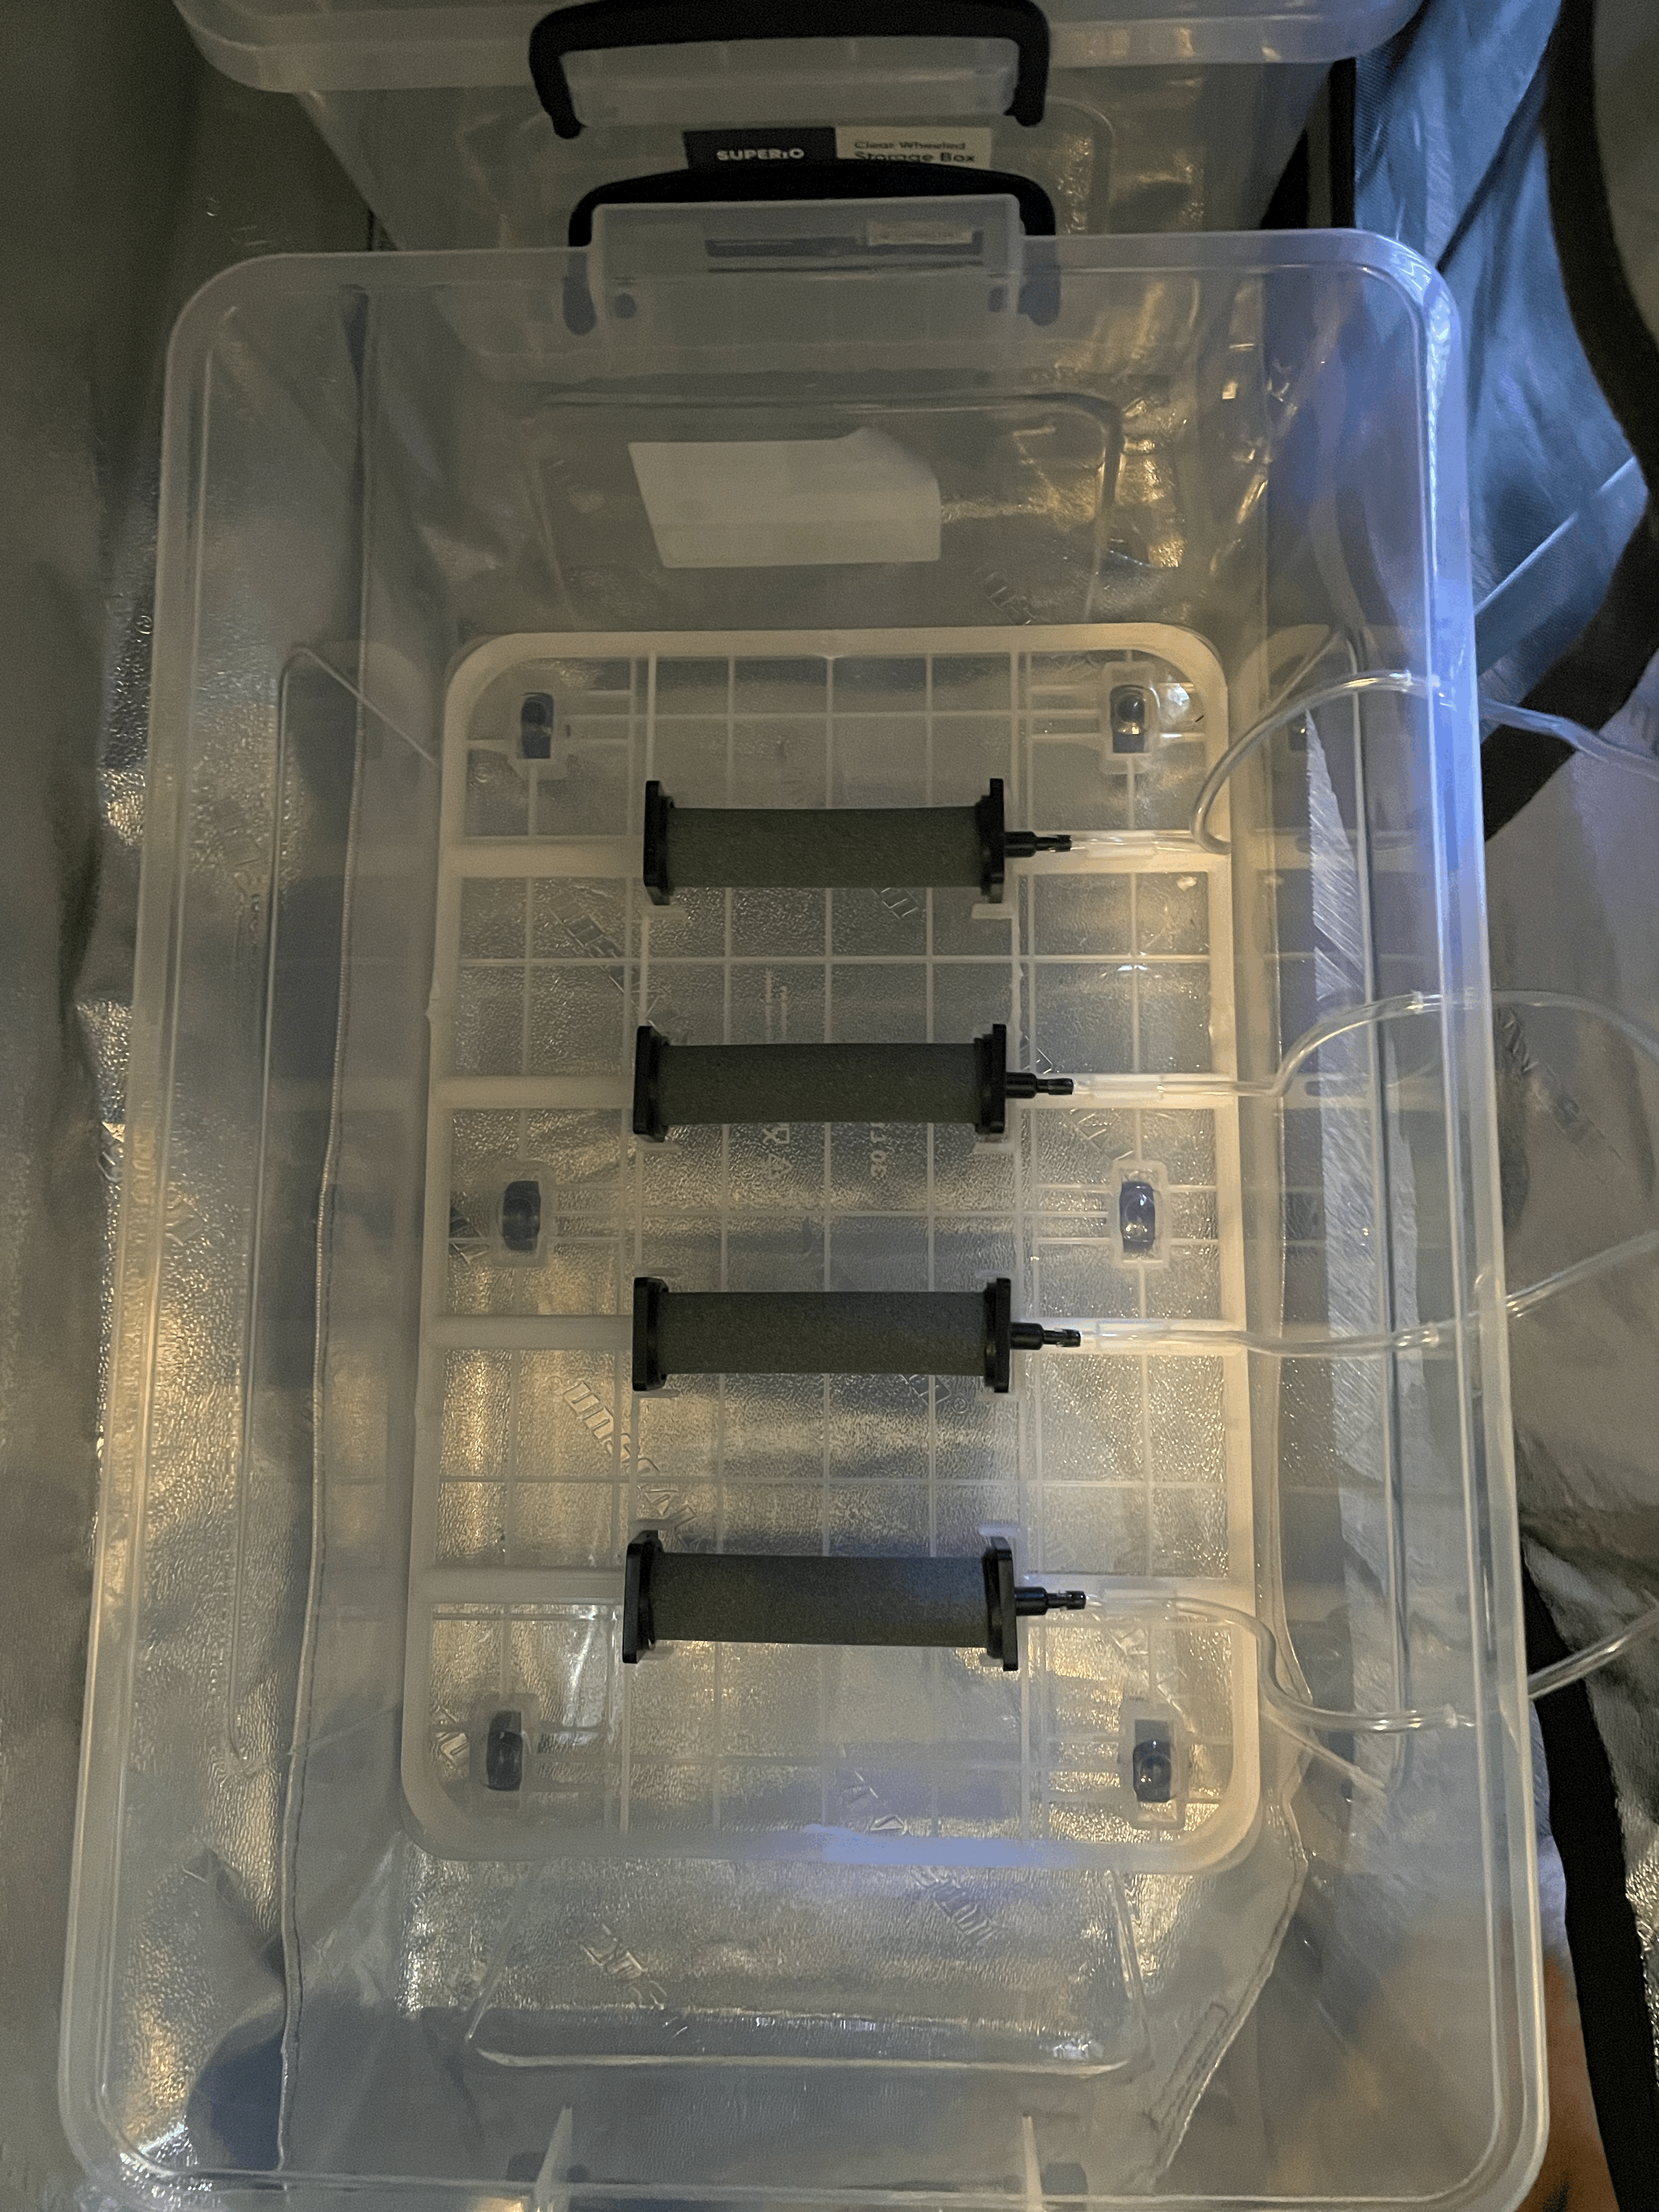
Clone Propagation Tank
8. Dashboard / Visualization
A small monitor connected to the Raspberry Pi is used to display my custom dashboard
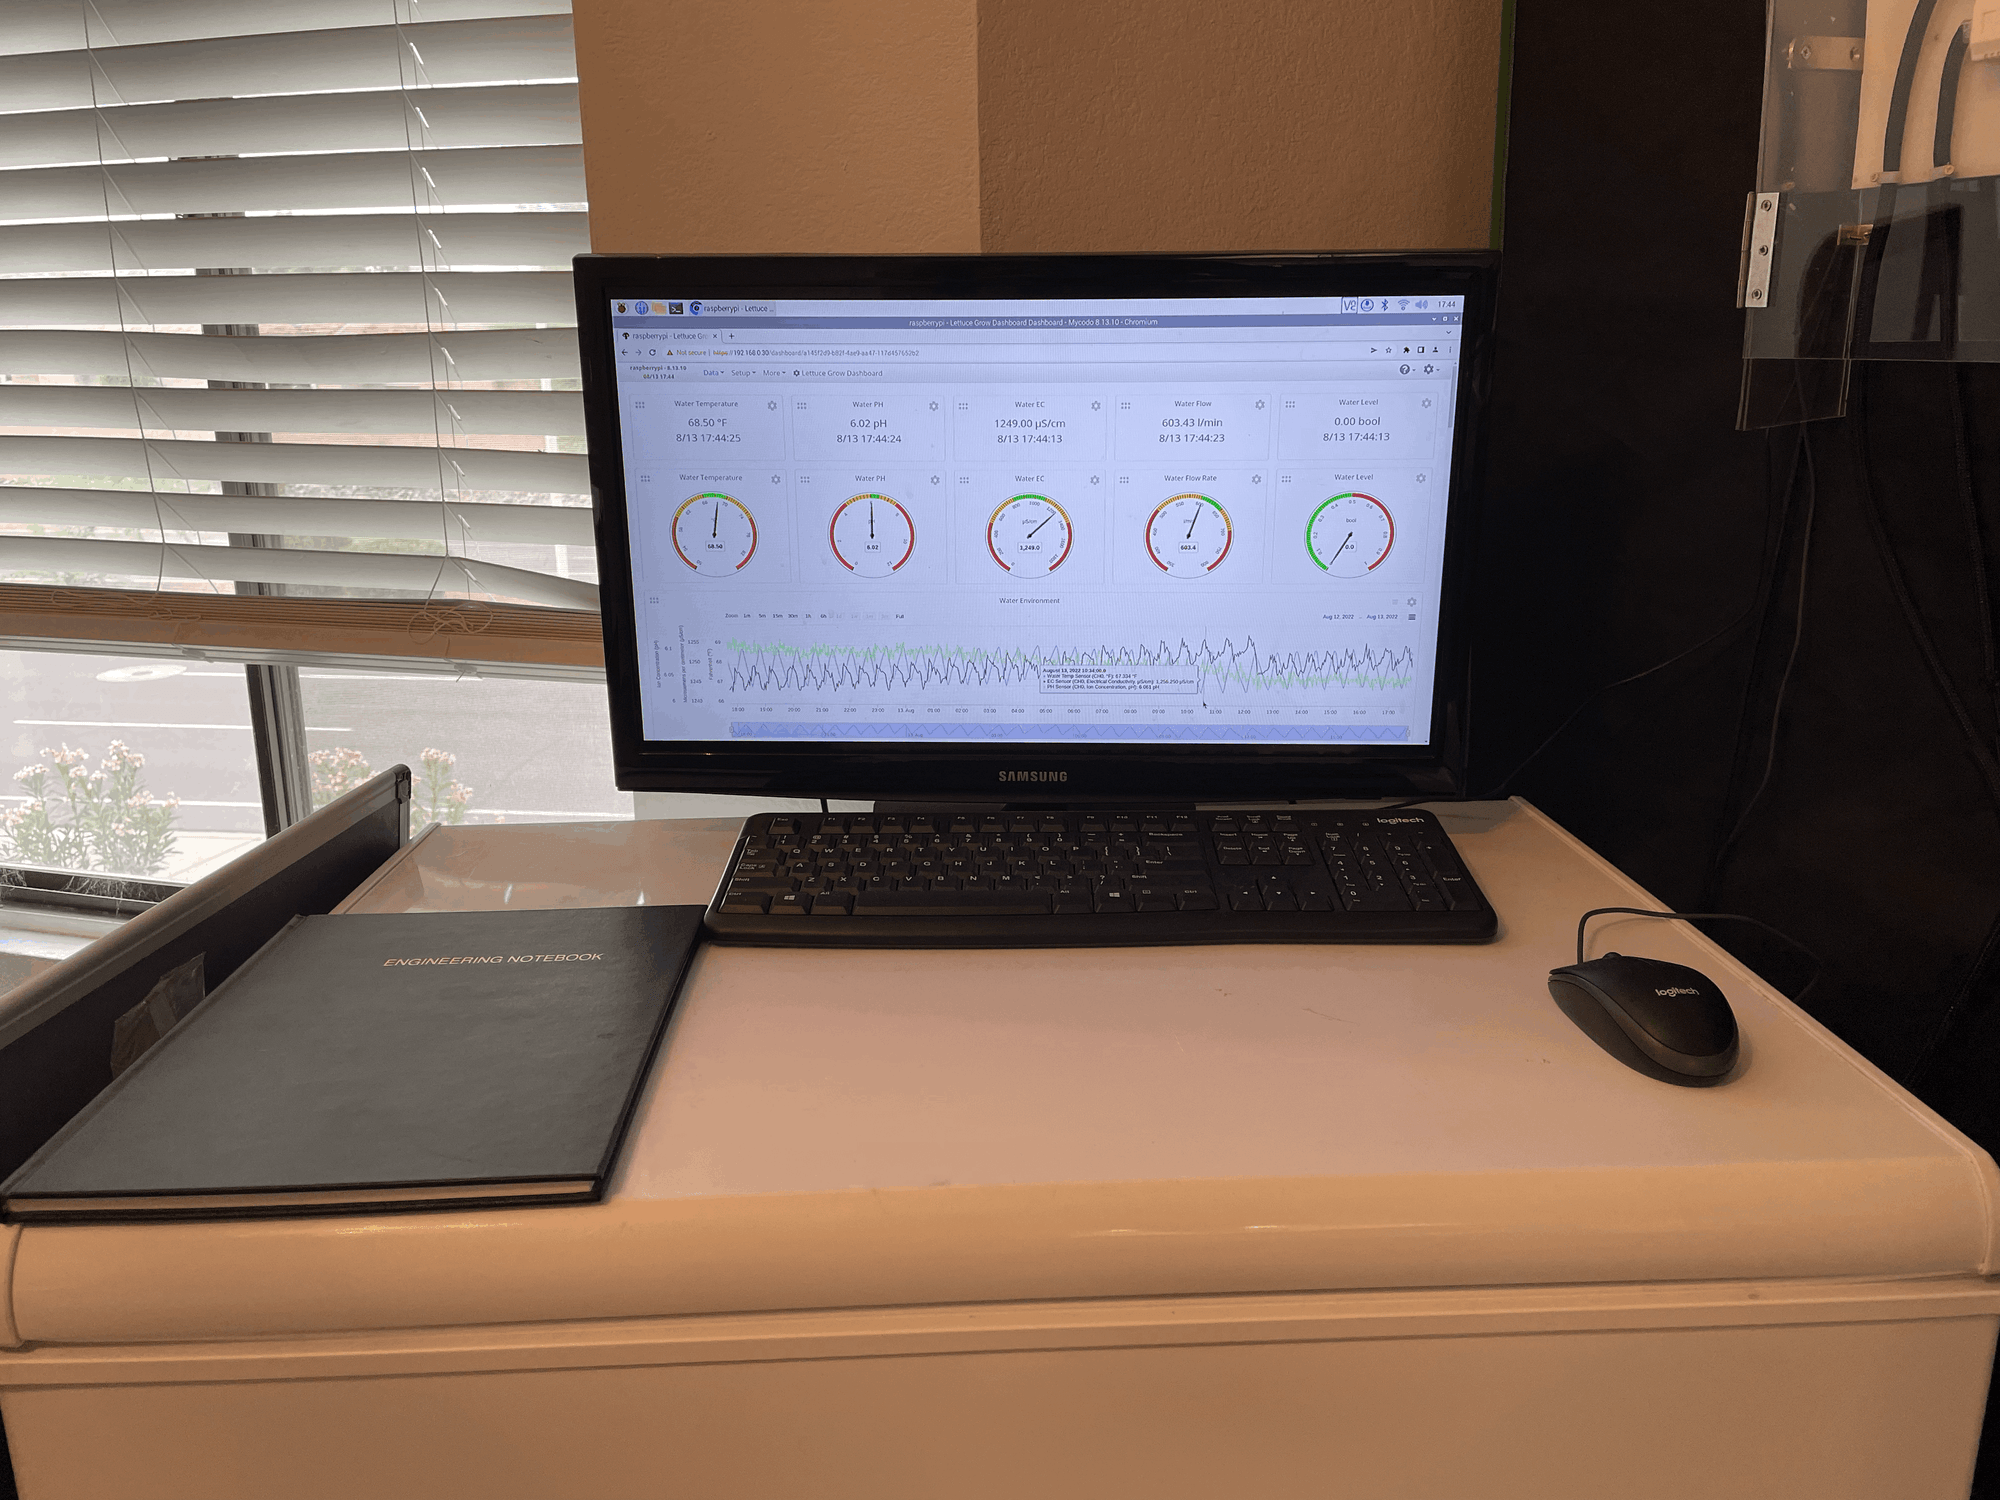
The dashboard shows the water environment

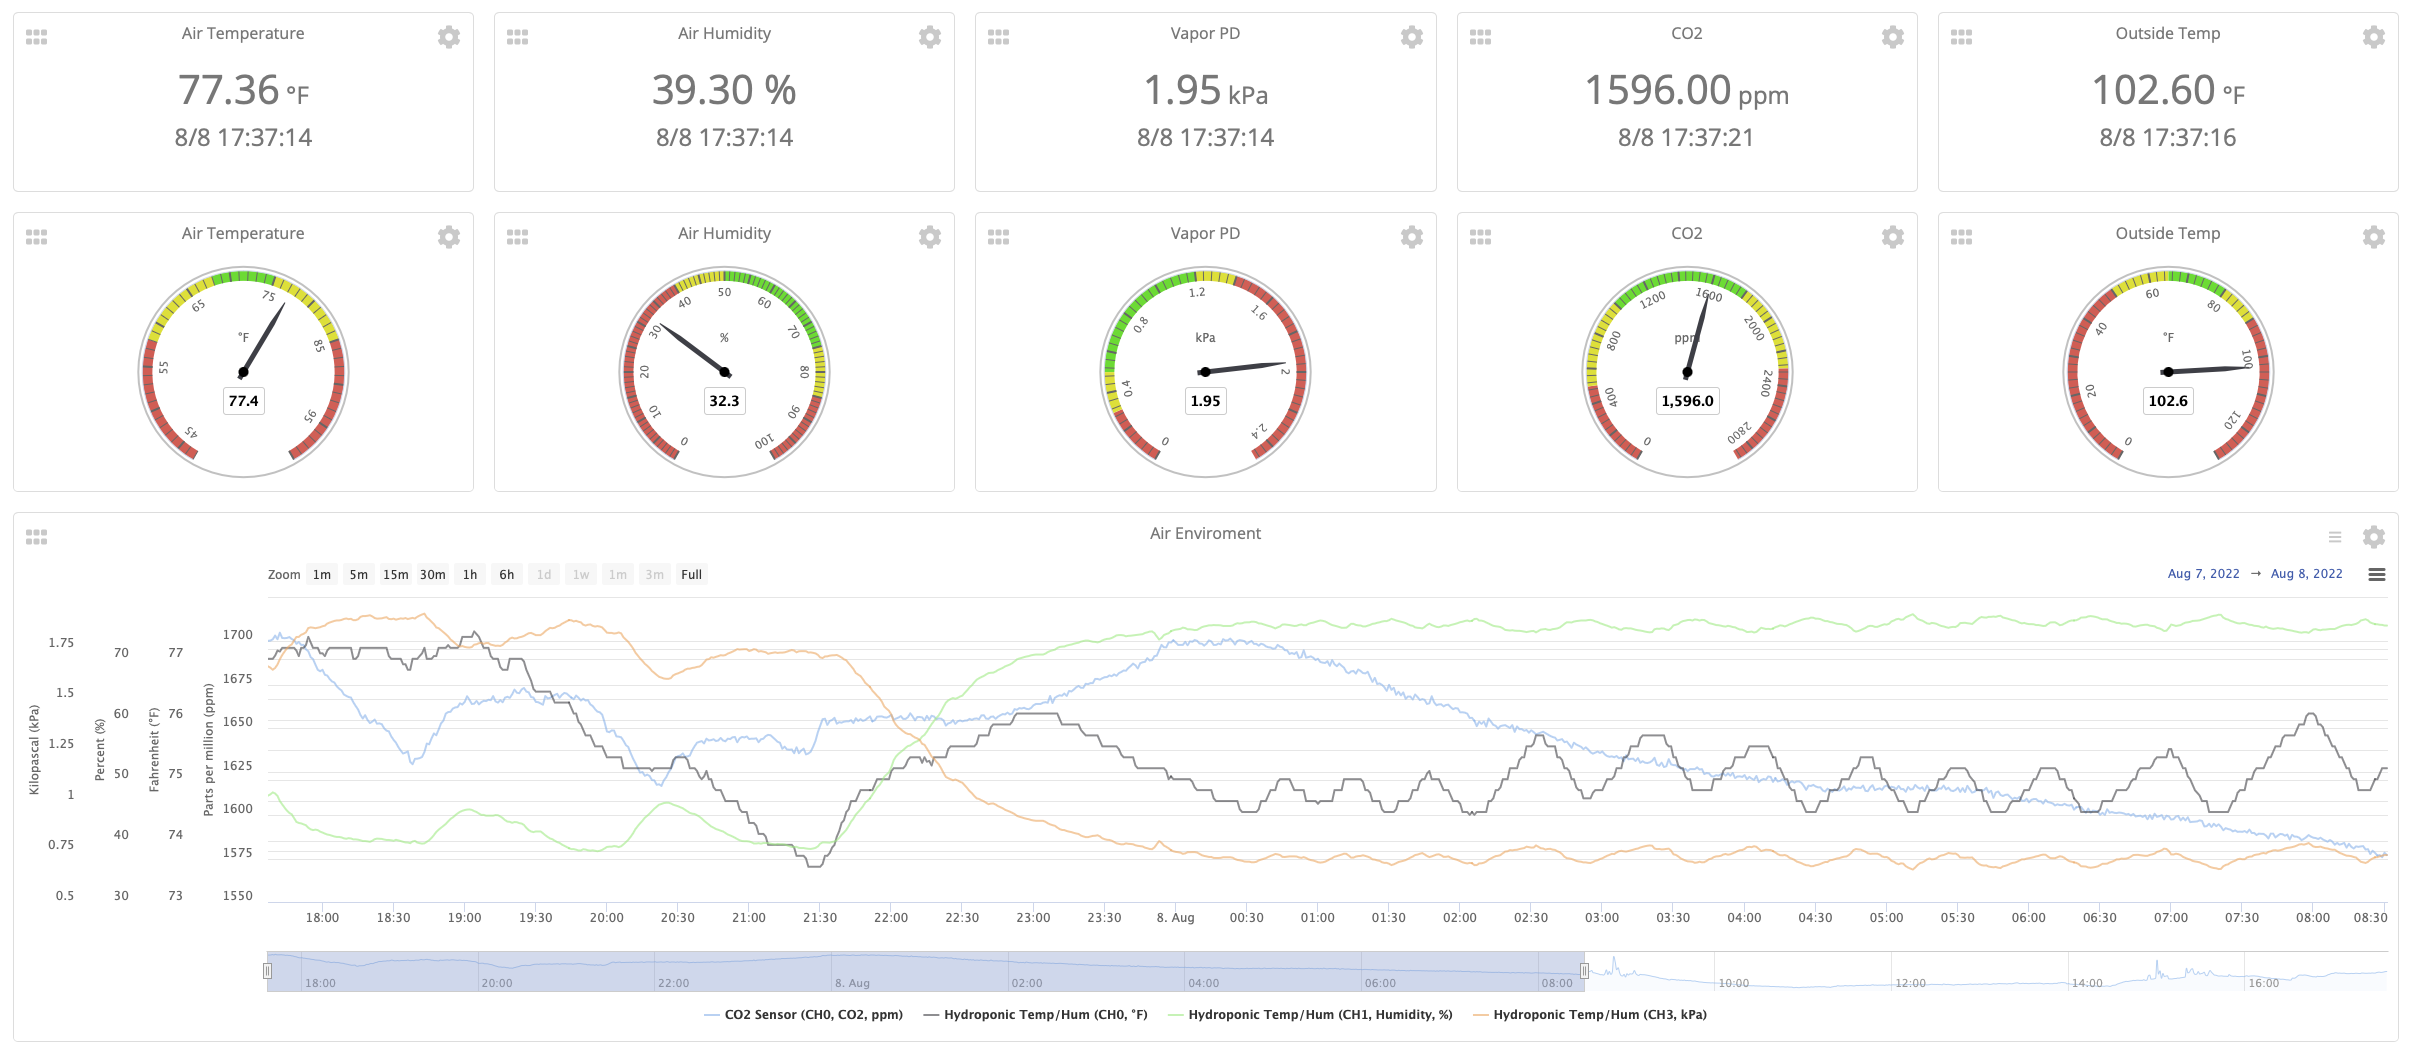
The Air Environment
The room environment and live stream
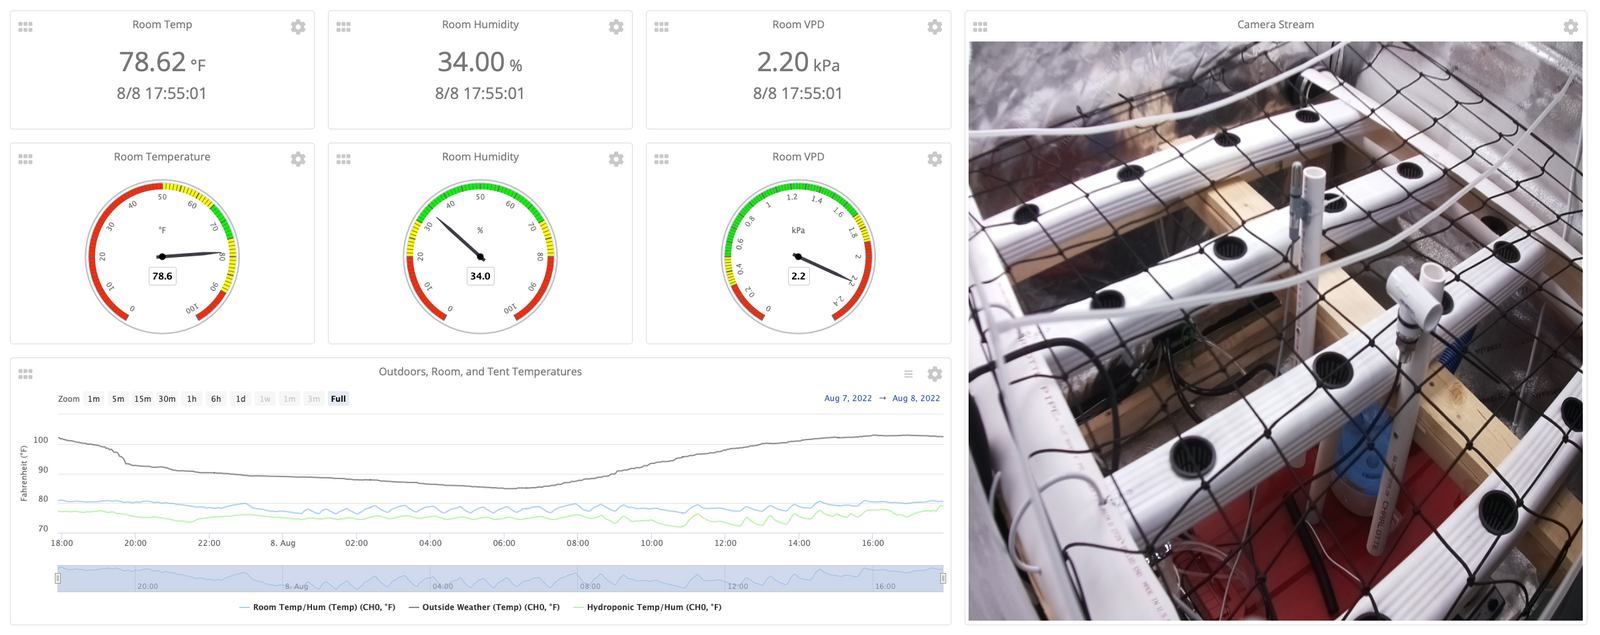
Room Environment and Livestream
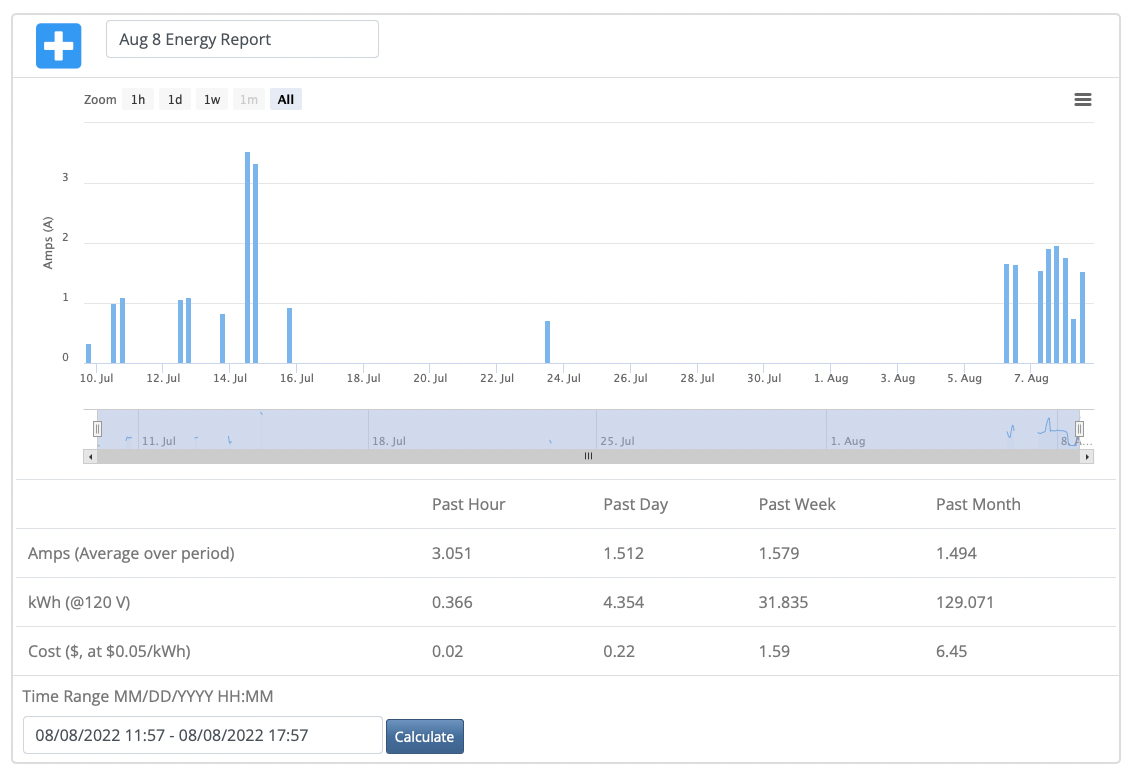
And creates an Energy Report
You can read more about the dashboard here
Austin Bergman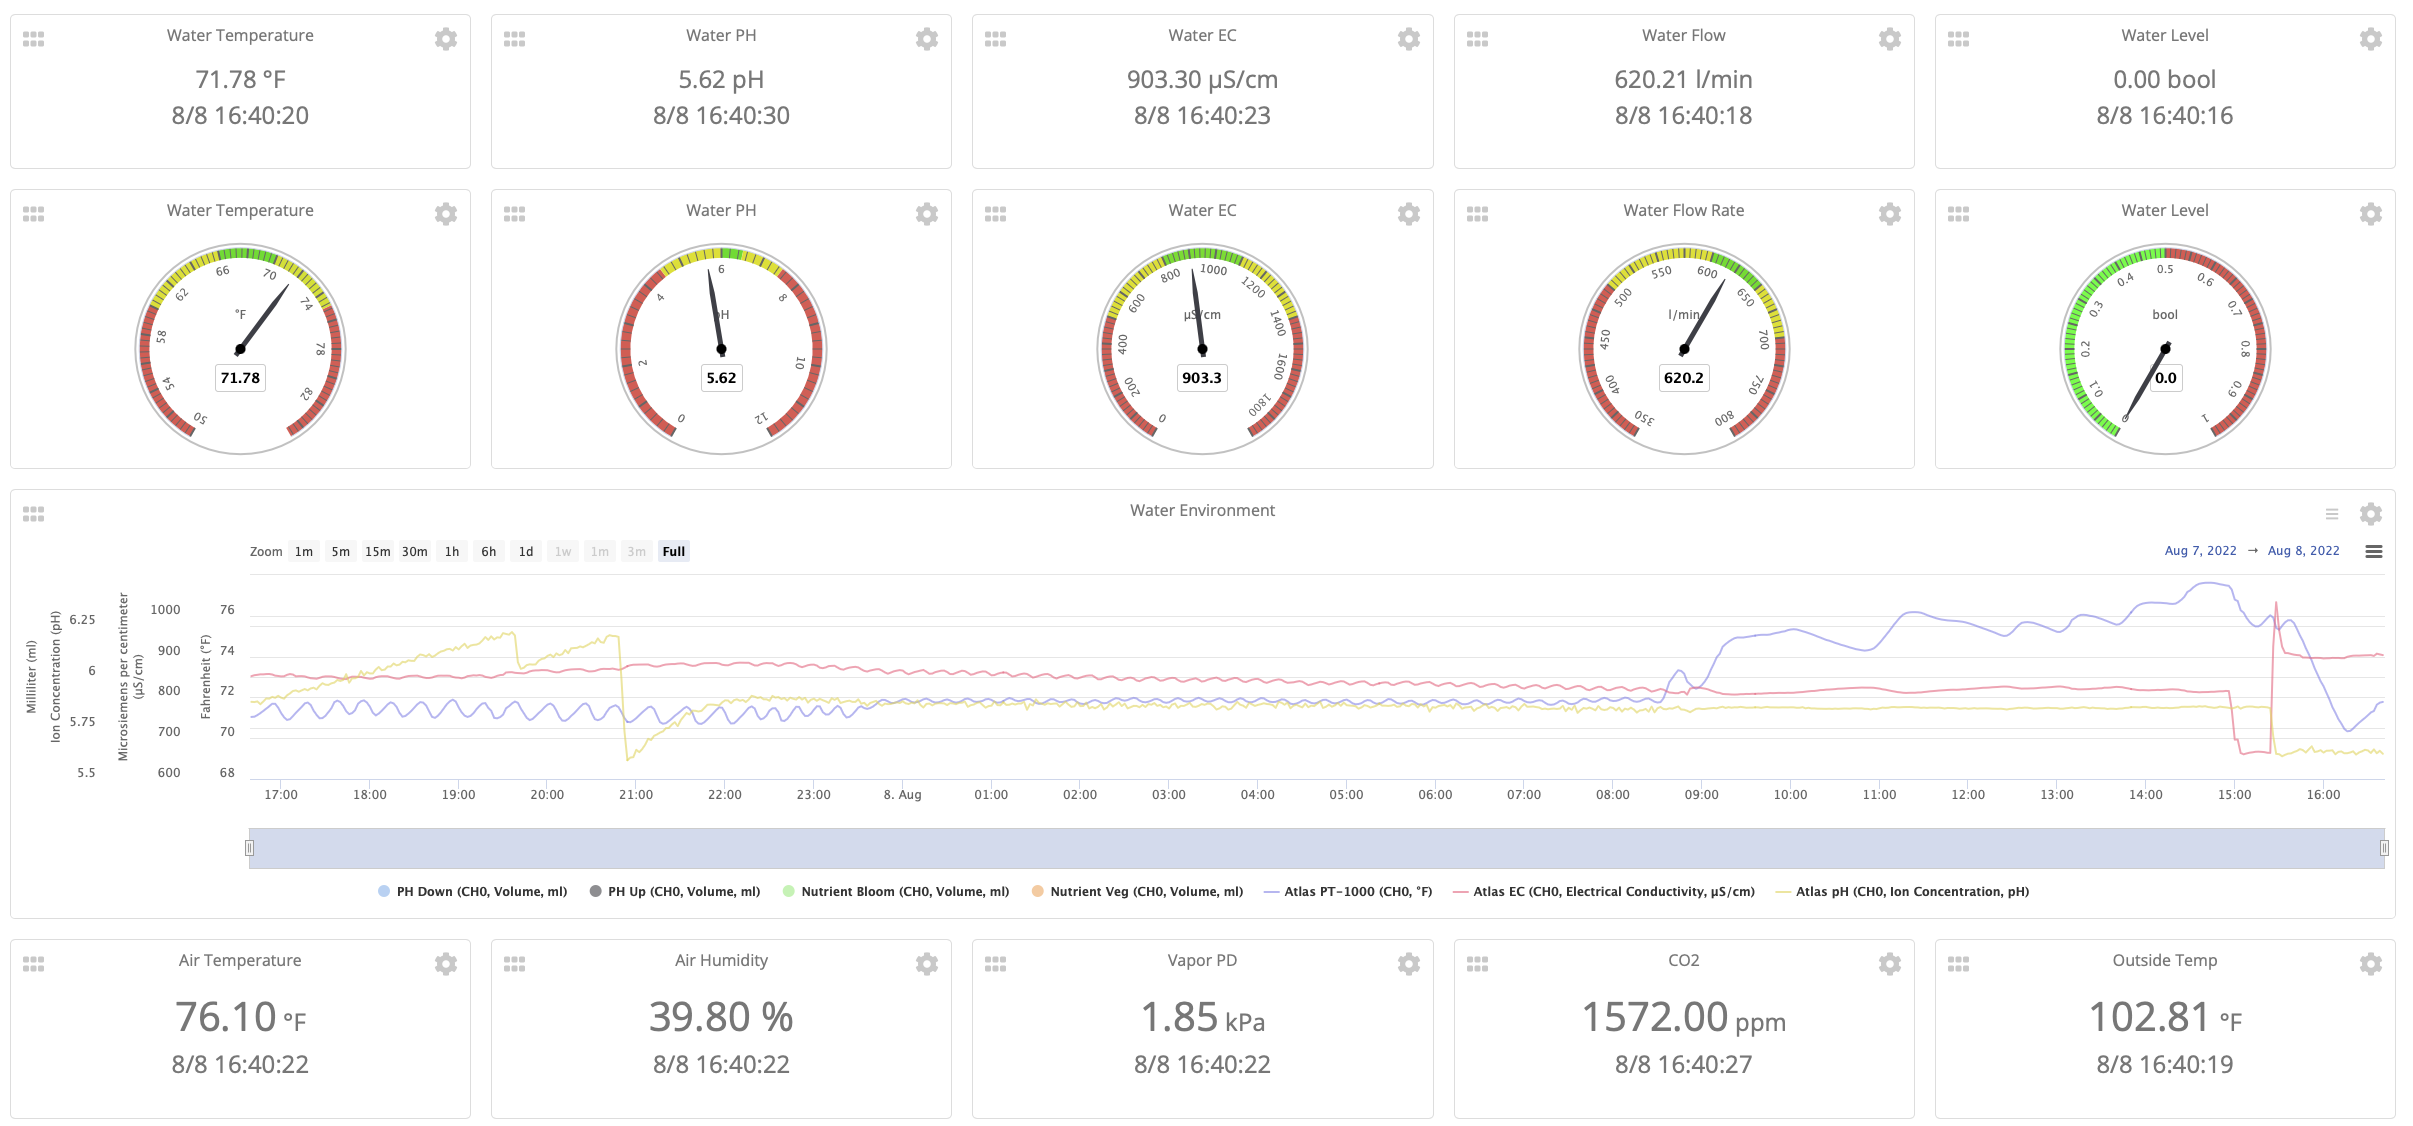
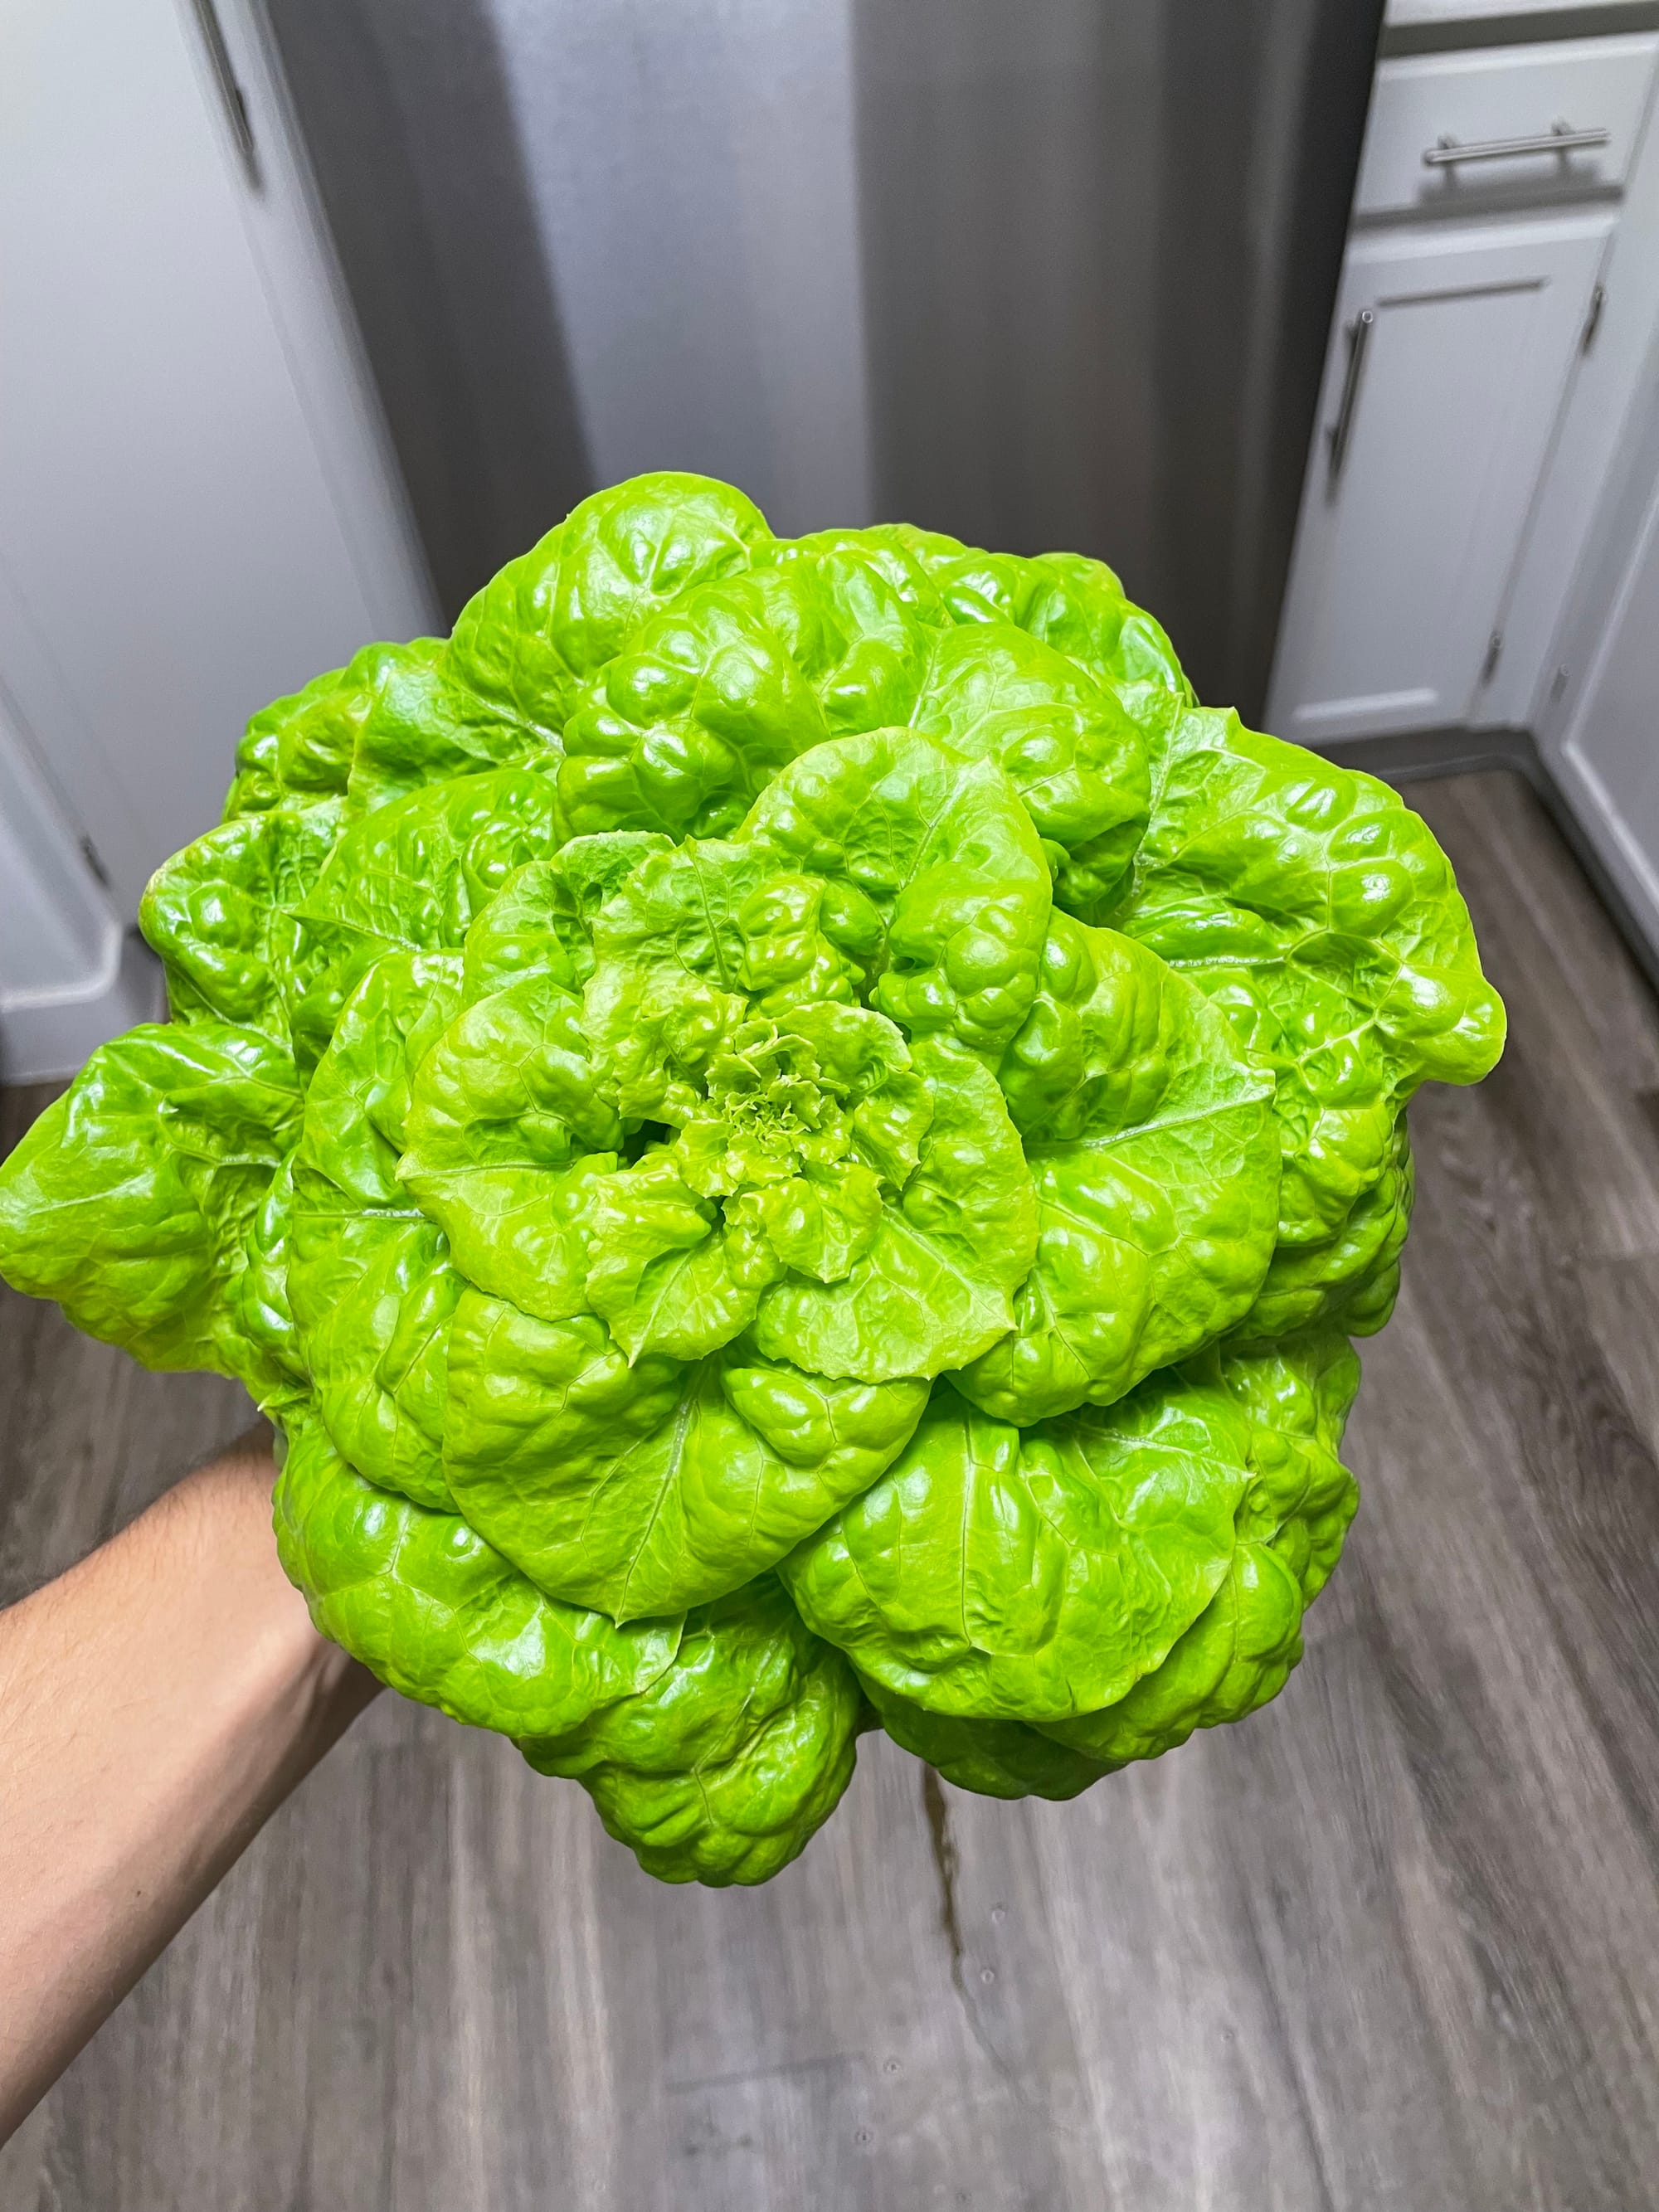
Finally here is the final product